Guide

Table of Contents
Usage warning
Attention! This guide may contain links to resources that may not be available to users in some countries and/or regions due to restrictions.
You may need to use a VPN service to access these resources.
EXBO company does not support, does not encourage and does not provide bypassing of restrictions, as well as is not responsible for the actions of the user in accordance with clause 1.7 of the rules of the support centre.
Specifying the version of the Windows OS
1. Go to the official Microsoft Corporation website and download the “PC Health Check” application.

2. Run the downloaded installer. Read the licence agreement of this application.

3. Tick “I accept the terms in the Licence Agreement” and click the “Install” button.

4. Once the installation is complete, the application will automatically launch. Click “Check now ”.

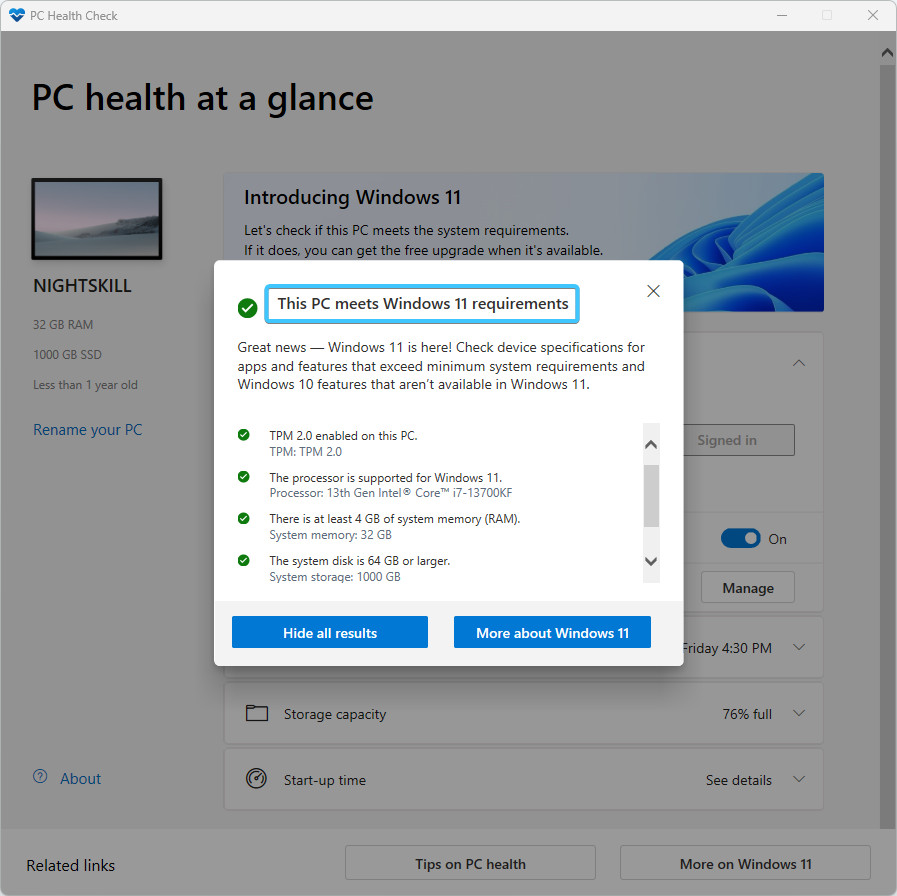
5. Click the “See all results” button. If the top icon is lit green, then you will be able to install Windows 11 operating system on your device. If the icon is lit yellow, then you need to solve some things before installing. For example, enable TPM 2.0 in BIOS. If the icon is lit red, then you cannot install Windows 11 operating system, and you will only be able to install the Windows 10 version.
Preparing the installation media
1. Insert a USB flash drive device with a minimum capacity of 8 gigabytes into the special port.

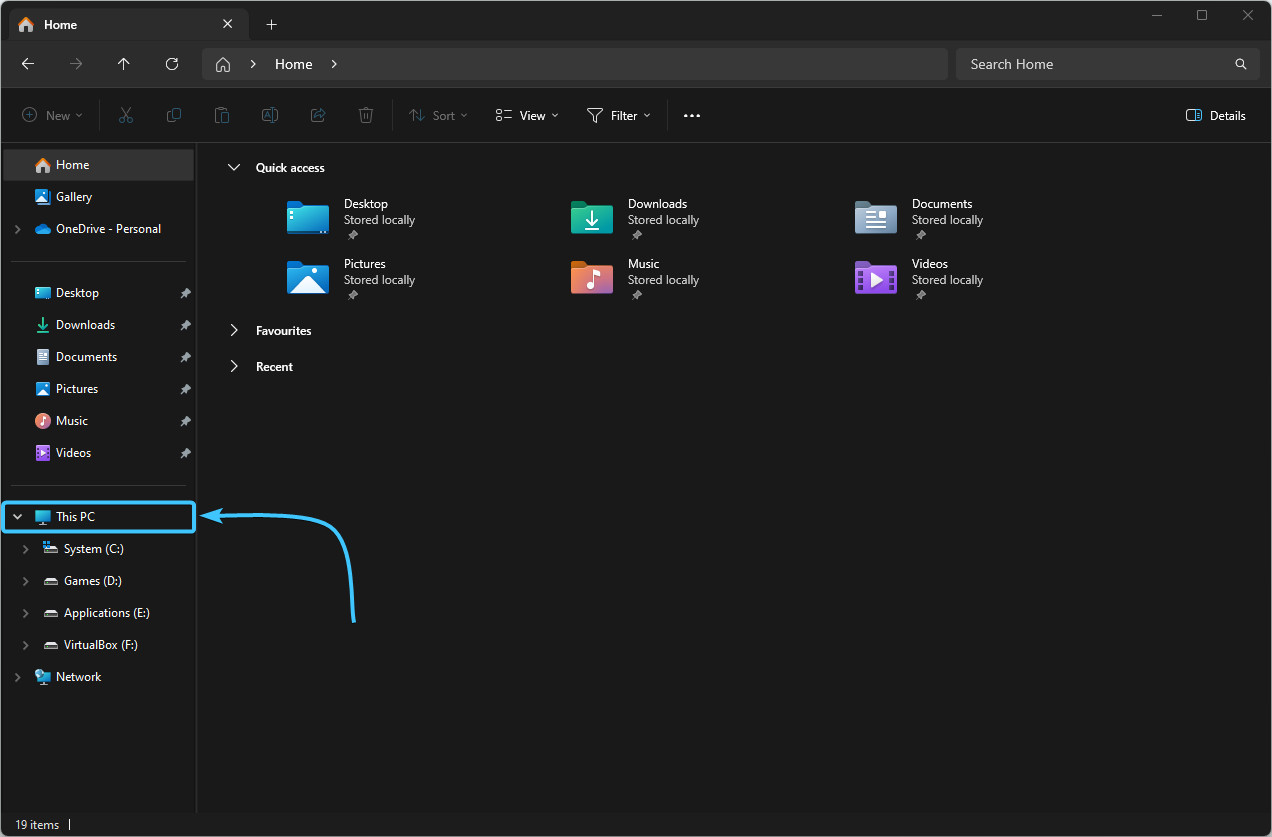
2. Open “File Explorer” of the Windows operating system. Next, open the “This PC” section.
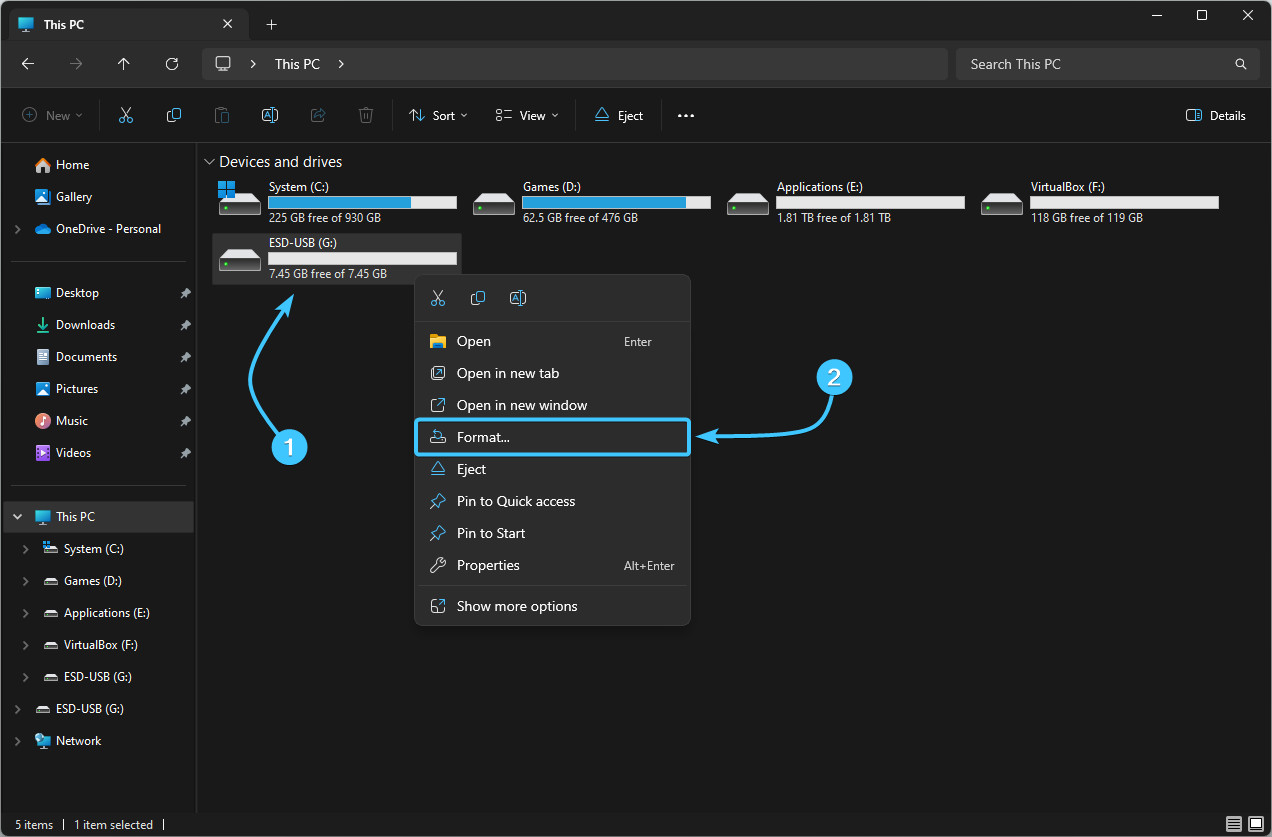
3. Locate the flash drive and right-click on it. Click the “Format” button.
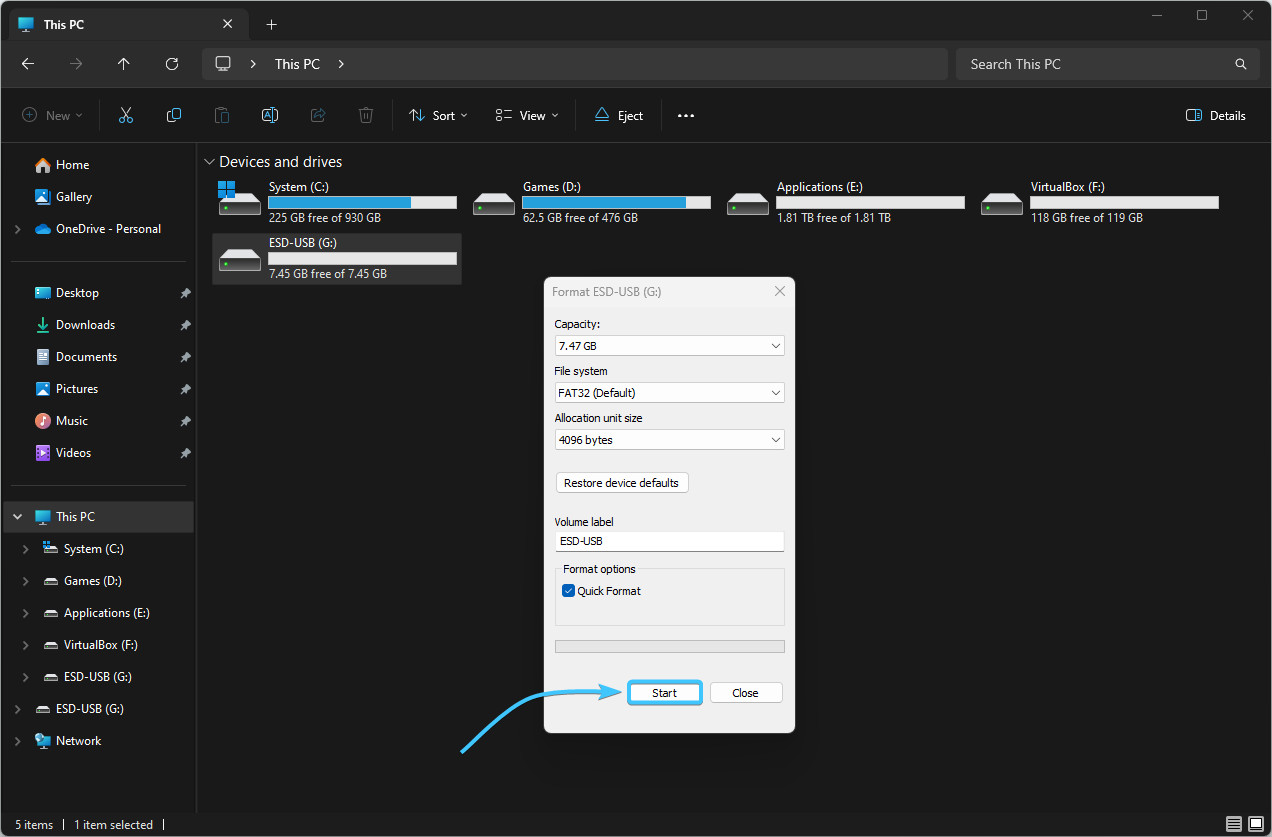
4. A new window will appear. There is no need to change any parameters. Just click the “Start” button.
5. In the window that appears, click “OK” and wait for the formatting process to complete.
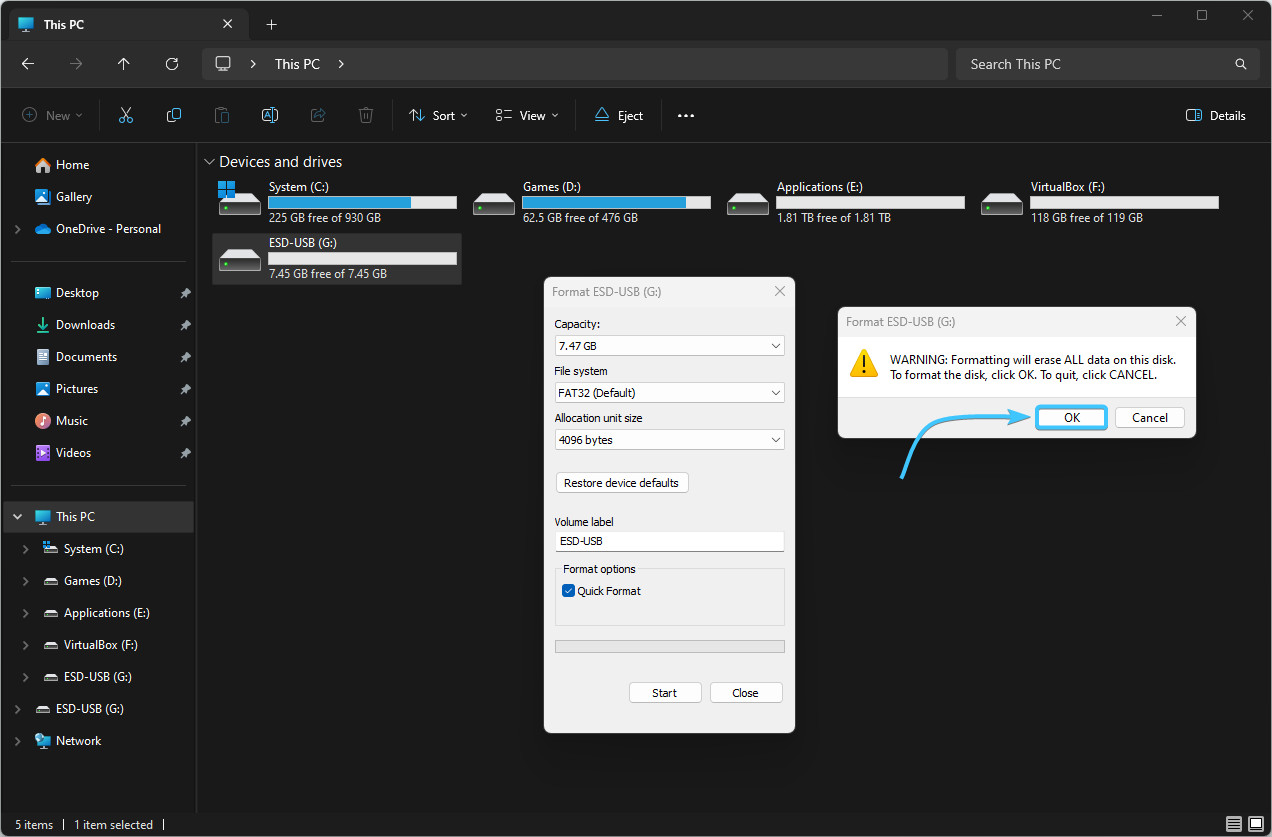
6. A notification will appear that the formatting process is complete. Press the “OK” button.

Installing the Windows 11 image on media
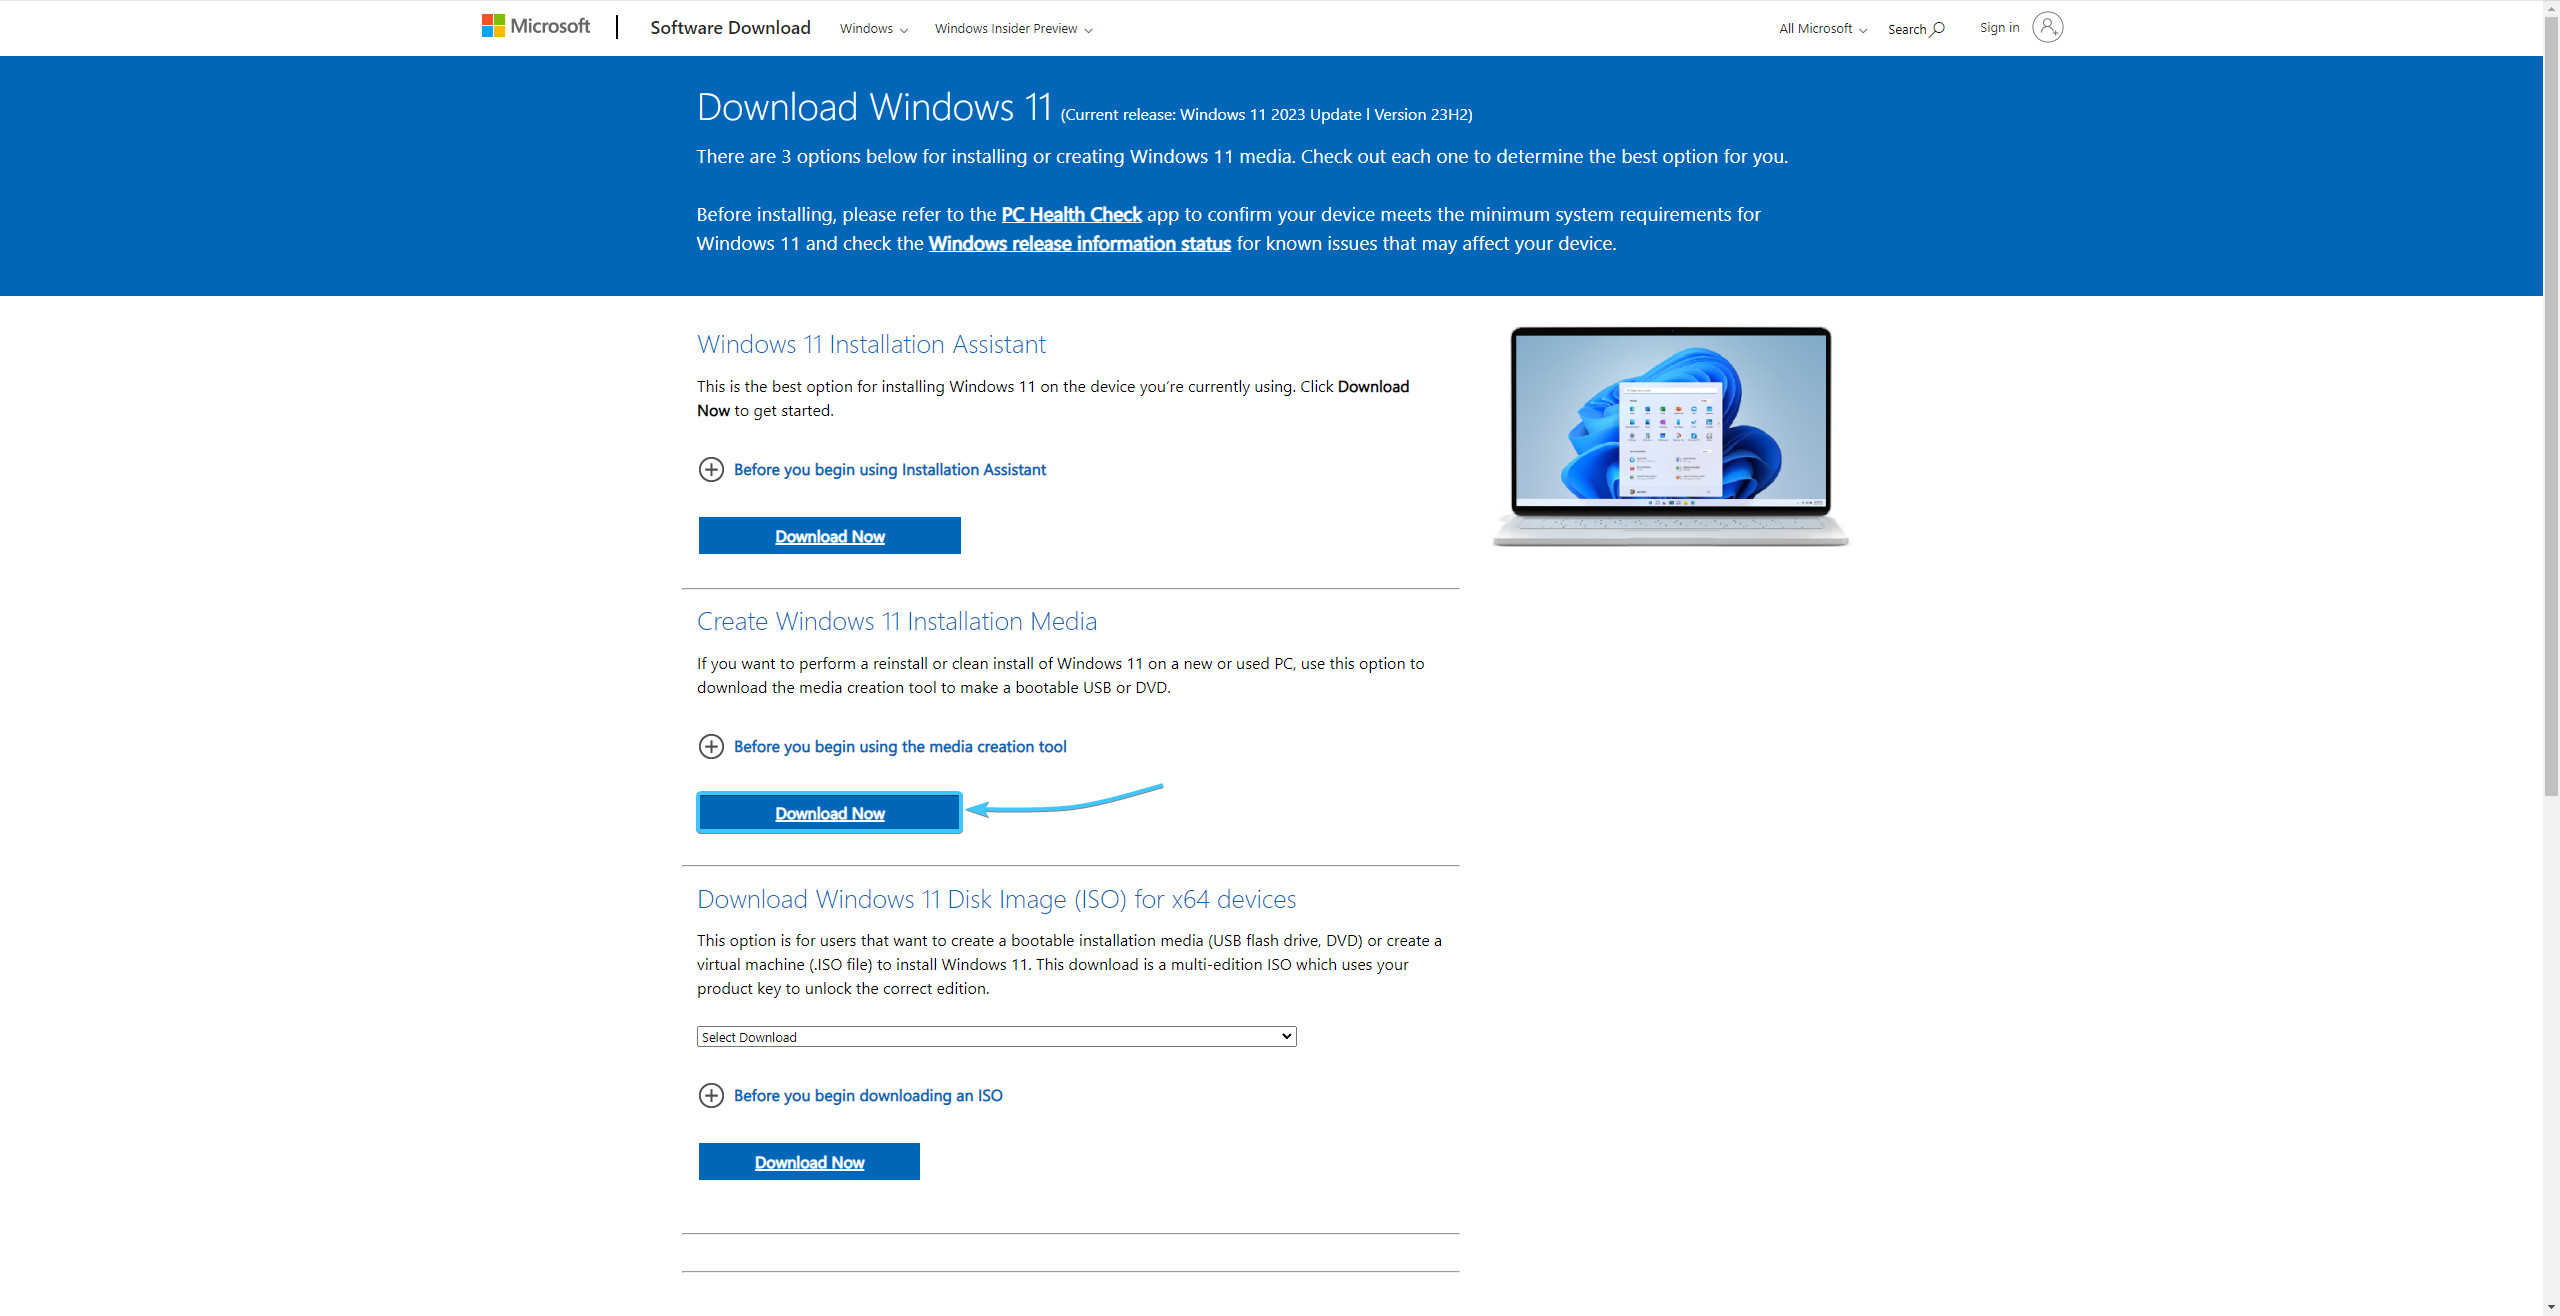
1. Go to the official Microsoft Corporation website and click the second “Download Now” button.
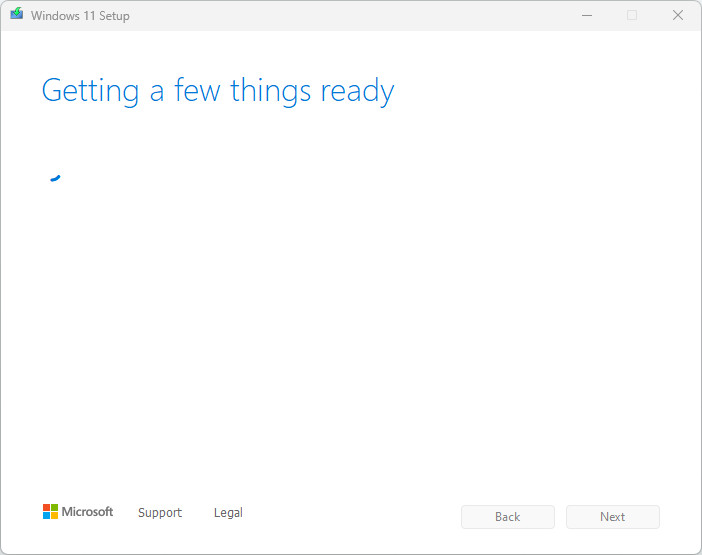
2. Start the “Media Creation Tool” application and wait for the preparation process to complete.
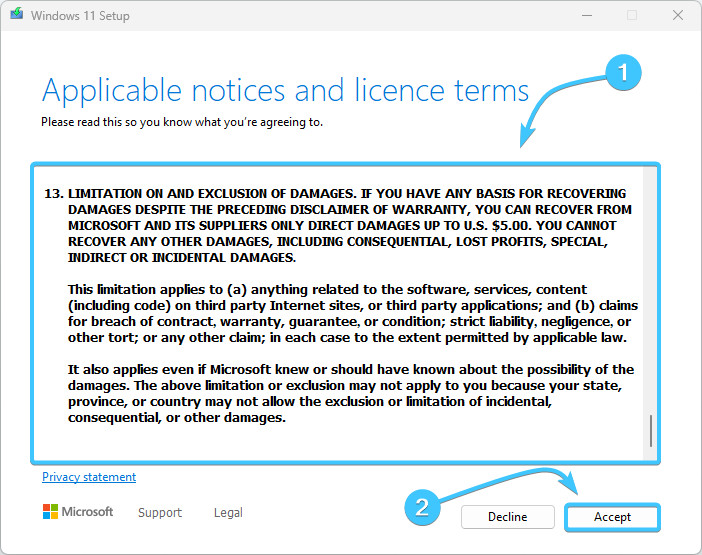
3. Read the licence agreement and click “Accept” button to continue.
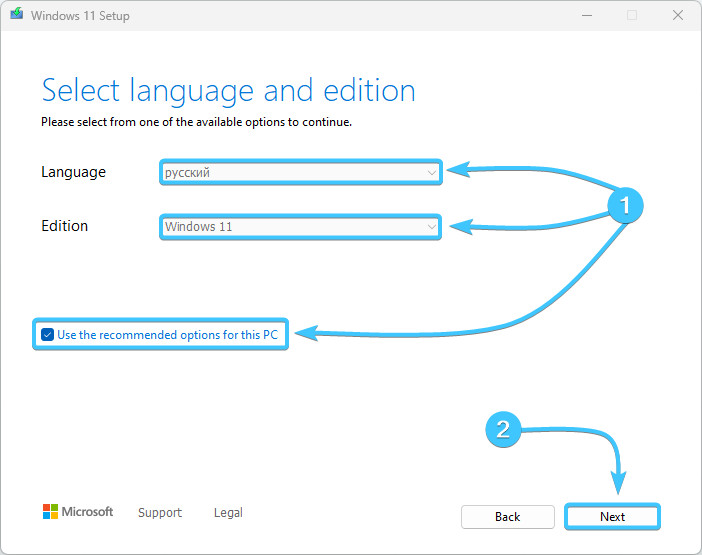
4. If you want to install the operating system on the current device, you need to tick the “Use the recommended options for this PC” checkbox. If you are creating installation media for another device, uncheck this box, read the characteristics of this device and select the required settings. Click the “Next” button.
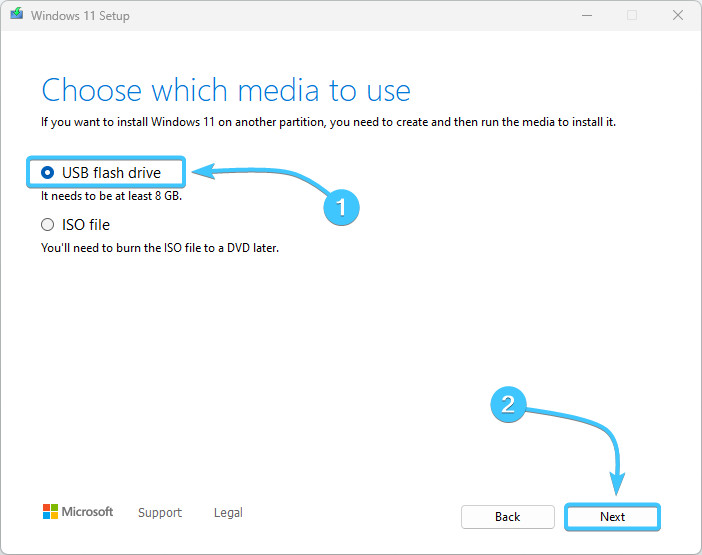
5. Insert the media into the device. Select “USB flash drive” and press the “Next” button.
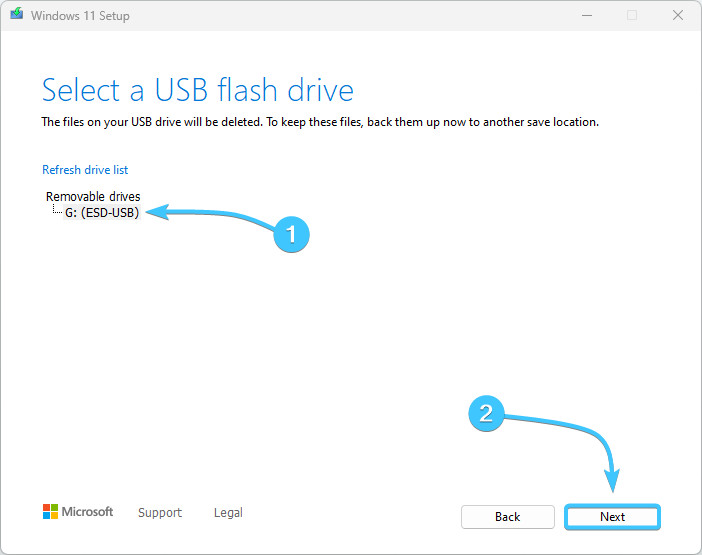
6. Select the media where the Windows 11 image will be installed and click the “Next” button.
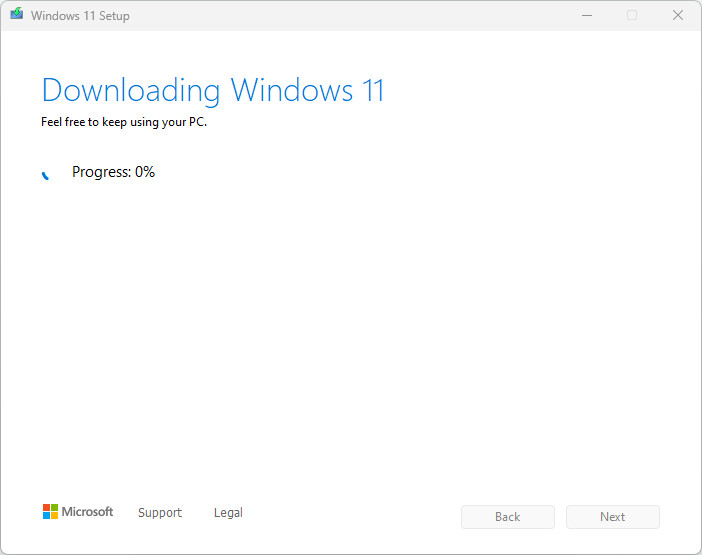
7. The process of creating the Windows 11 installation media will start. Wait for it to complete.
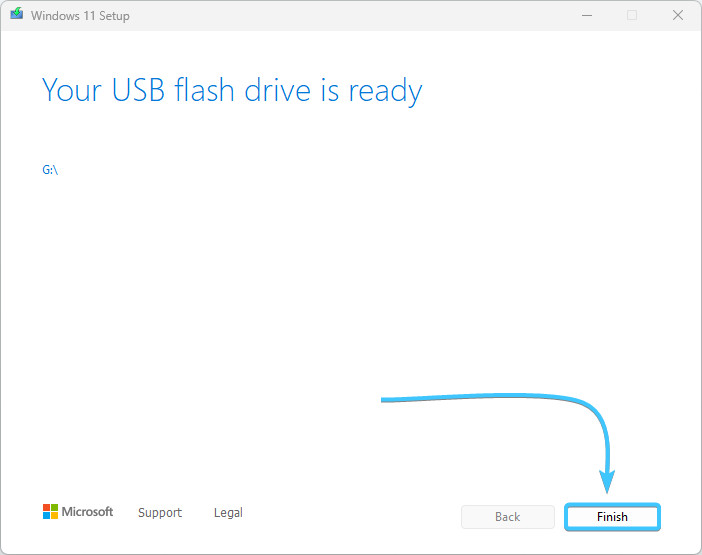
8. The installation media has been successfully created. Click the “Finish” button to close this window.
Windows 11 operating system installation
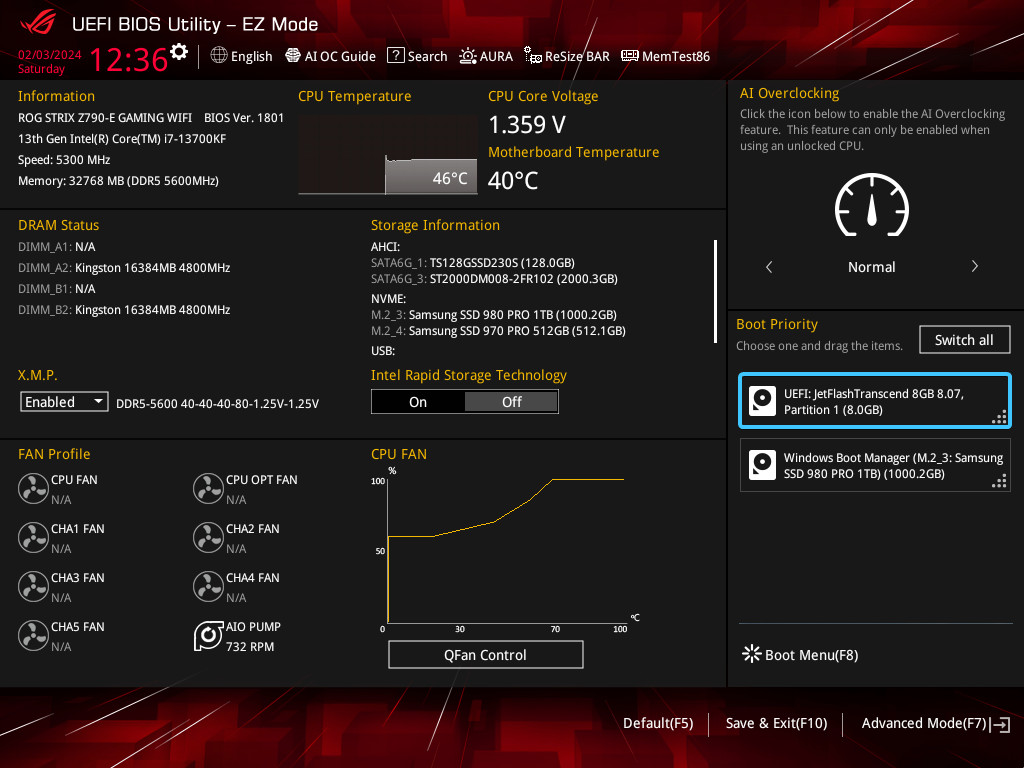
1. Insert the prepared media with the Windows 11 image into the device. Switch on or restart the device. During startup, press the appropriate button to open BIOS. It should be shown at the bottom of the screen when the device is switching on, or you can look it up on the Internet.
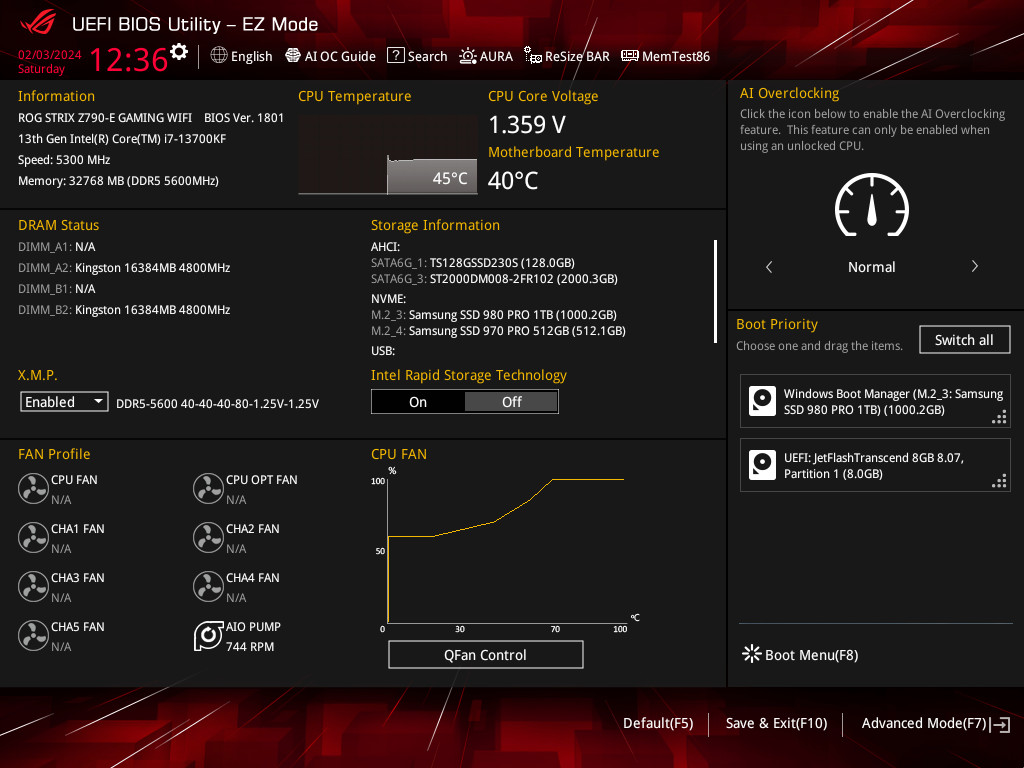
2. In BIOS, find the section responsible for booting devices. Set the media with the Windows 11 image to the first place in the boot list. Save the changes in BIOS and reboot the device.
3. If you have correctly set the boot device in BIOS, the menu for installing Windows 11 will appear after rebooting. Select the following options: language to install (1), time and currency format (2). Click the “Next” button to continue (3).

4. A new window will appear. Select the keyboard language and input method (1). Press the “Next” button (2).

5. Select “Install Windows 11” (1) and agree to delete data (2). Click “Next” (3).

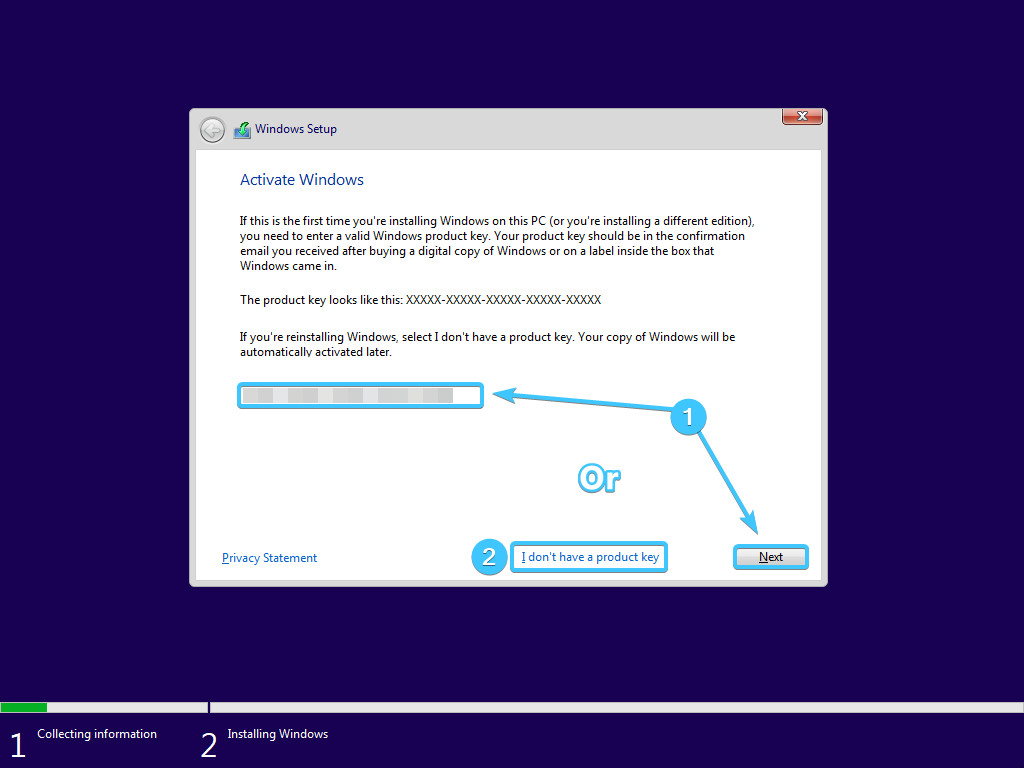
6. You will be asked to enter your product licence key. Do this if you have one, and click “Next” (1). If you do not have one, click the “I don't have a product key” button (2).
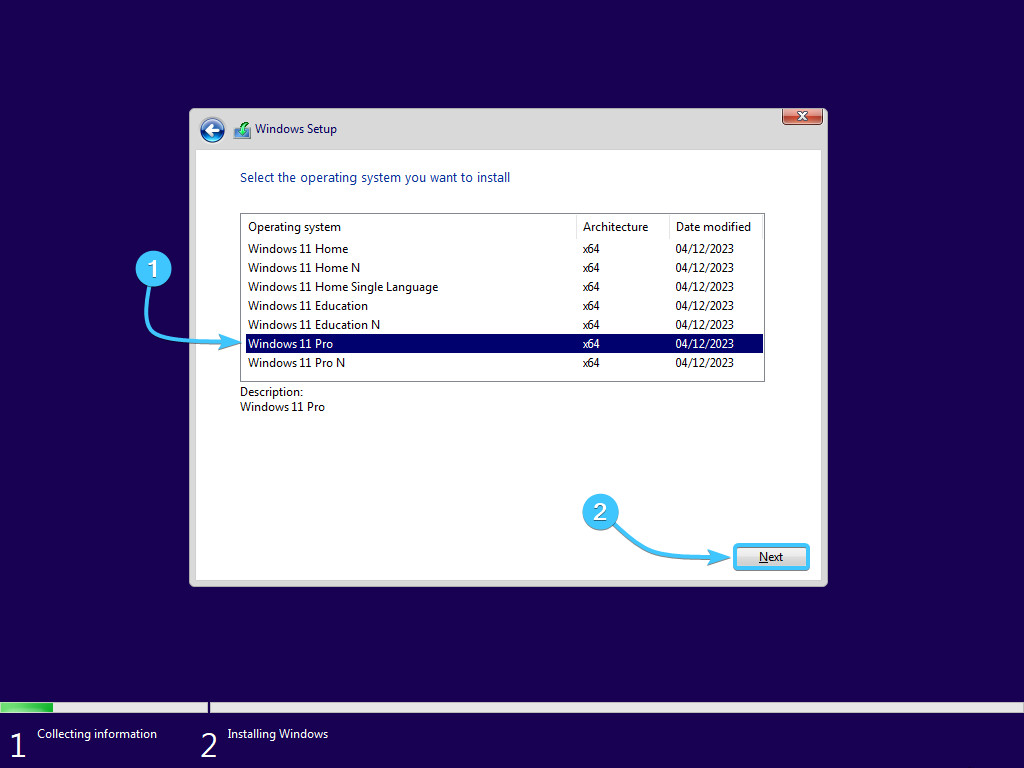
7. Select the edition of the Windows 11 operating system that you would like to install. We recommend installing the “Pro” or “Home” editions. Once selected, click the “Next” button.
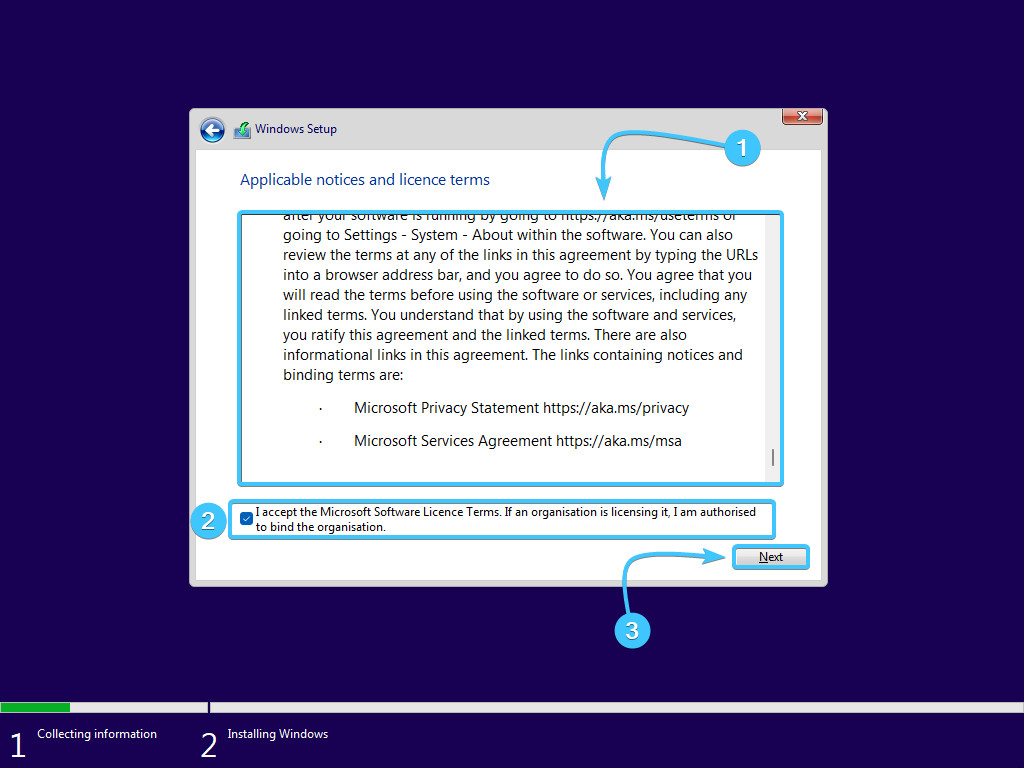
8. Read the licence agreement of the Windows 11 operating system. After that, tick the checkbox next to the confirmation option and click the “Next” button to continue the installation.
9. This will take you to the disc space partitioning menu. Unless you have a brand-new SSD or HDD, you will see more partitions than you would normally see in File Explorer. It is recommended to completely delete all partitions and determine how much unused space you will end up with. After that, you need to perform the partitioning of the disc space. It all depends on how many partitions you need. We recommend the following: one disc = one partition. If you have an SSD, you should install the operating system on it. Once the partitioning is complete, click on the partition where Windows 11 will be installed and click “Next”.

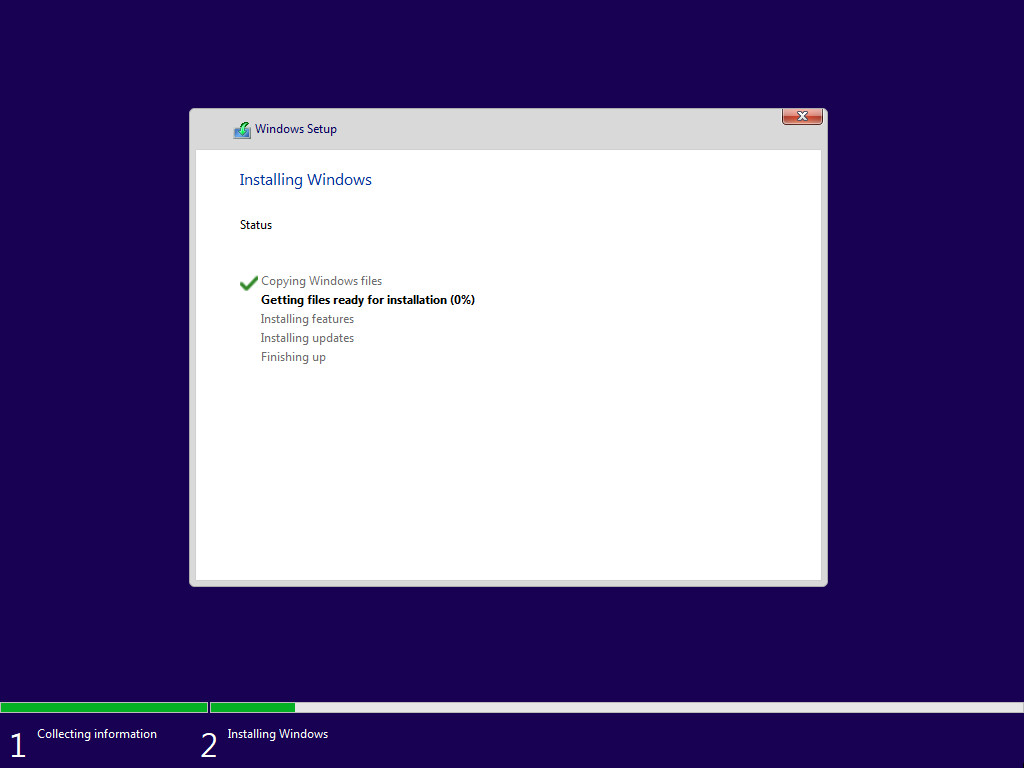
10. After successful disc partitioning, the Windows 11 operating system installation process will start, the device will reboot several times. Wait until all installation processes are complete.
11. Perform the Windows 11 initial setup. Select a region and click the “Yes” button.

12. Select the required keyboard layout or input method. Press the “Yes” button.

13. Click the “Skip” button if you do not need an additional keyboard layout.

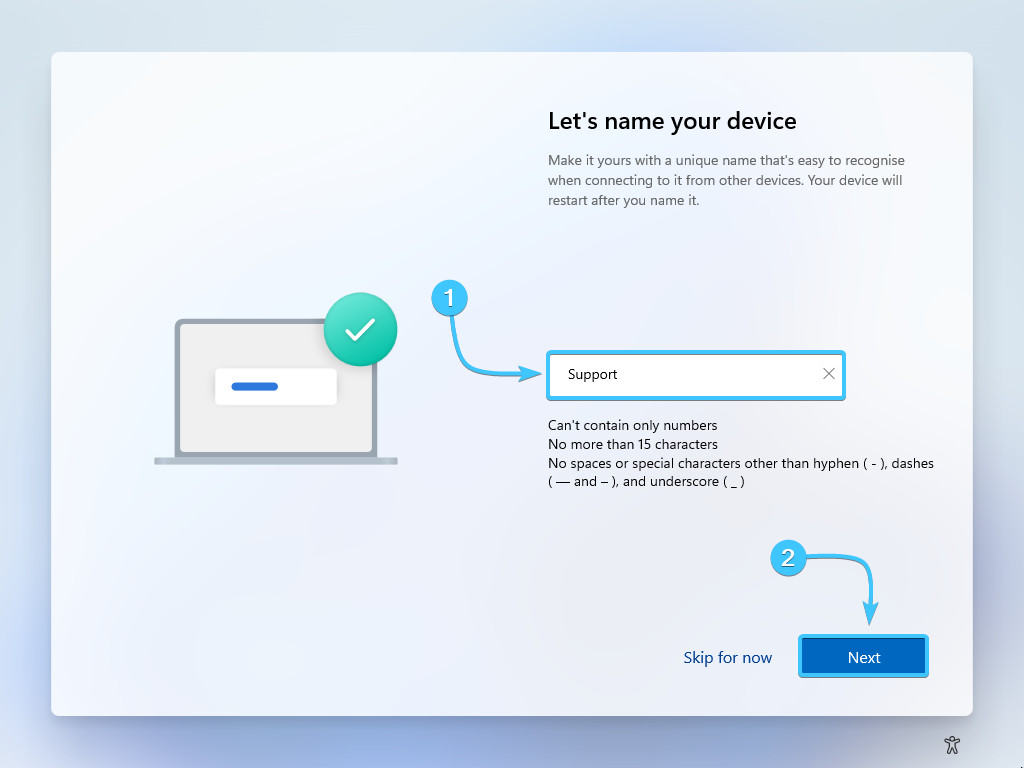
14. Name the device. We recommend using English letters only. Press the “Next” button.
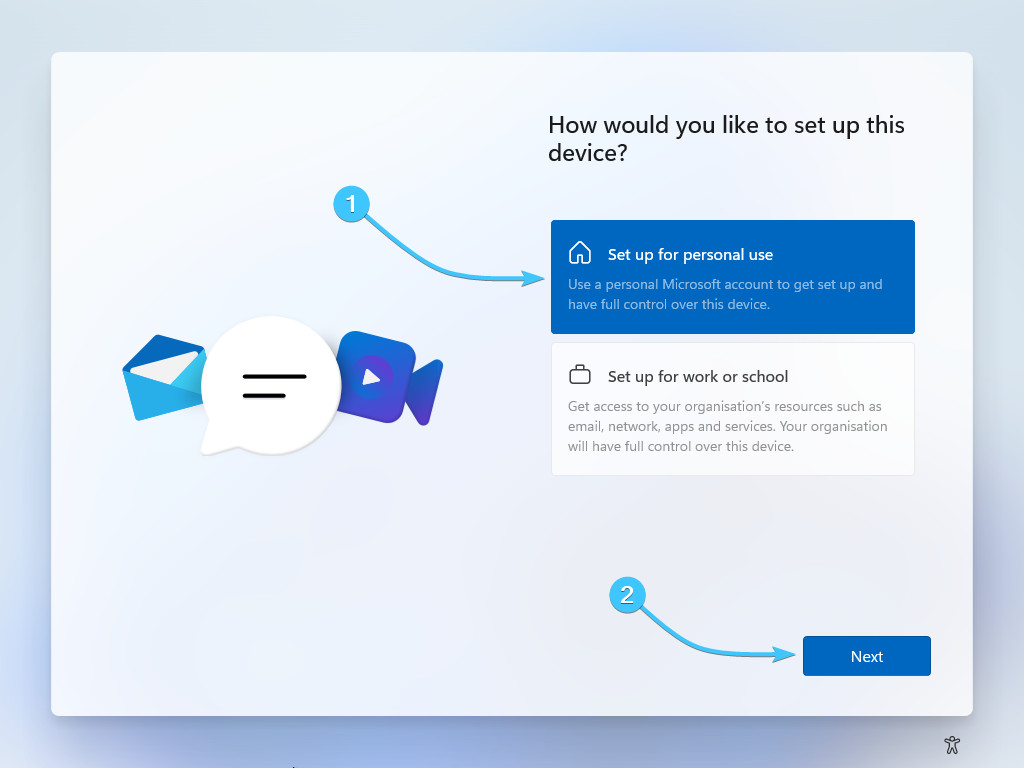
15. After restarting the device, select the “Set up for personal use” method.
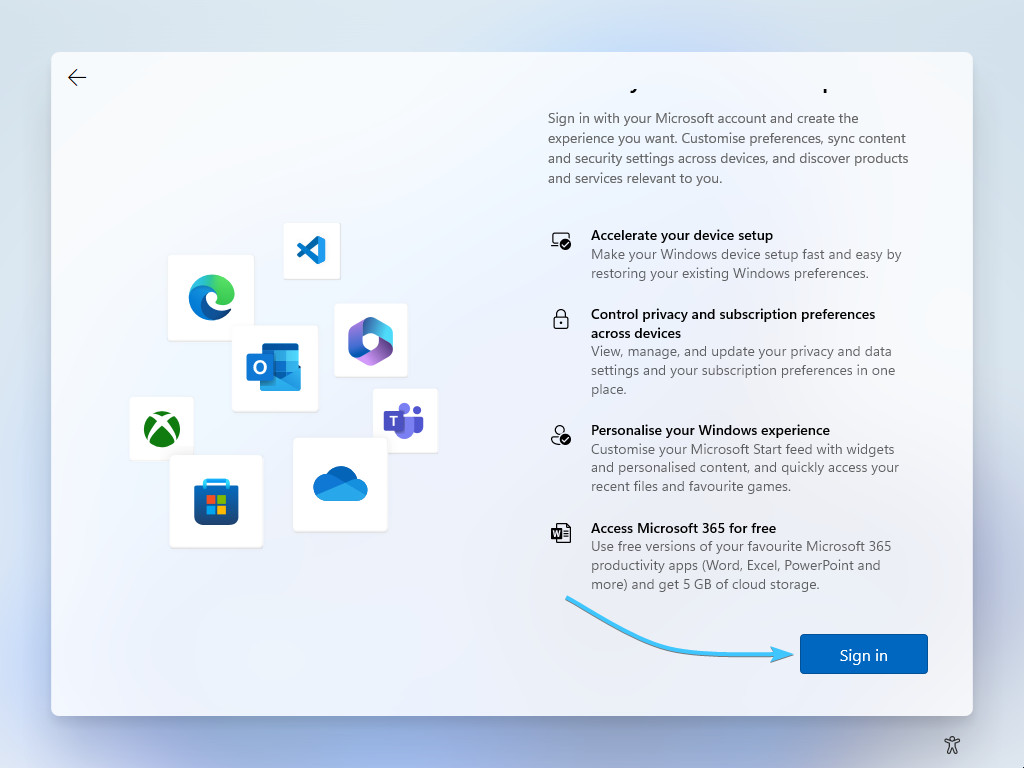
16. Log in with a Microsoft account. If you do not have one, create one right there.
17. The parameter recovery will appear. Click the “More options” button.

18. Press the “Set up as a new PC” button to not download previous data and continue the installation.

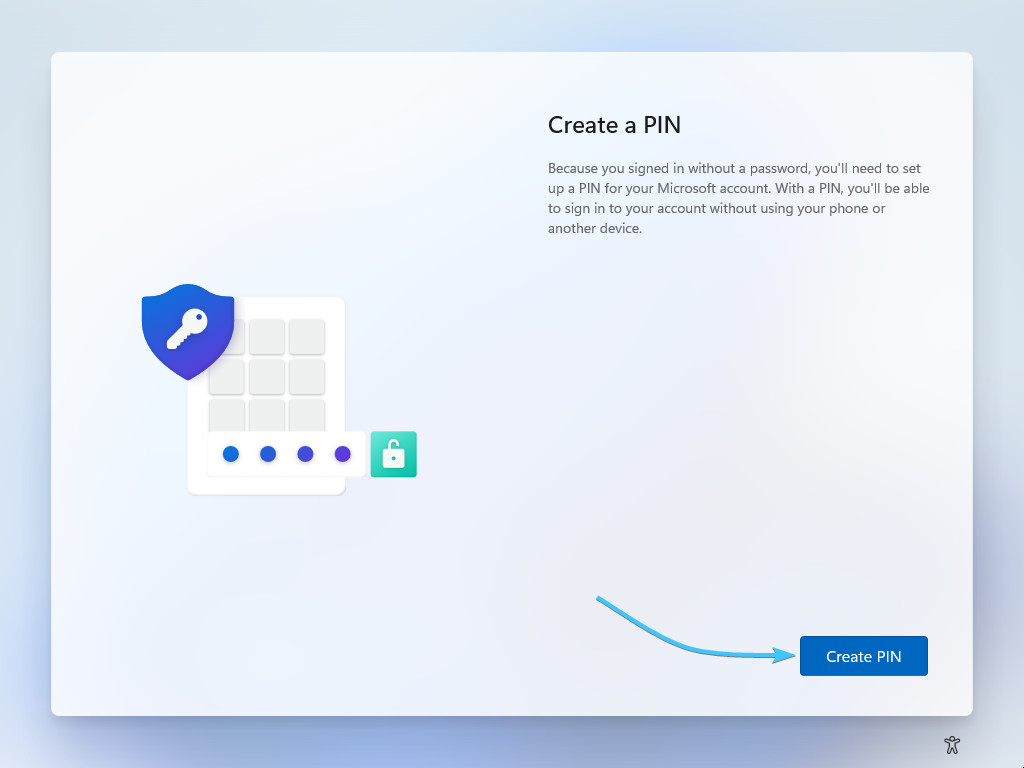
19. The system will suggest you to set a PIN code for security purposes. Press the “Create PIN” button.
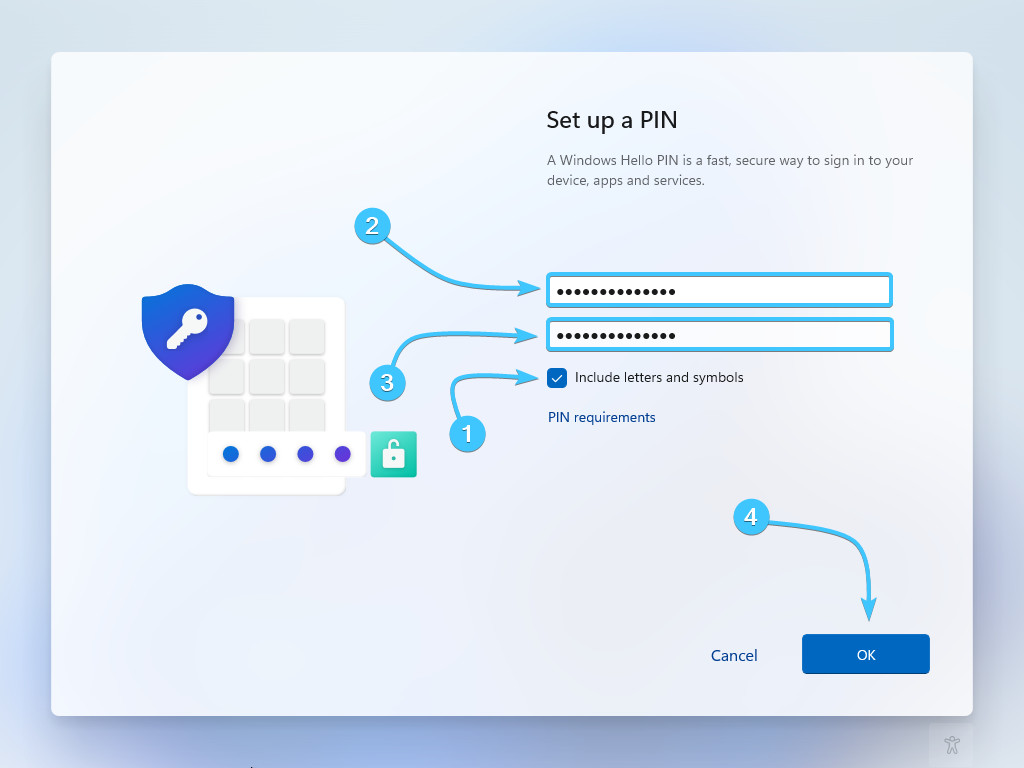
20. Enter the pin code, then repeat it. Press the “OK” button to continue setting up the system.
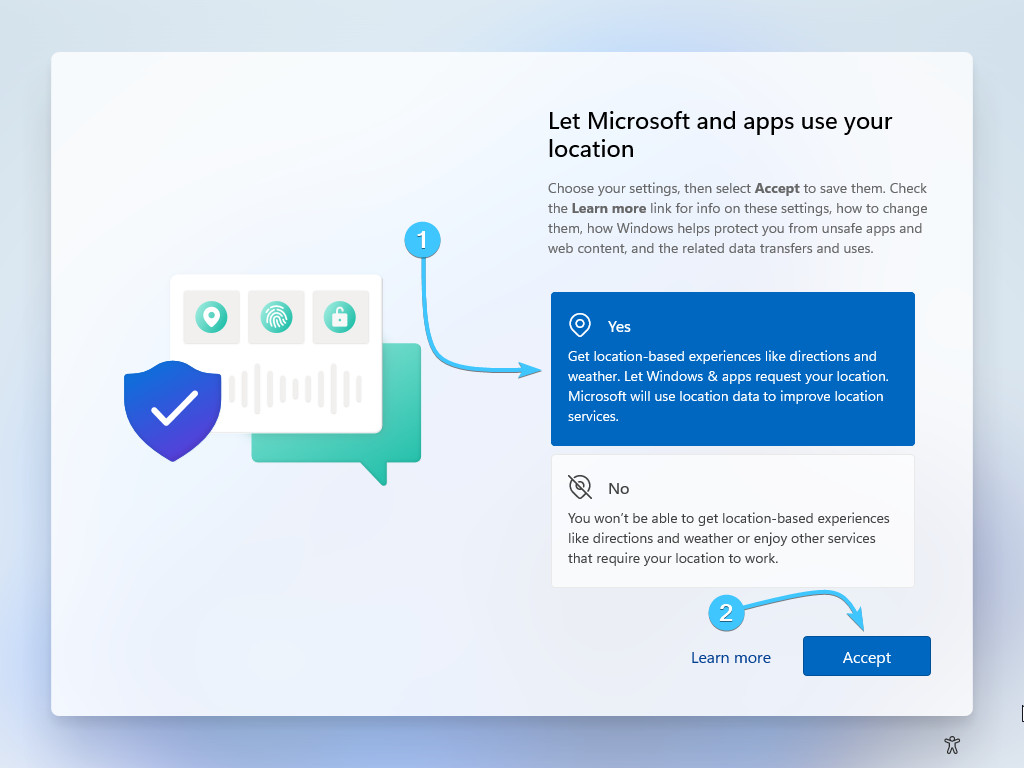
21. A confirmation message regarding the transfer of your location data will appear. Select the “Yes” or “No” option and press the “Accept” button.
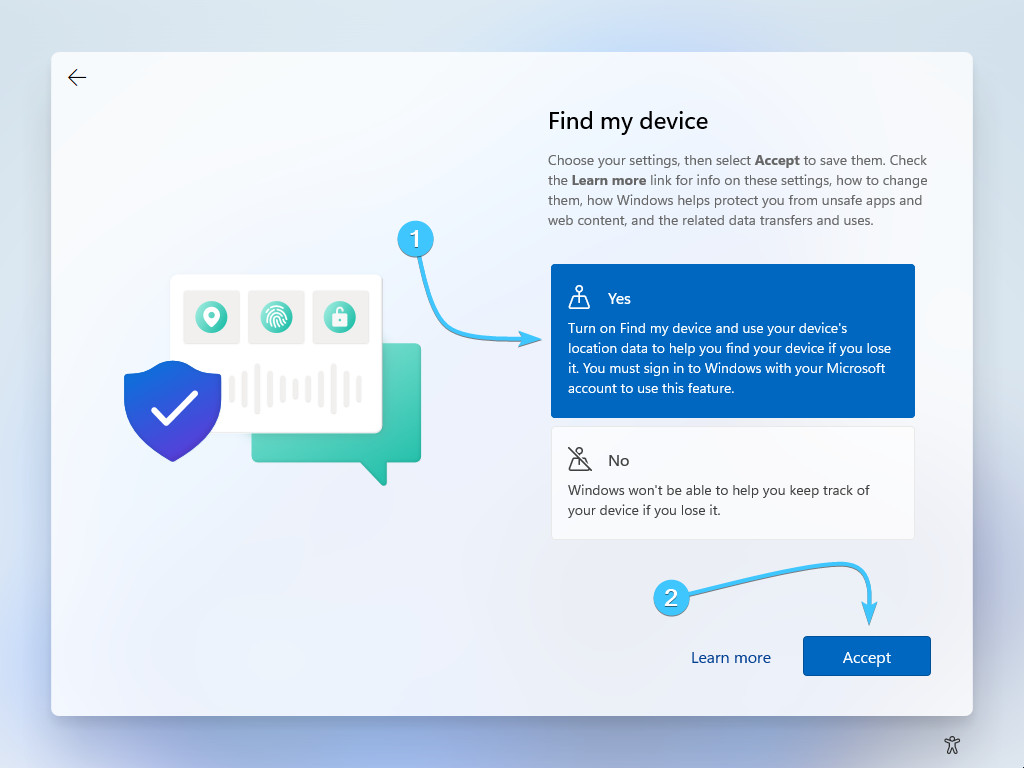
22. A clarification message regarding the search for your device will appear. Select the “Yes” or “No” option and press the “Accept” button.
23. A clarification message regarding the diagnostic data of the device will appear. Select “Include Optional” or “Required only” and click the “Accept” button.

24. A clarification message regarding typing on the device will appear. Select the “Yes” or “No” option and click the “Accept” button.

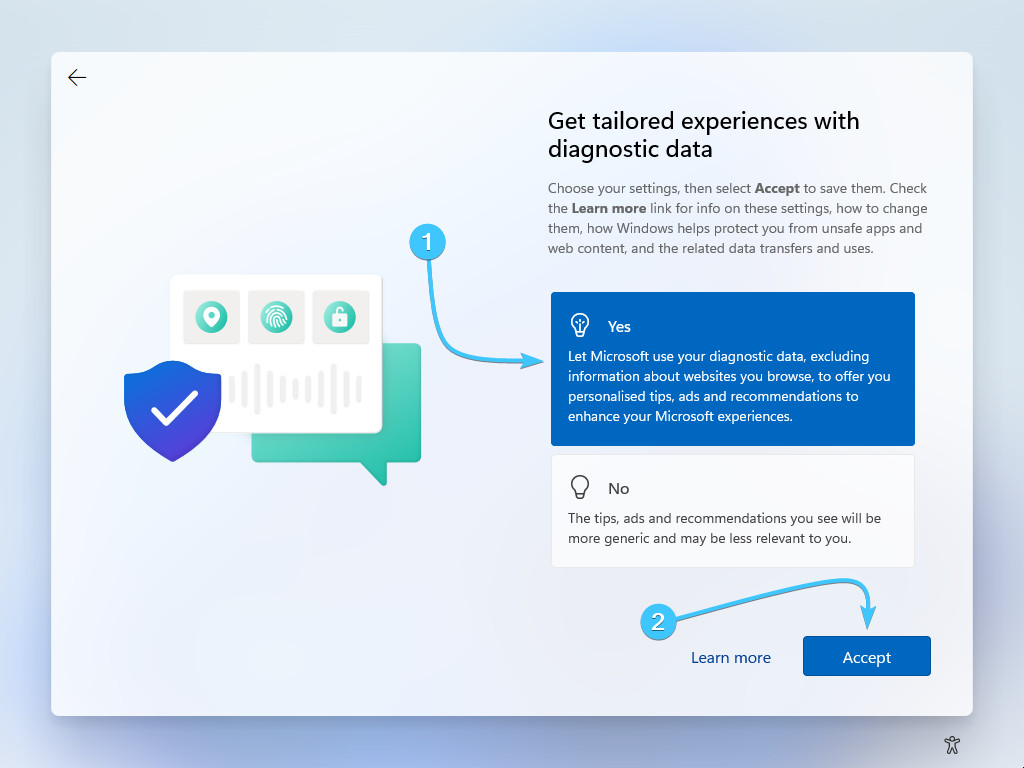
25. A clarification message regarding the individual experience of the diagnostic data will appear. Select the “Yes” or “No” option and press the “Accept” button.
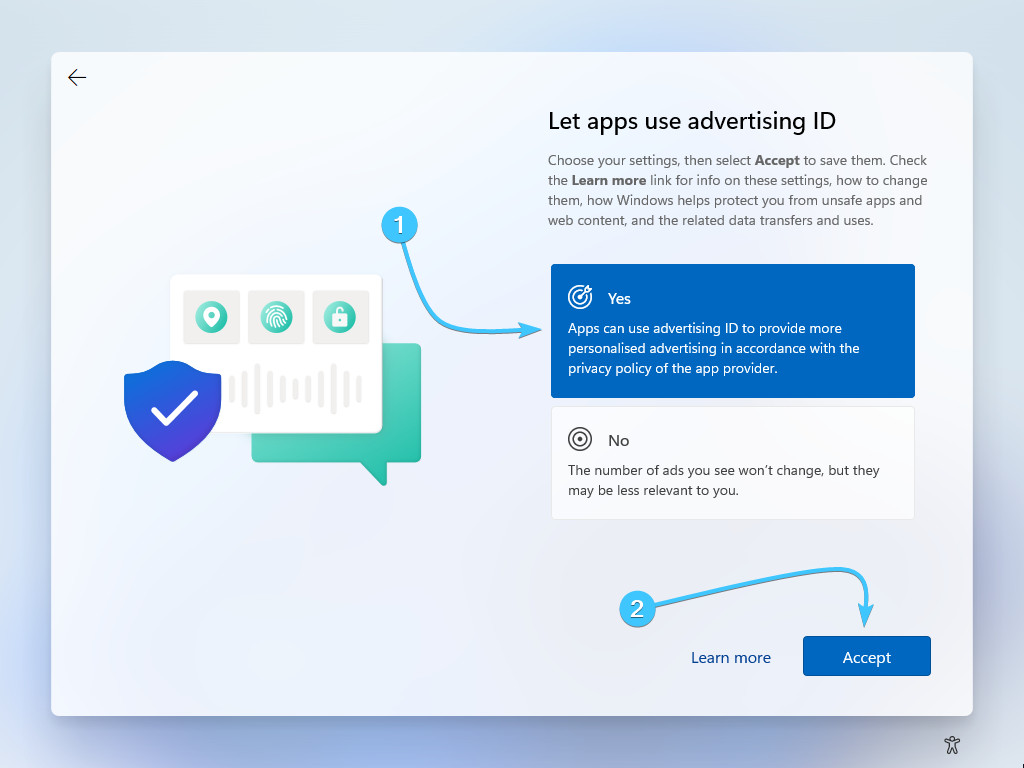
26. A clarification message regarding the use of an advertising identifier will appear. Select the “Yes” or “No” option and click the “Accept” button.
27. Familiarise yourself with the ways of interacting with the device. Select the required options and press the “Accept” button (1). In case you do not want to do it, press the “Skip” button (2).
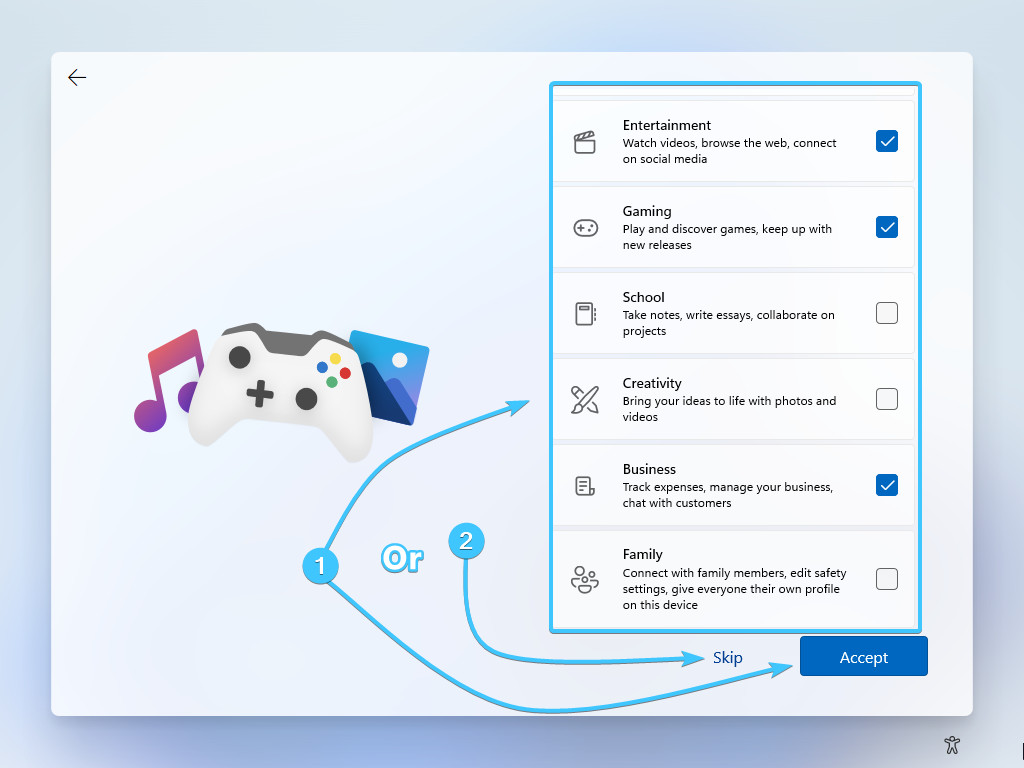
28. If you prefer, you can link your mobile phone to the device by scanning the QR code (1). If you do not want to do this, press the “Skip” button (2).

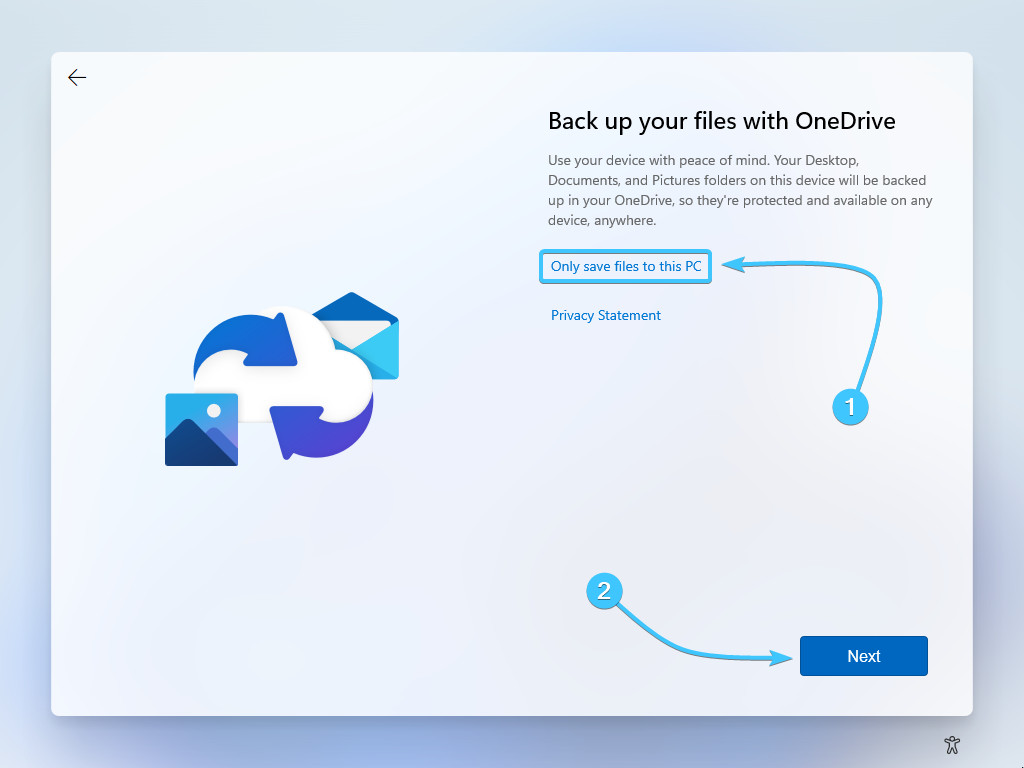
29. Select the type of file backup. Click the “Next” button if you want to use “OneDrive”. If not, click the “Only save files to this PC” button.
30. A clarification message regarding data transfer to the Microsoft Edge browser will appear. Select “Yes, import” or “Not now” option, depending on your preference.

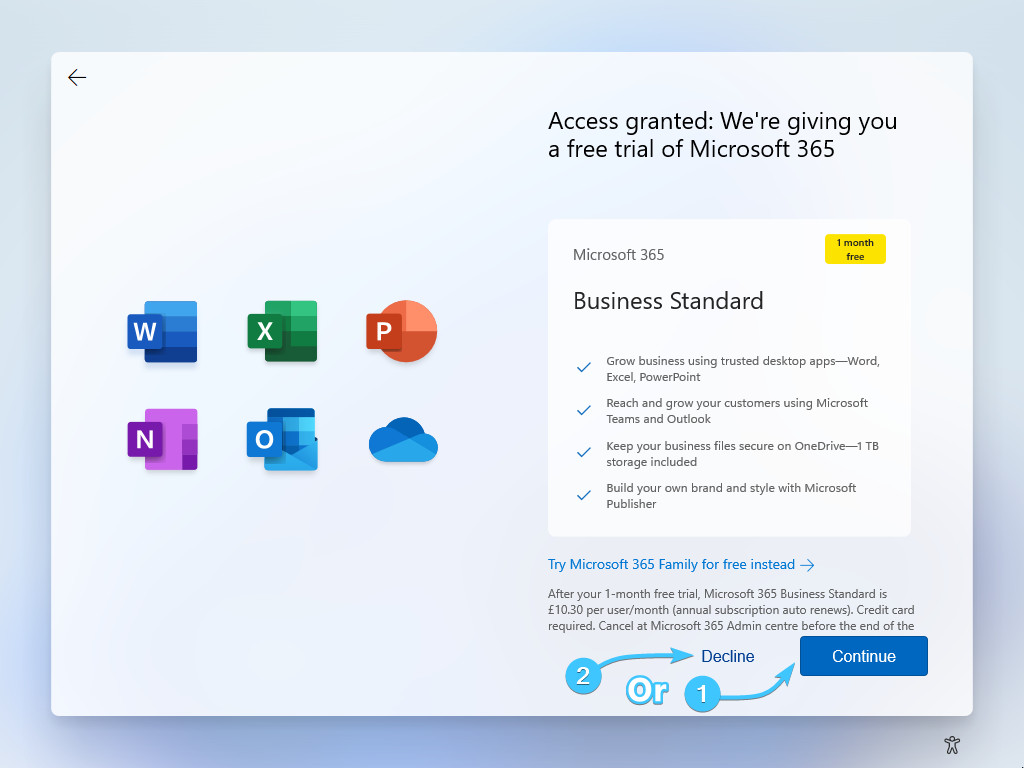
31. A clarification message regarding the purchase of “Microsoft Office 365” will appear. Select the “Continue” or “Decline” option, depending on your preference. Click on “Continue” and follow the next steps.
32. A clarification message regarding the purchase of an additional 100 GB of OneDrive will appear. Select “Continue” or “Decline” option, depending on your preference. Click on “Continue” and follow the next steps.

33. A clarification message regarding the purchase of a “PC Game Pass” will appear. Select “Join for £7.99” or “Skip for now” option, depending on your preference. Click on “Join for £7.99” and follow the next steps.

34. The desktop will appear. Windows 11 operating system is installed and can be used.

Recommendations after Windows 11 installation
After installing Windows 11 operating system, it is recommended performing the following:
- Install all the latest updates using the “Windows Update” section;
- Install all the latest drivers by downloading them from the motherboard's official website;
- Install the latest drivers for graphics card by downloading them from the manufacturer's official website.
Other guides
- Switching DEP technology;
- Paging file setting;
- RAM diagnostics;
- Diagnosis of disc devices;
- Power plans in Windows 11;
- Disabling the Hyper-V component;
- Windows system update;
- Disabling application startup;
- Windows 10 system installation;
- Adding power plans;
- Windows time correction;
- Disabling core isolation;
- Uninstalling applications on the system;
- Disabling visual effects;
- MSInfo32 and DxDiag reports;
- Disabling disc indexing;
- Optimising the disk device;
- Windows integrity check;
- Removing “Java options”;
- Restoring system fonts;
- Disabling the debug parameter;
- Location of the application list;
- Power plans in Windows 10;
- Disabling remote assistant;
- Operating system reset;
- Operating system activation;
- Enabling storage sense;
- Deleting temporary files;
- Pausing system updates.