Table of Contents
Graphics card switching in Windows 11
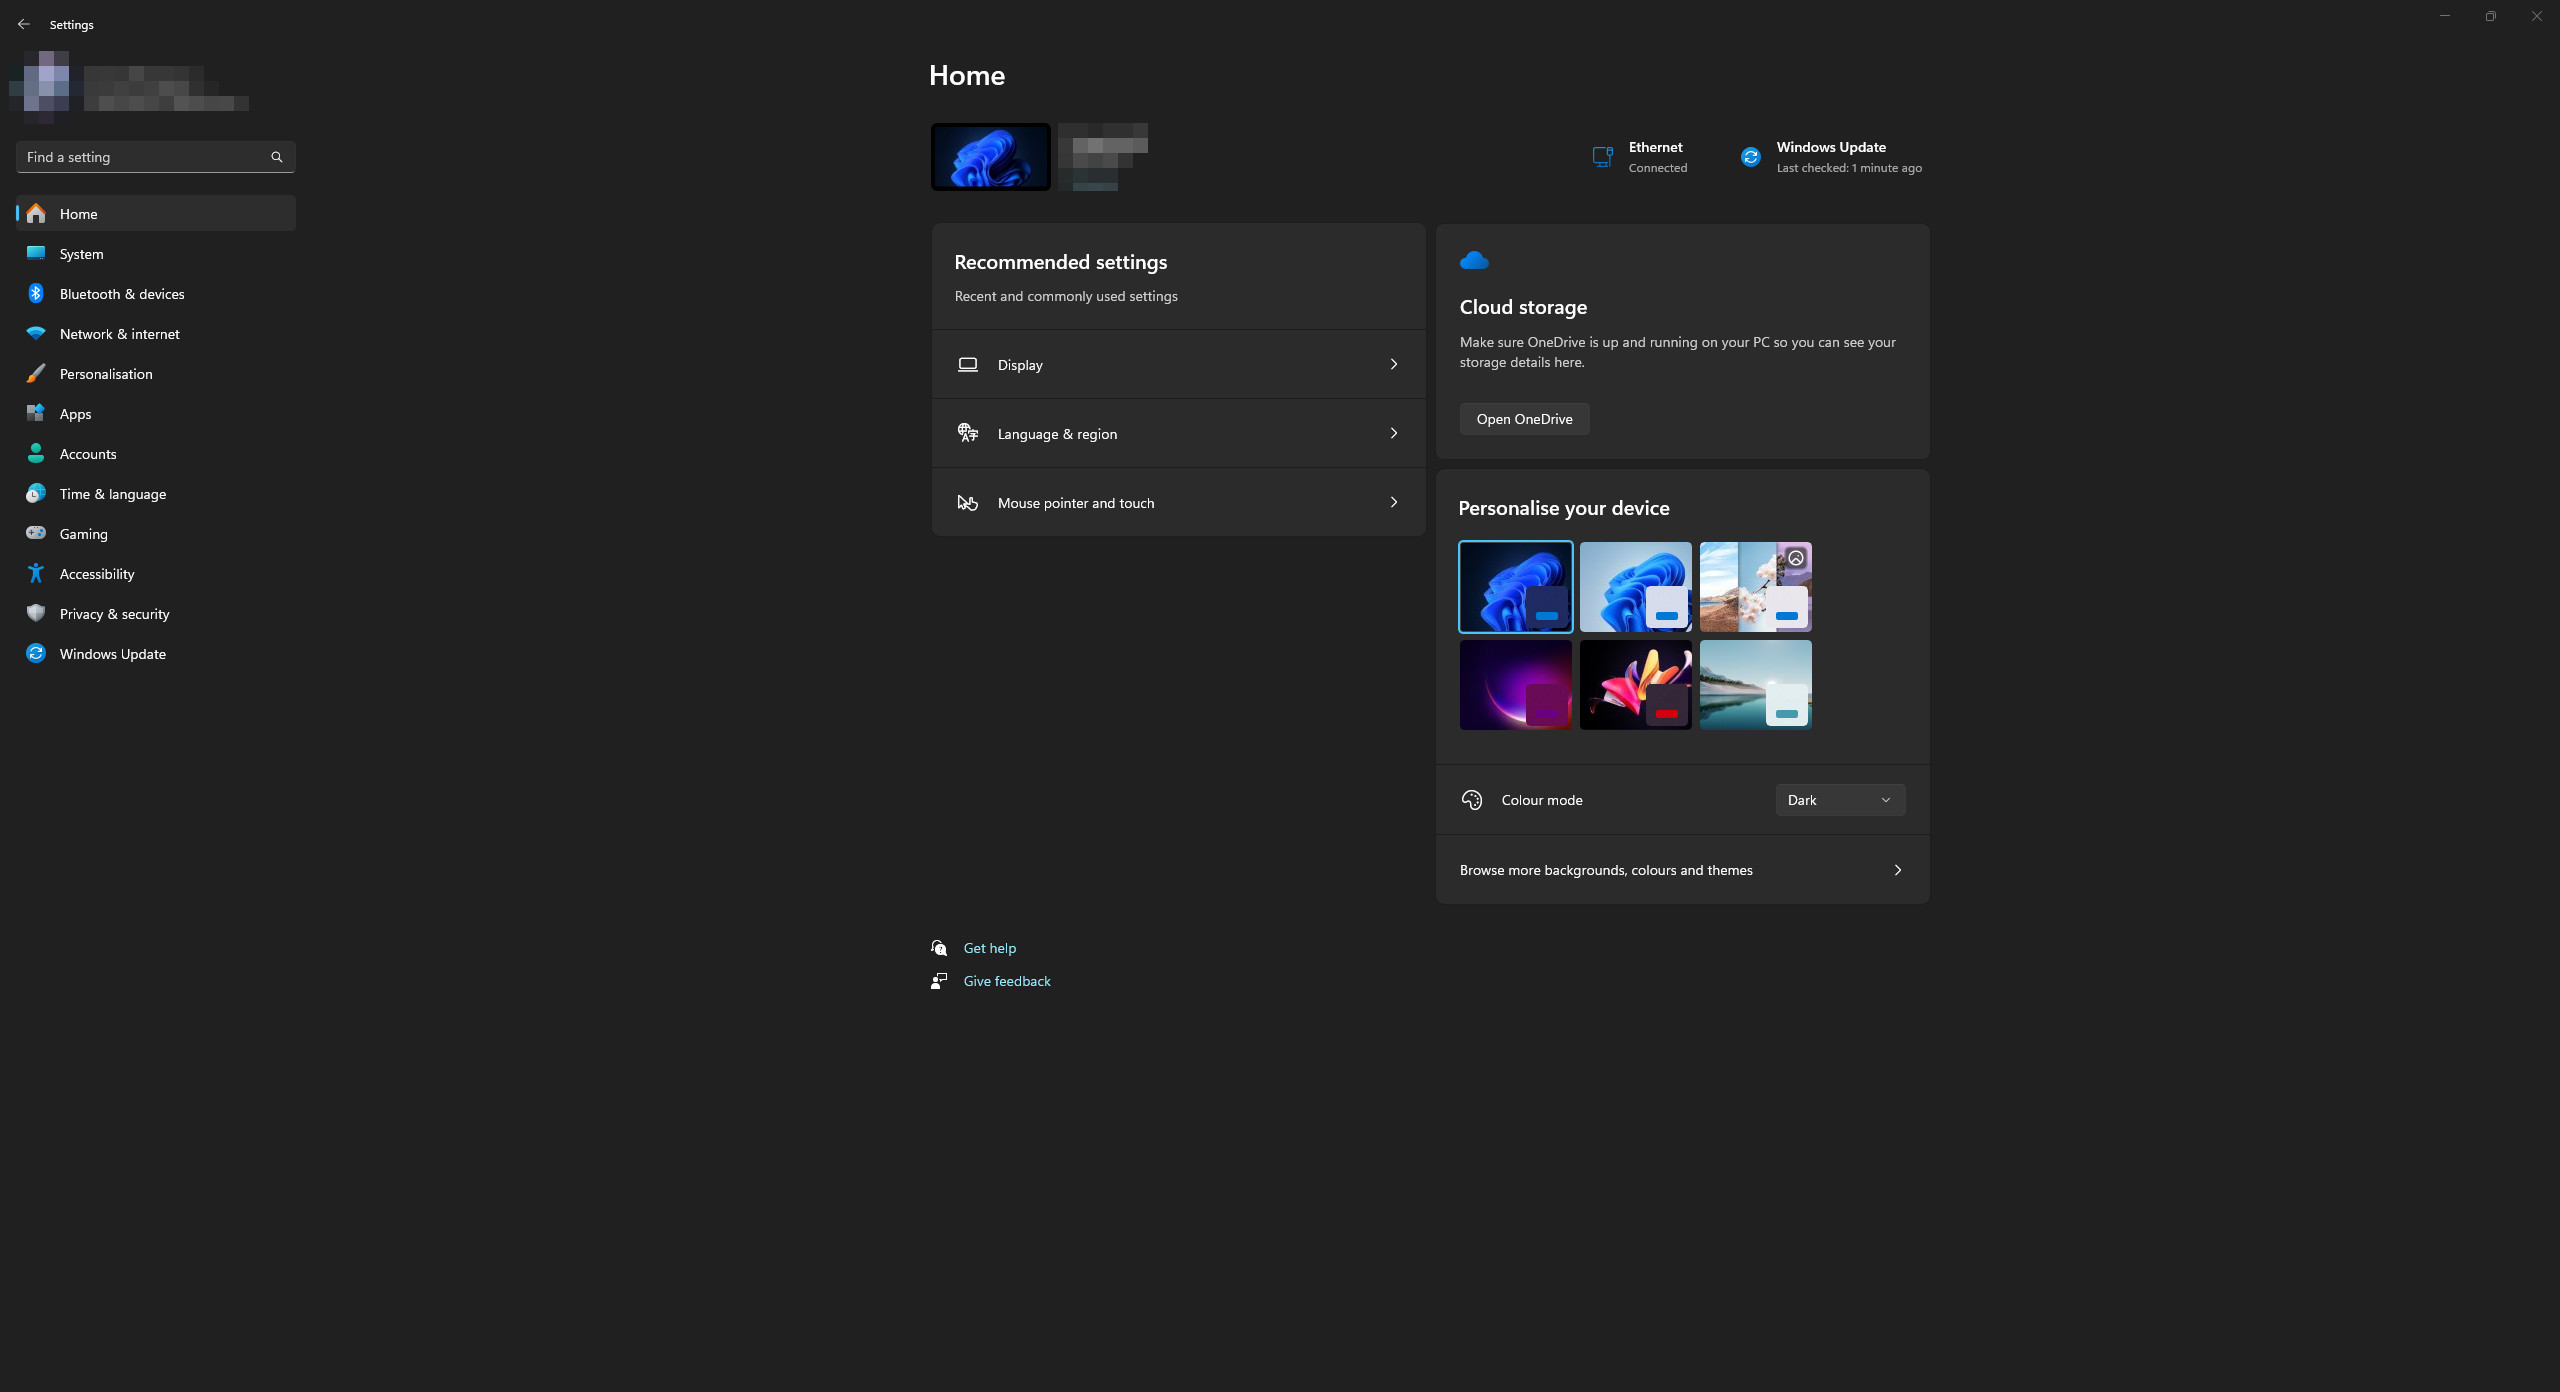
1. Open the Start menu and go to Settings in the Windows 11 operating system.
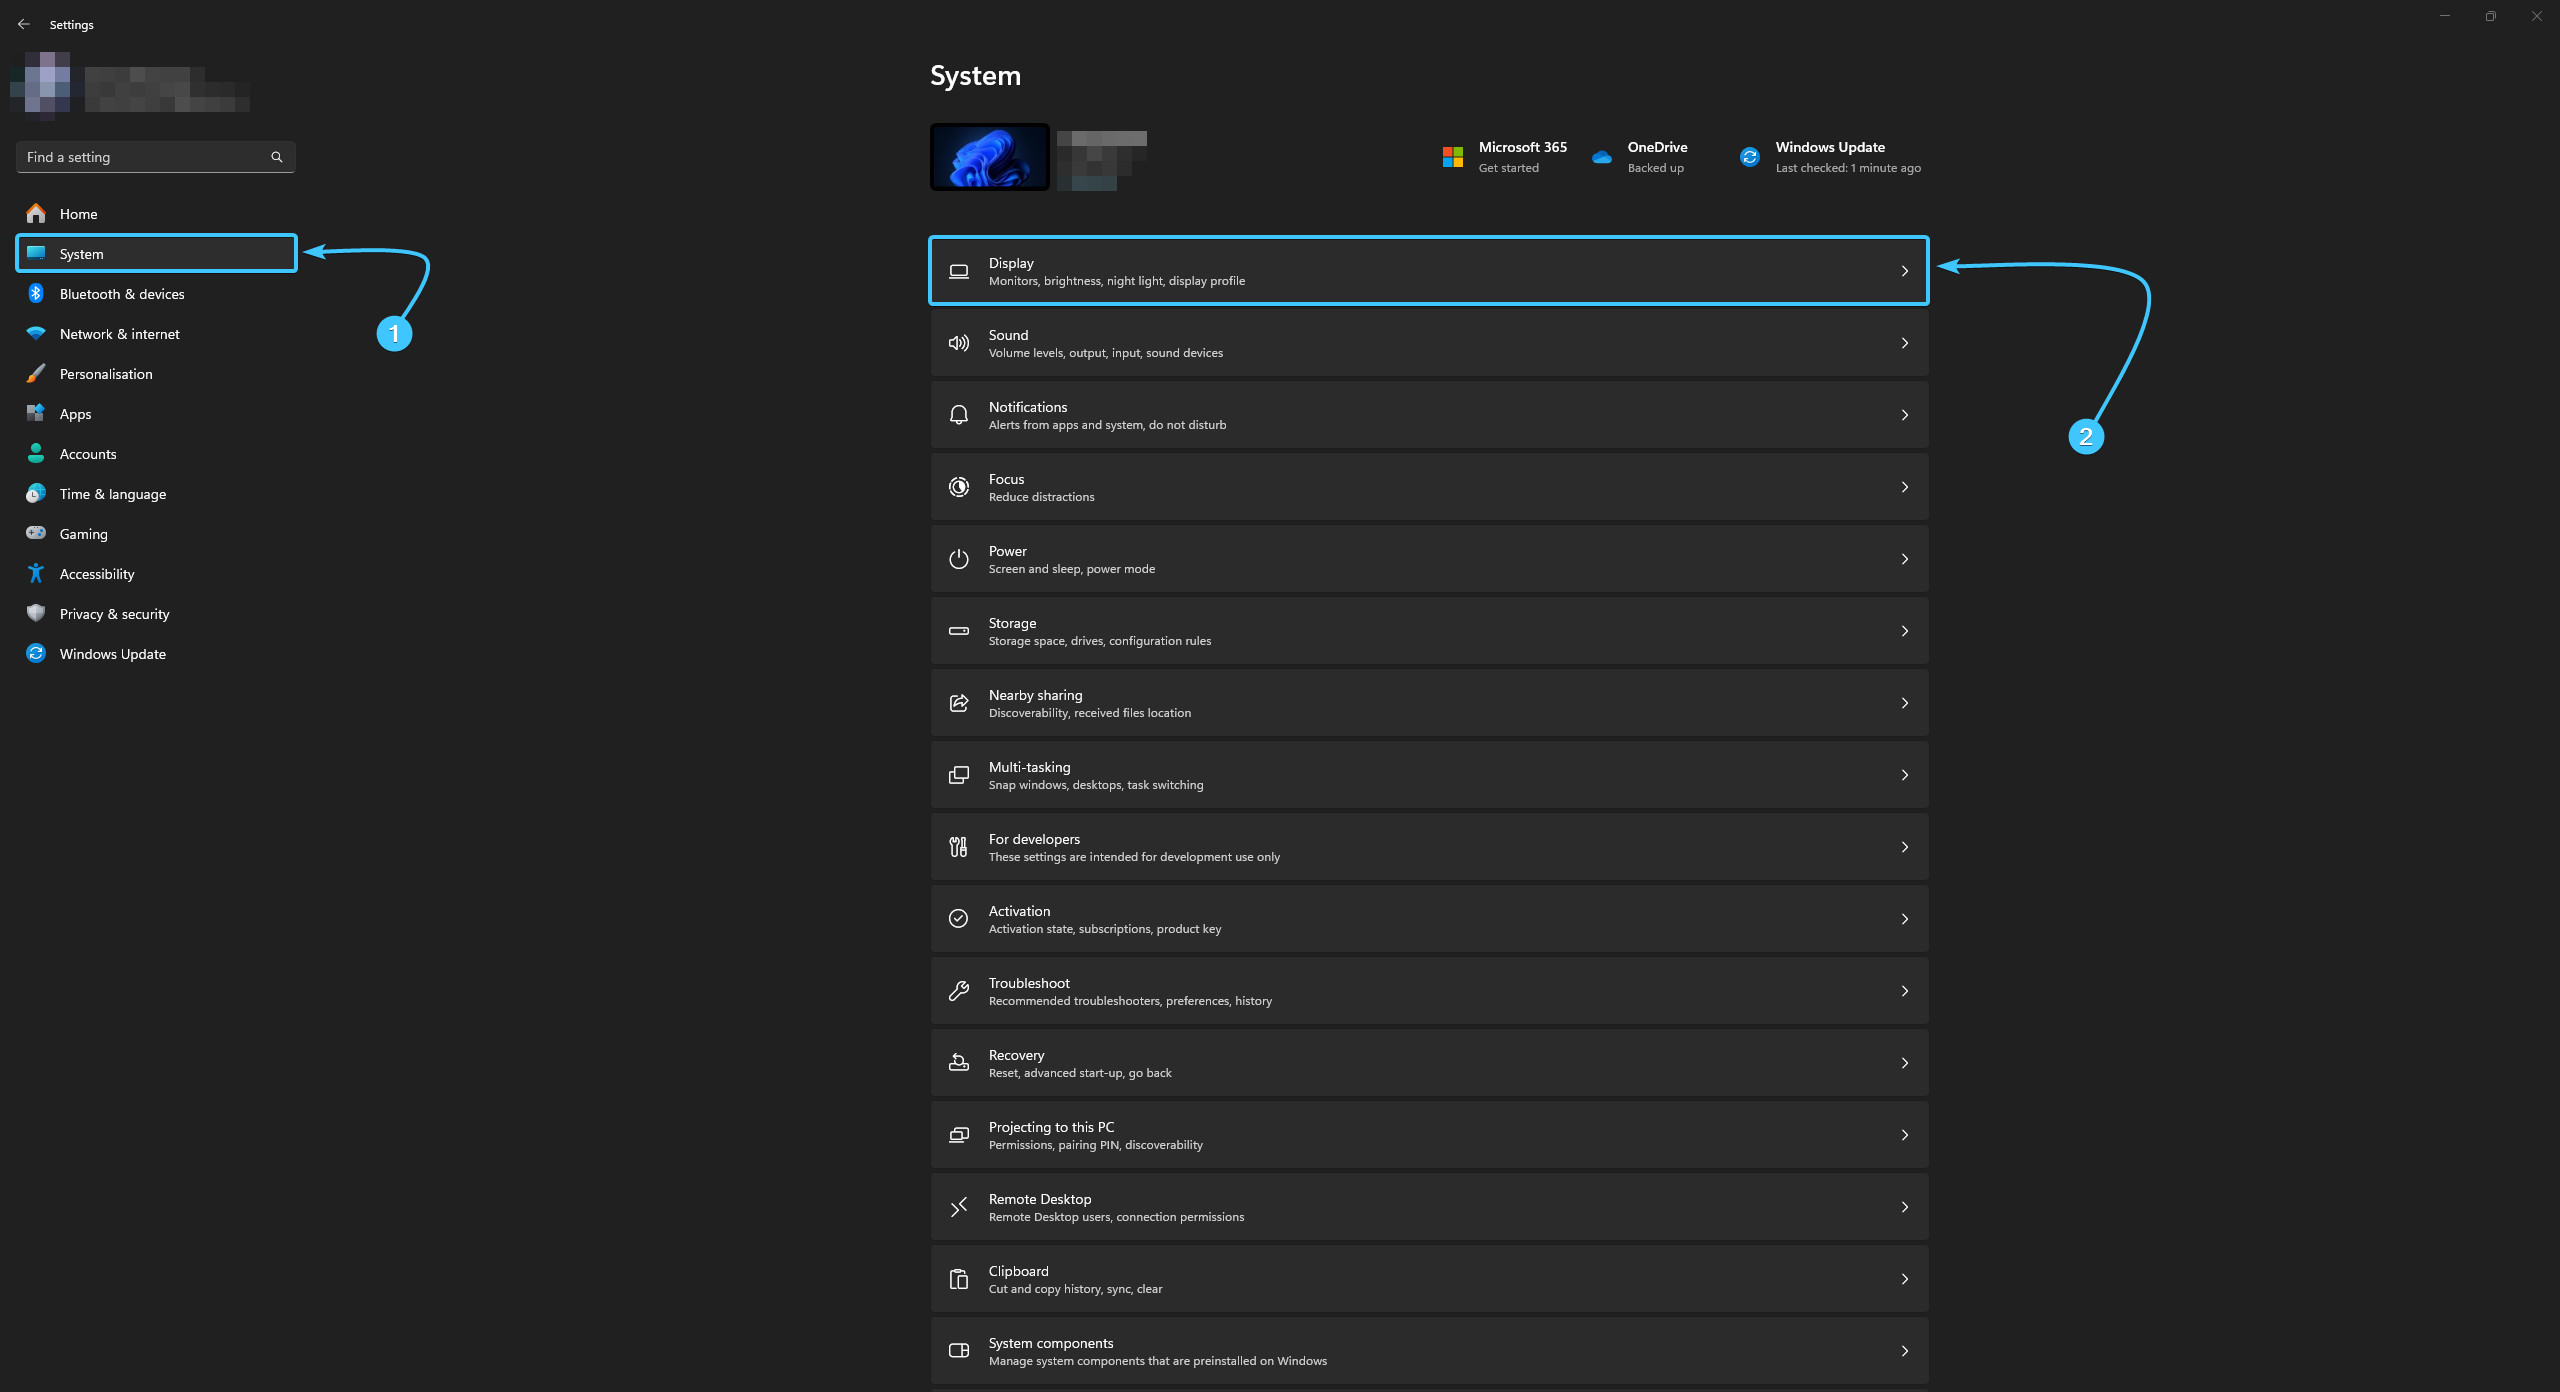
2. In the list, open the “System” category. Go to the “Display” section.
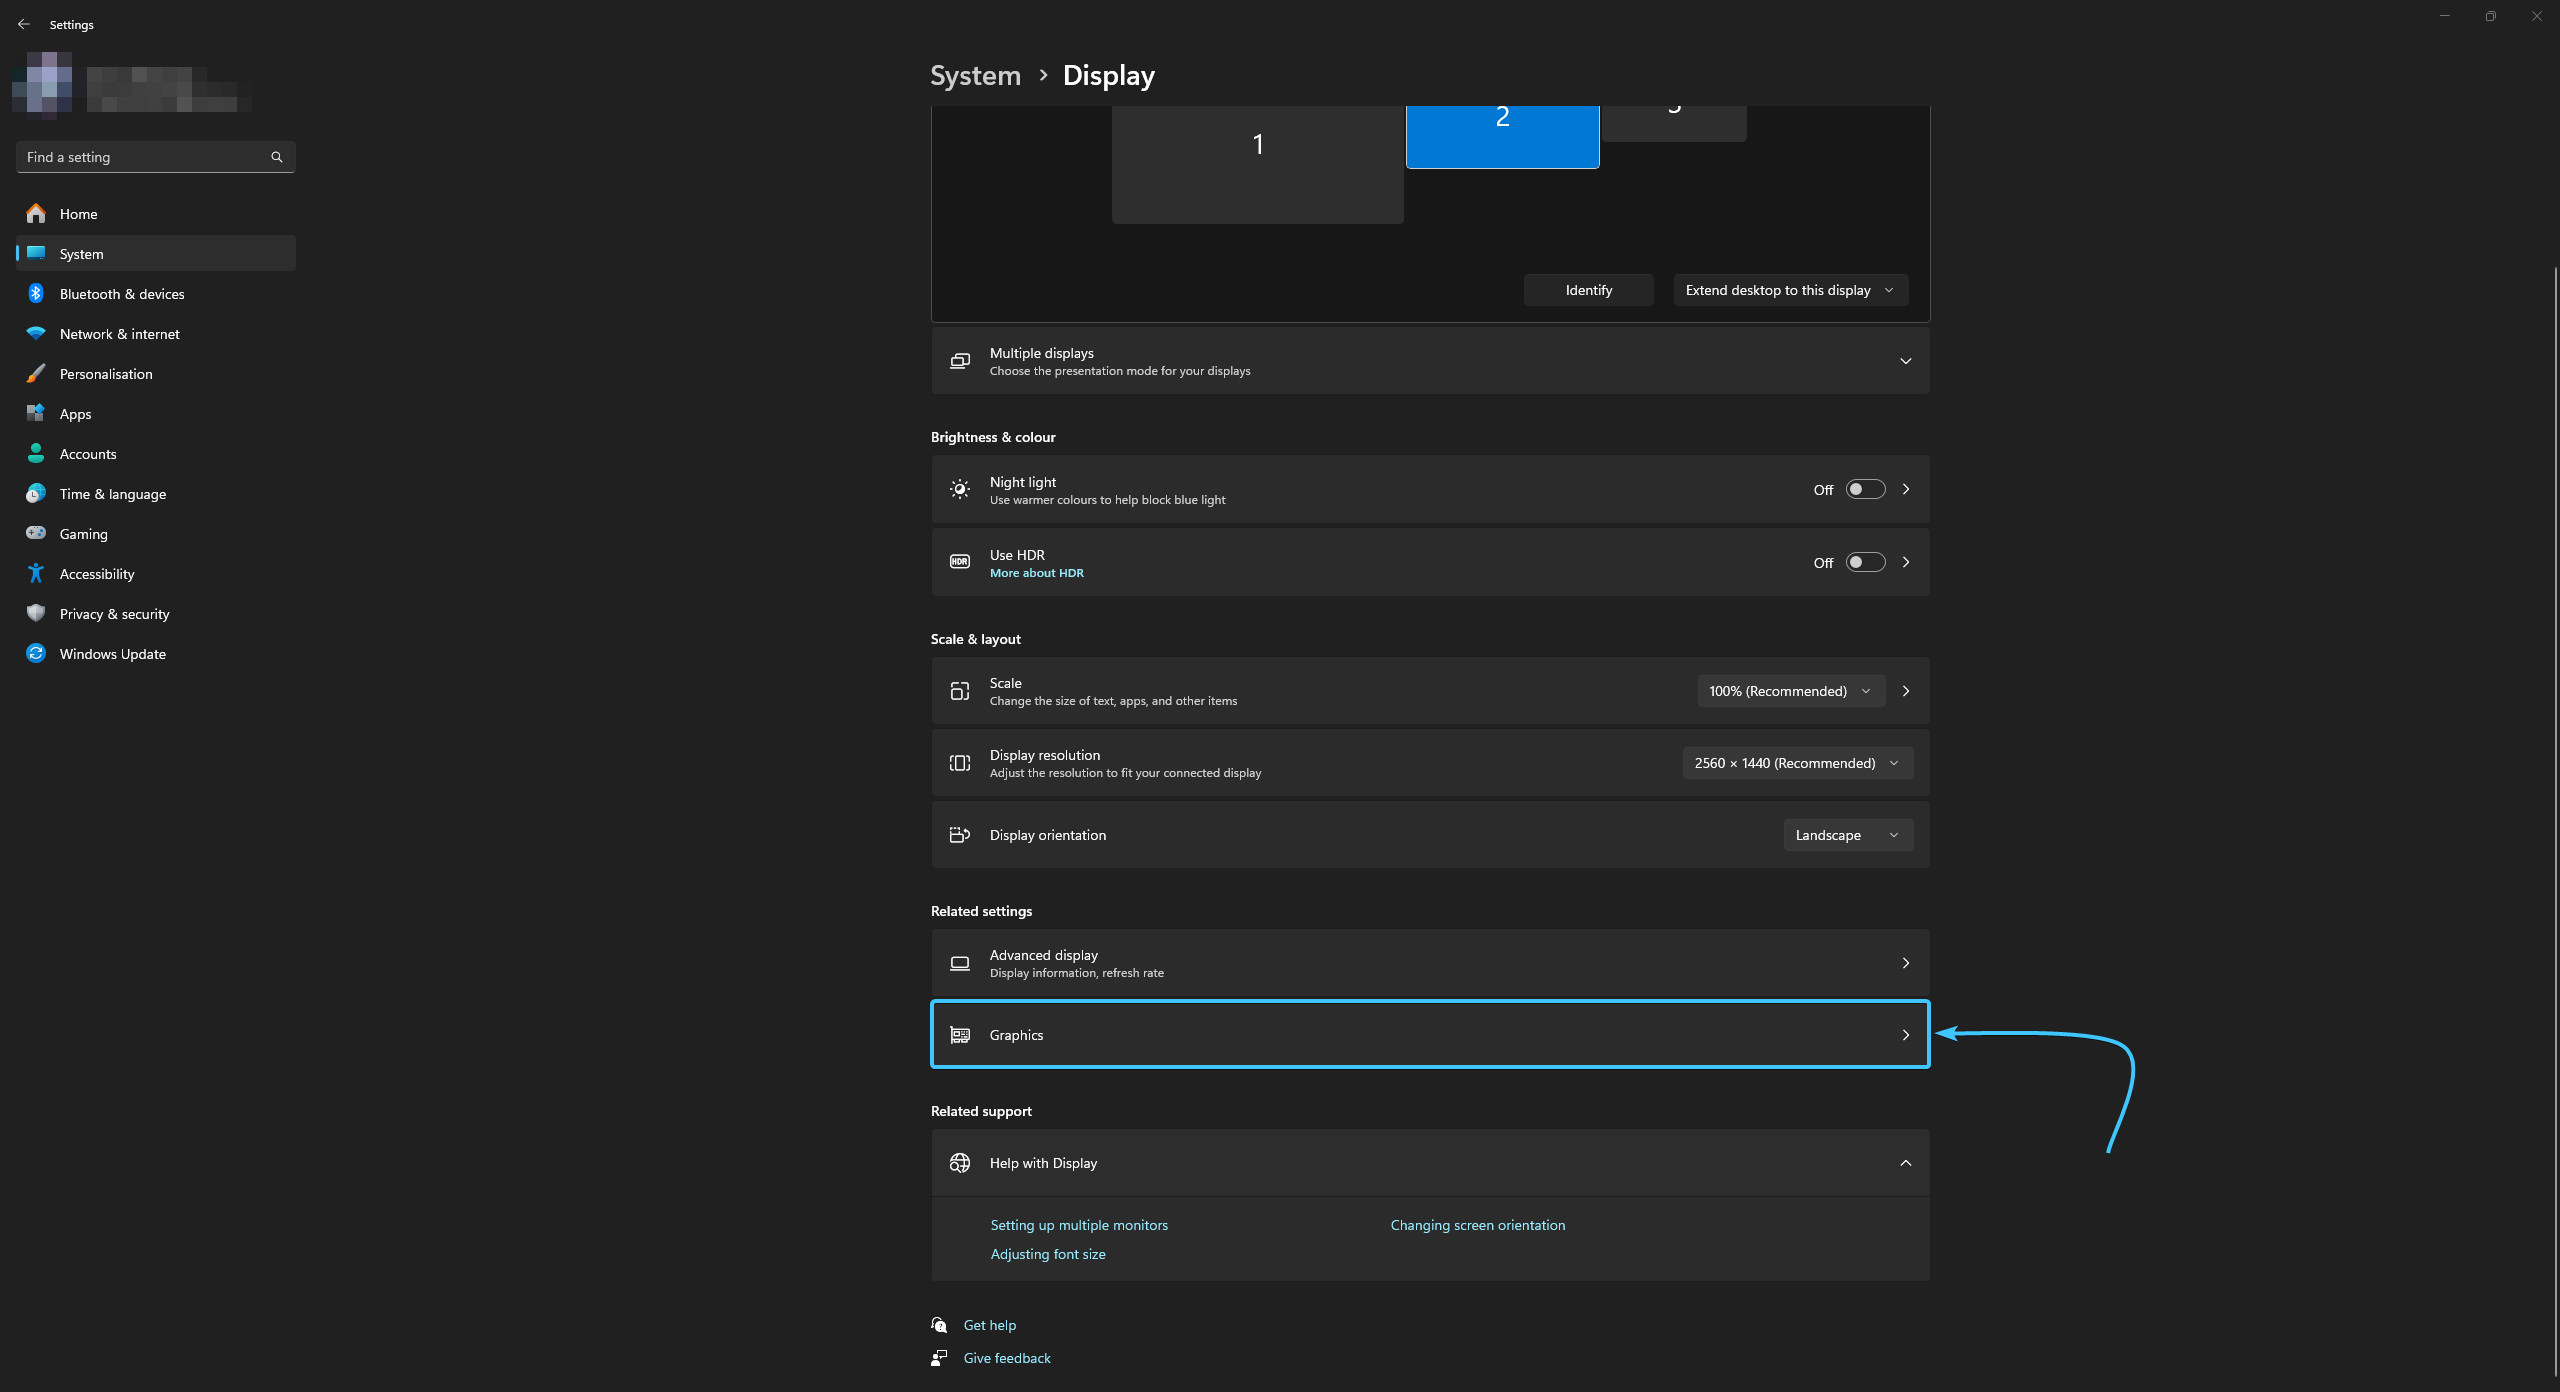
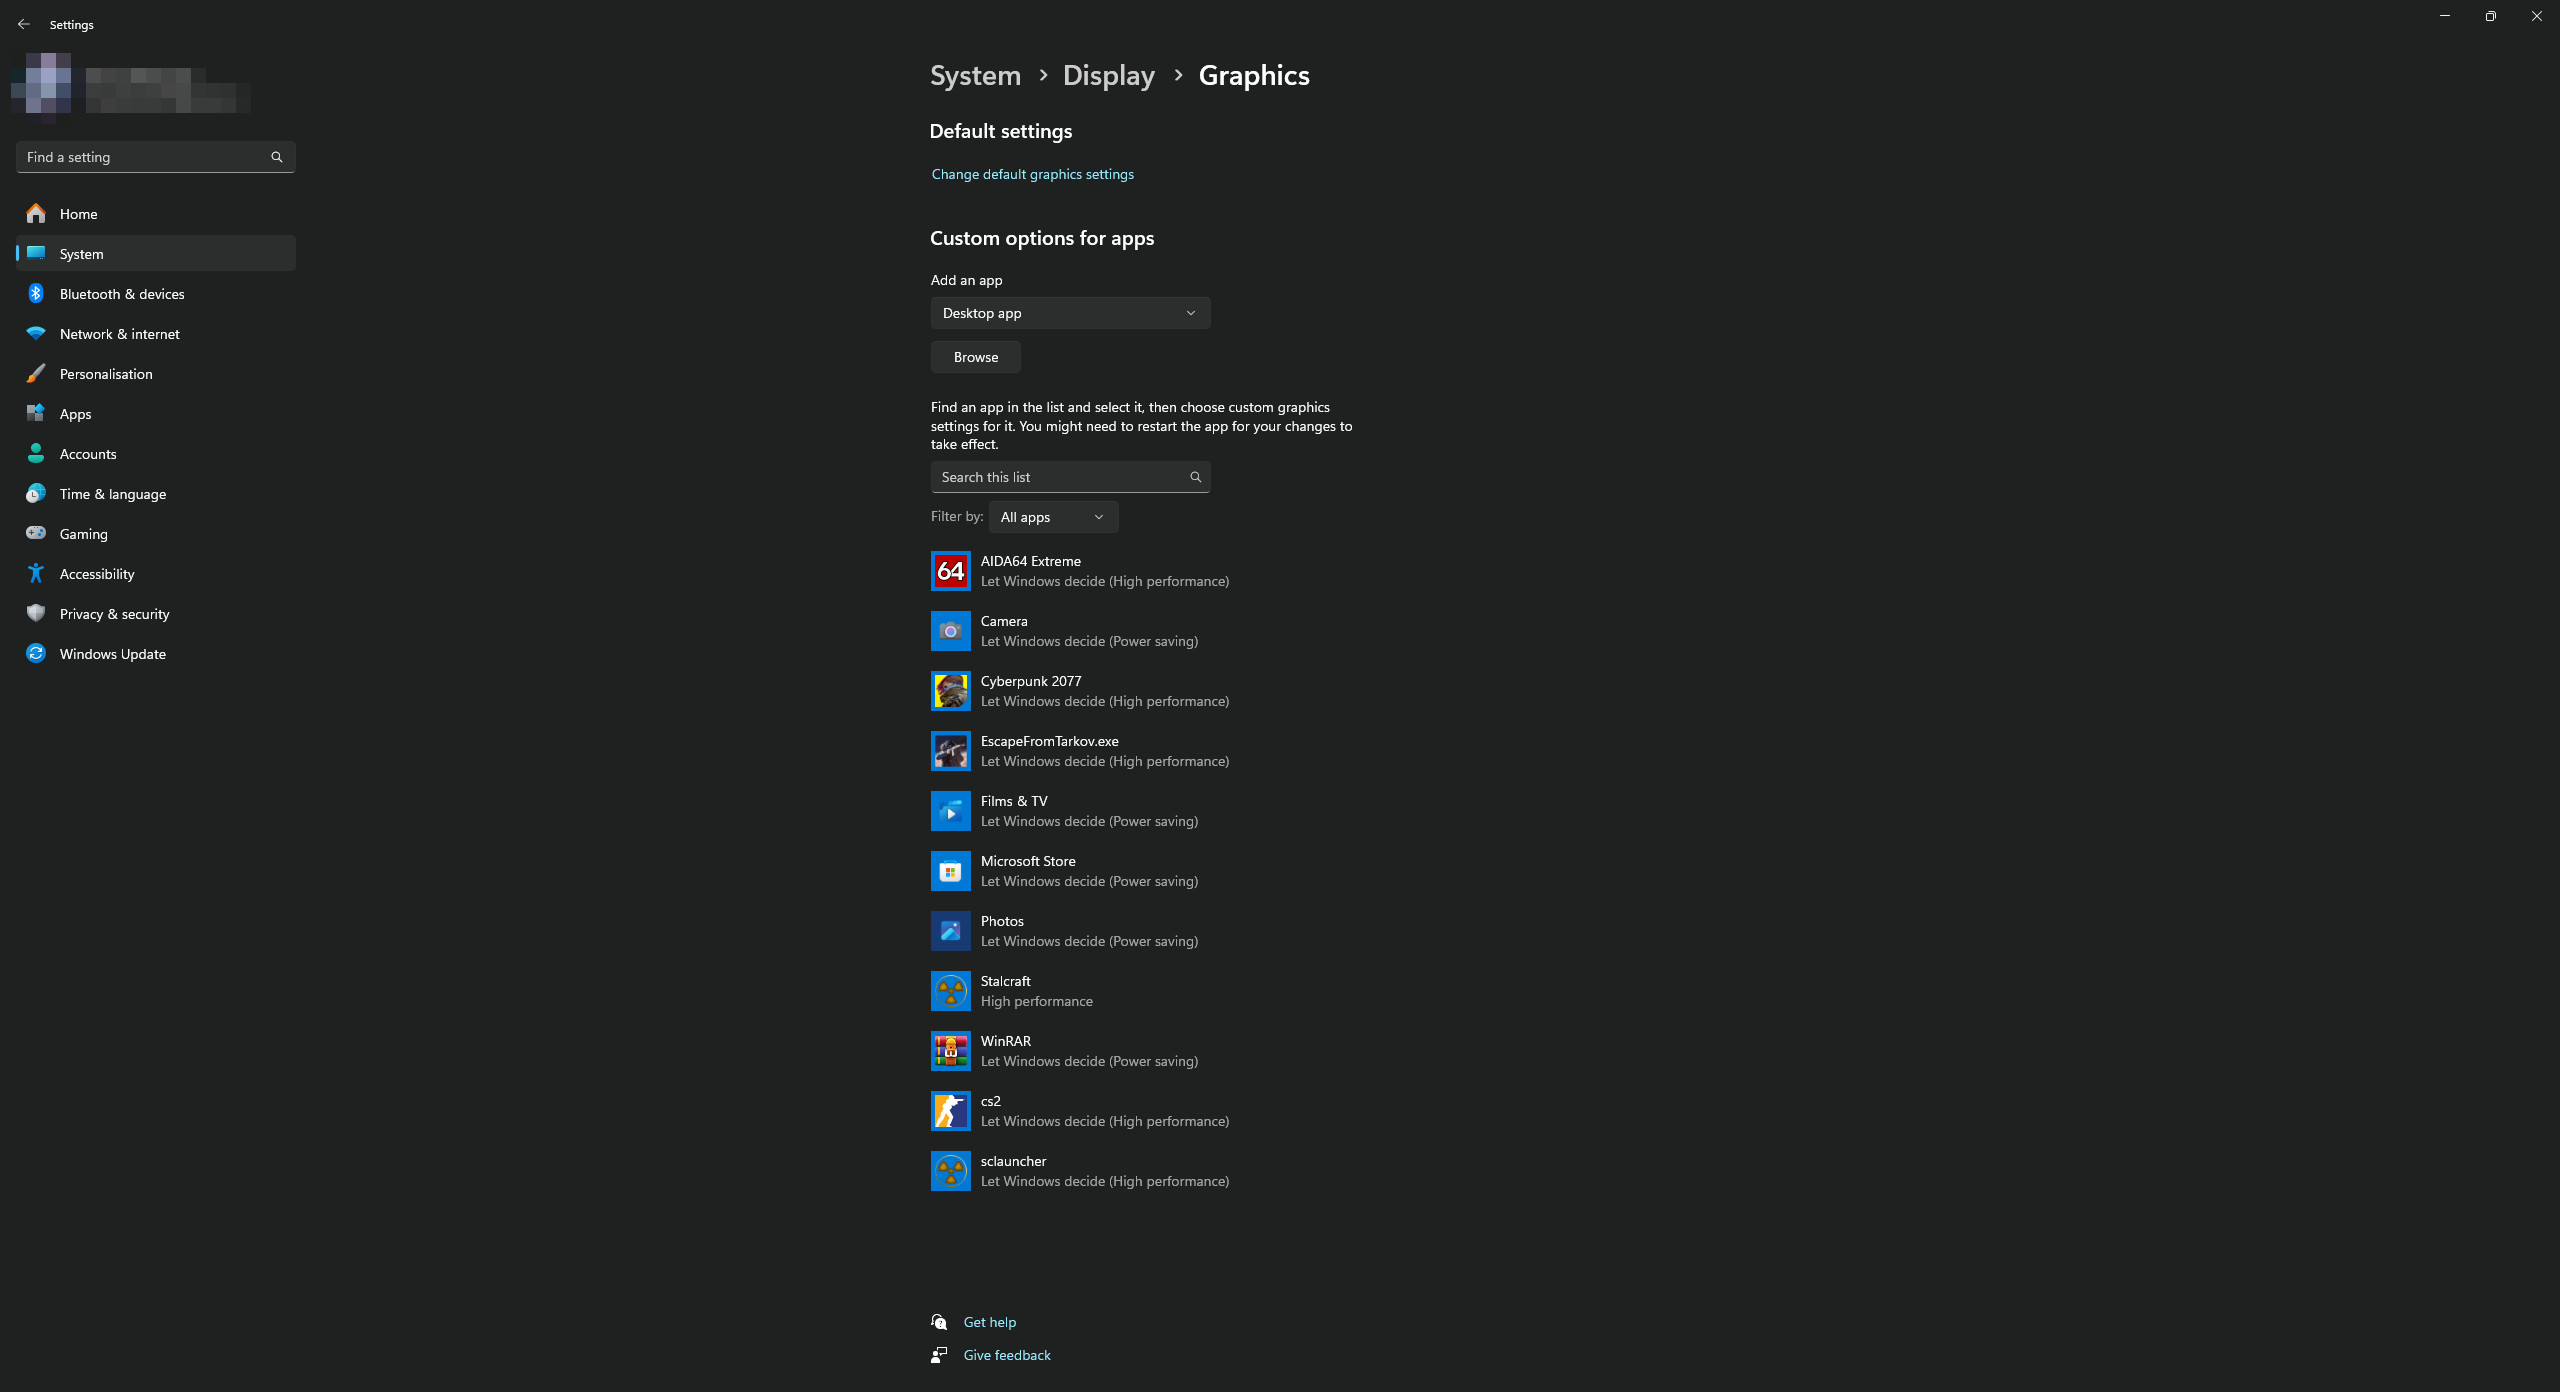
3. A list of monitor settings will be displayed. Open the “Graphics” section.
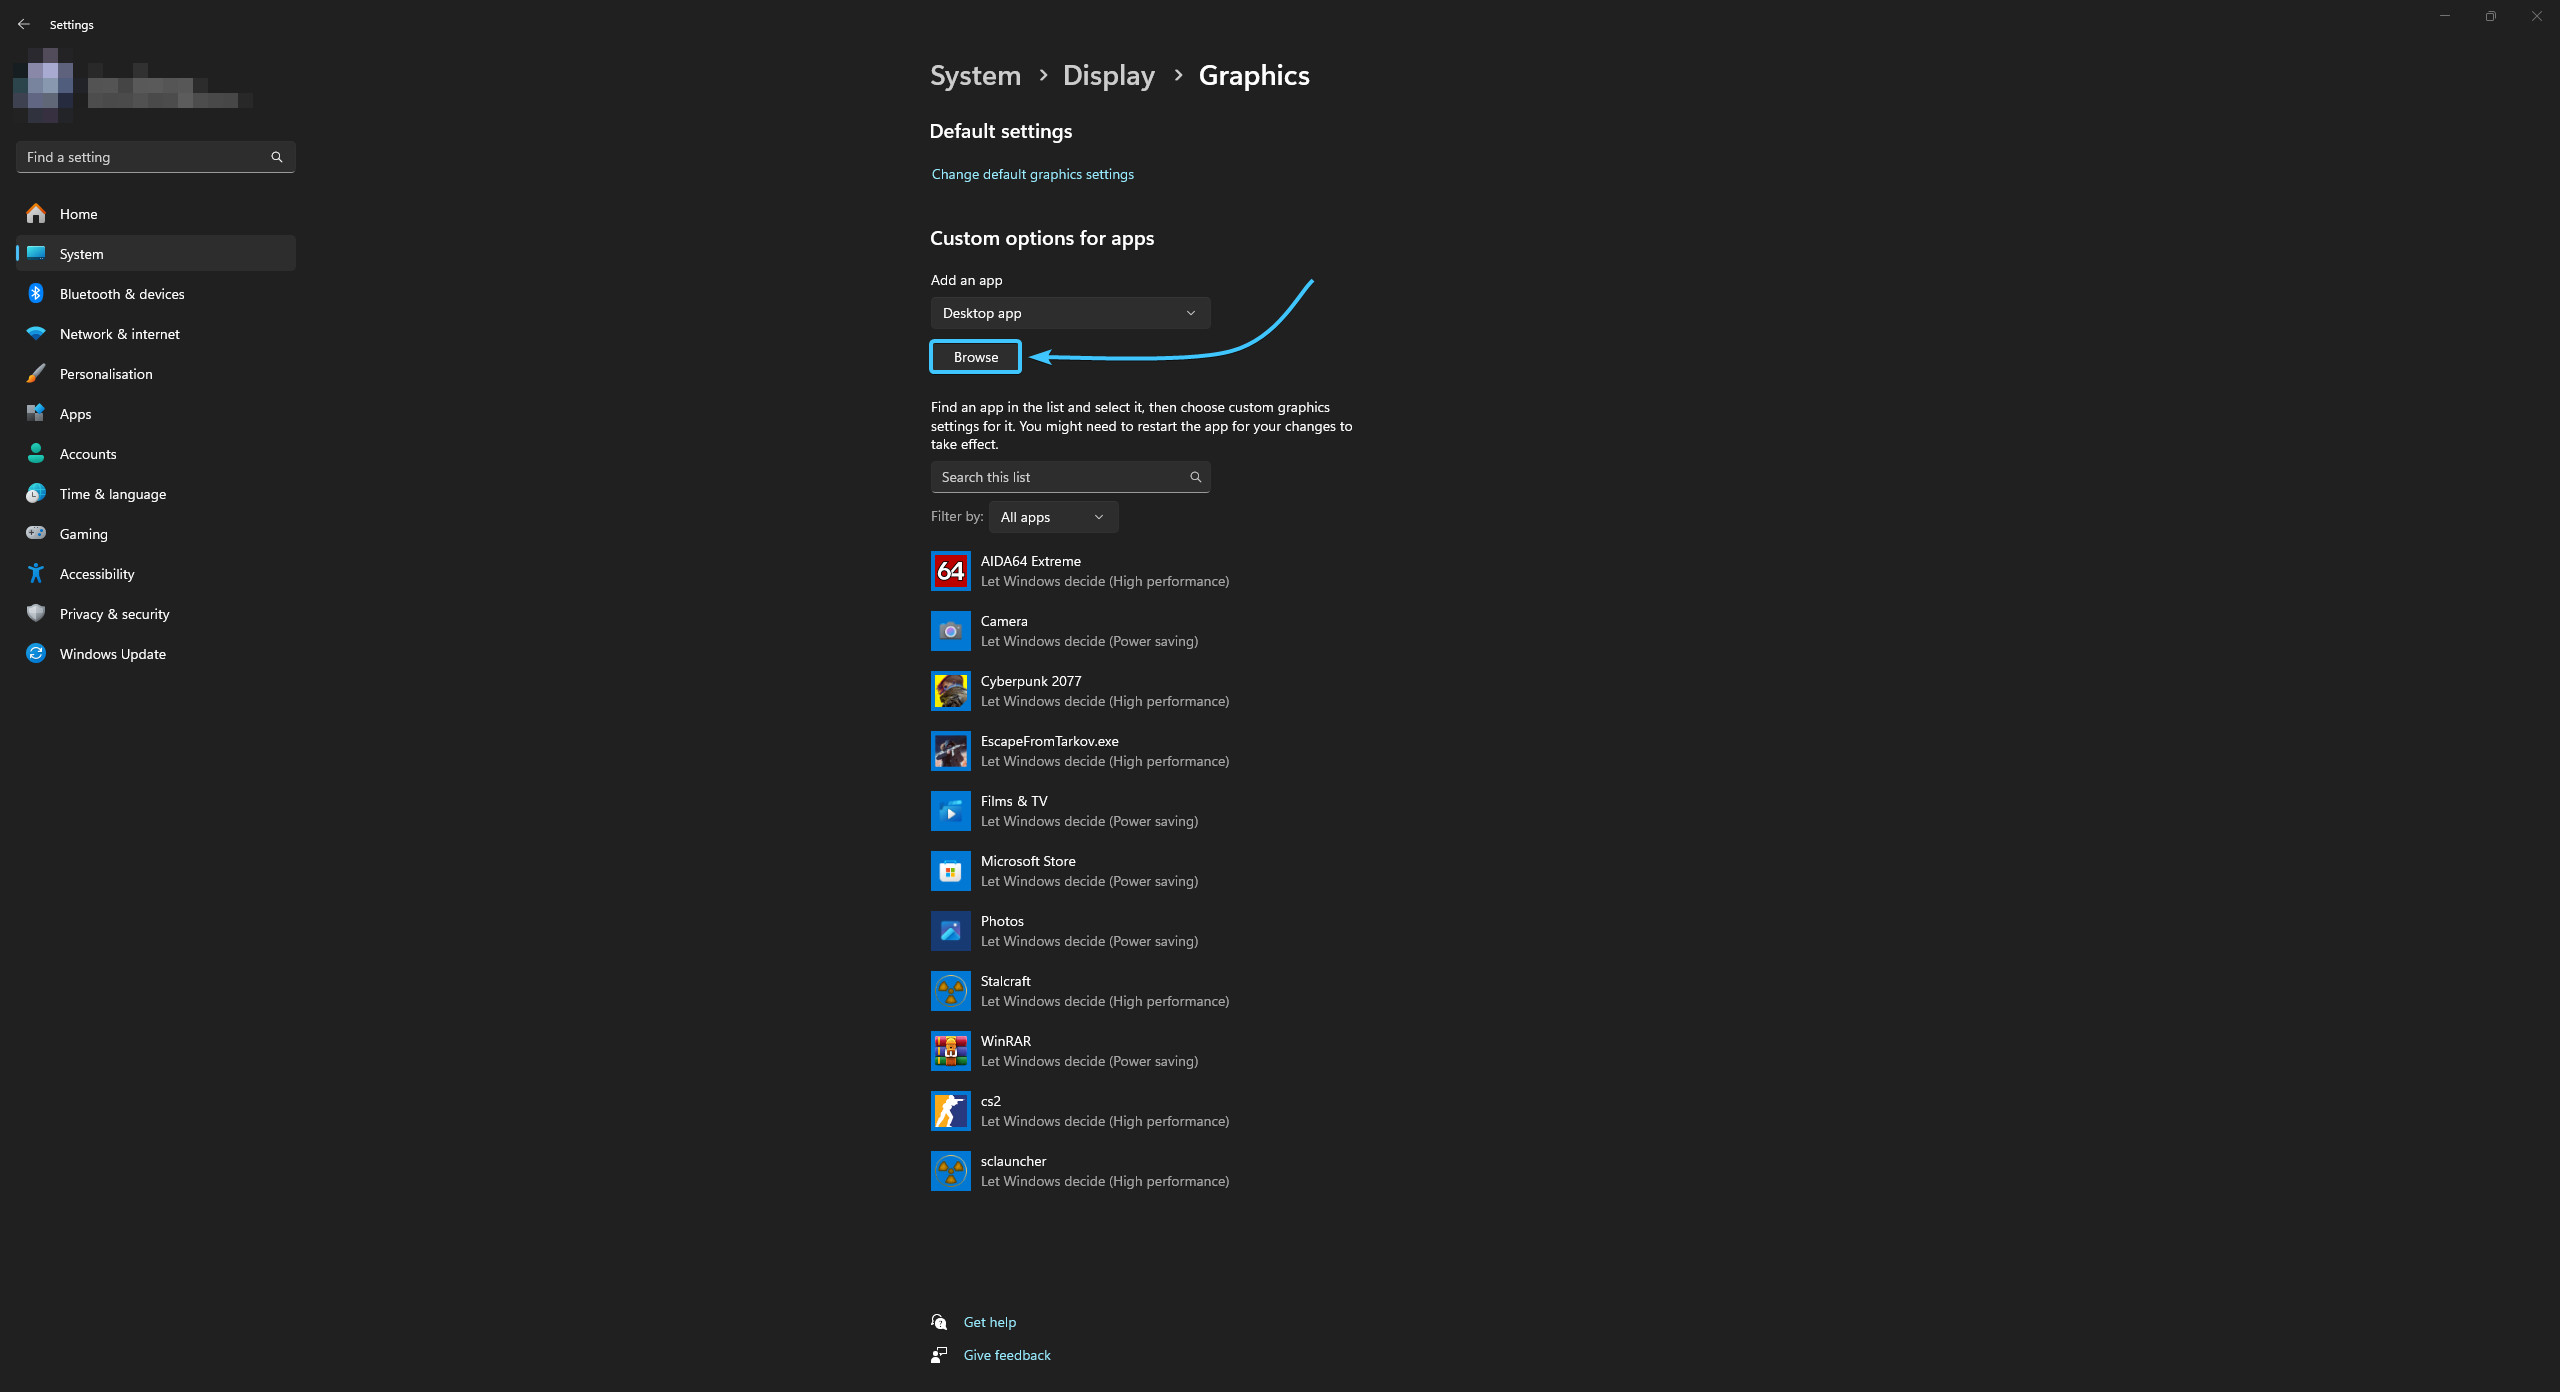
4. Click the “Browse” button in the “Custom options for apps” section.
5. A file explorer window will open. Follow the path “EXBO\runtime\stalcraft\win64\java\bin”.
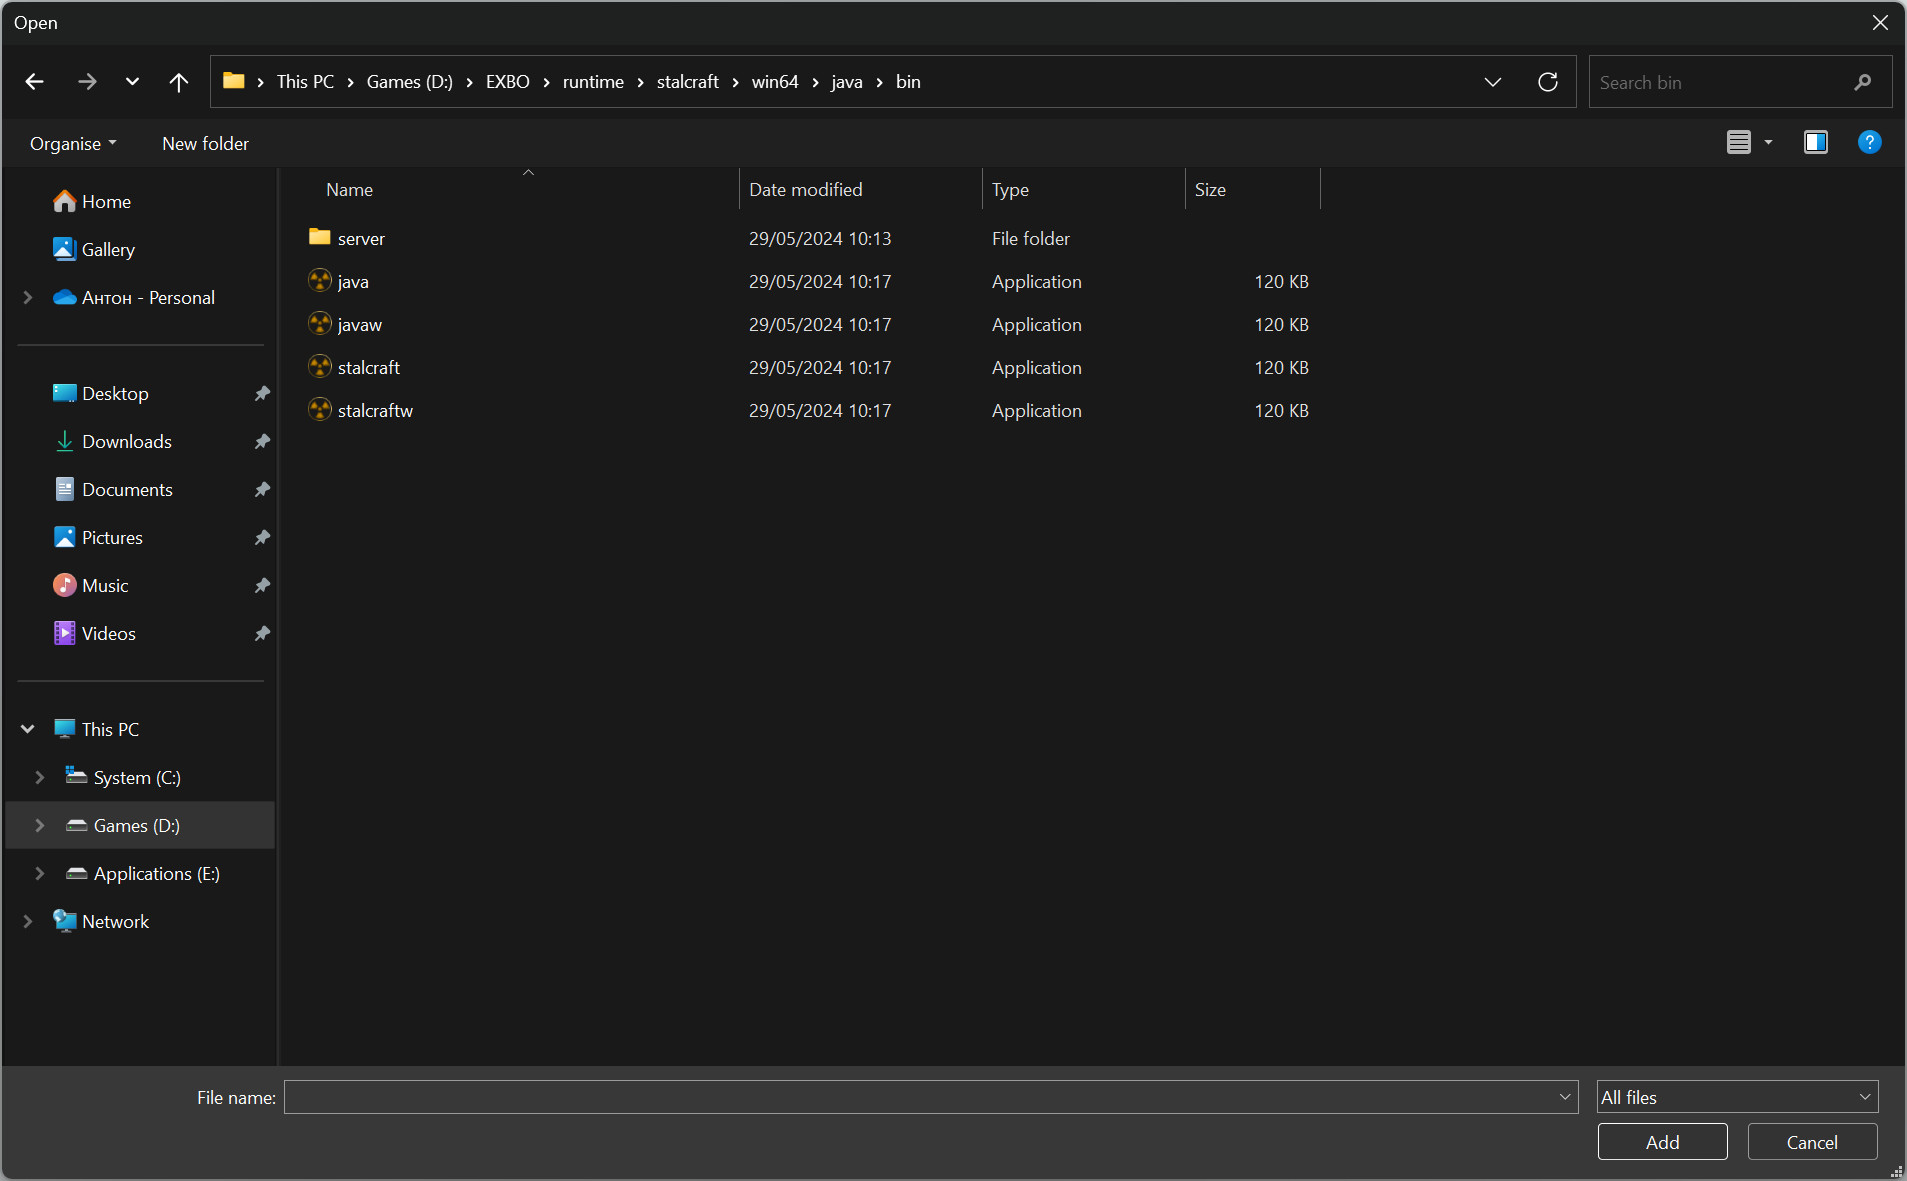
6. Select “stalcraftw” (for Steam) or “stalcraft” (for others) and click the “Add” button.
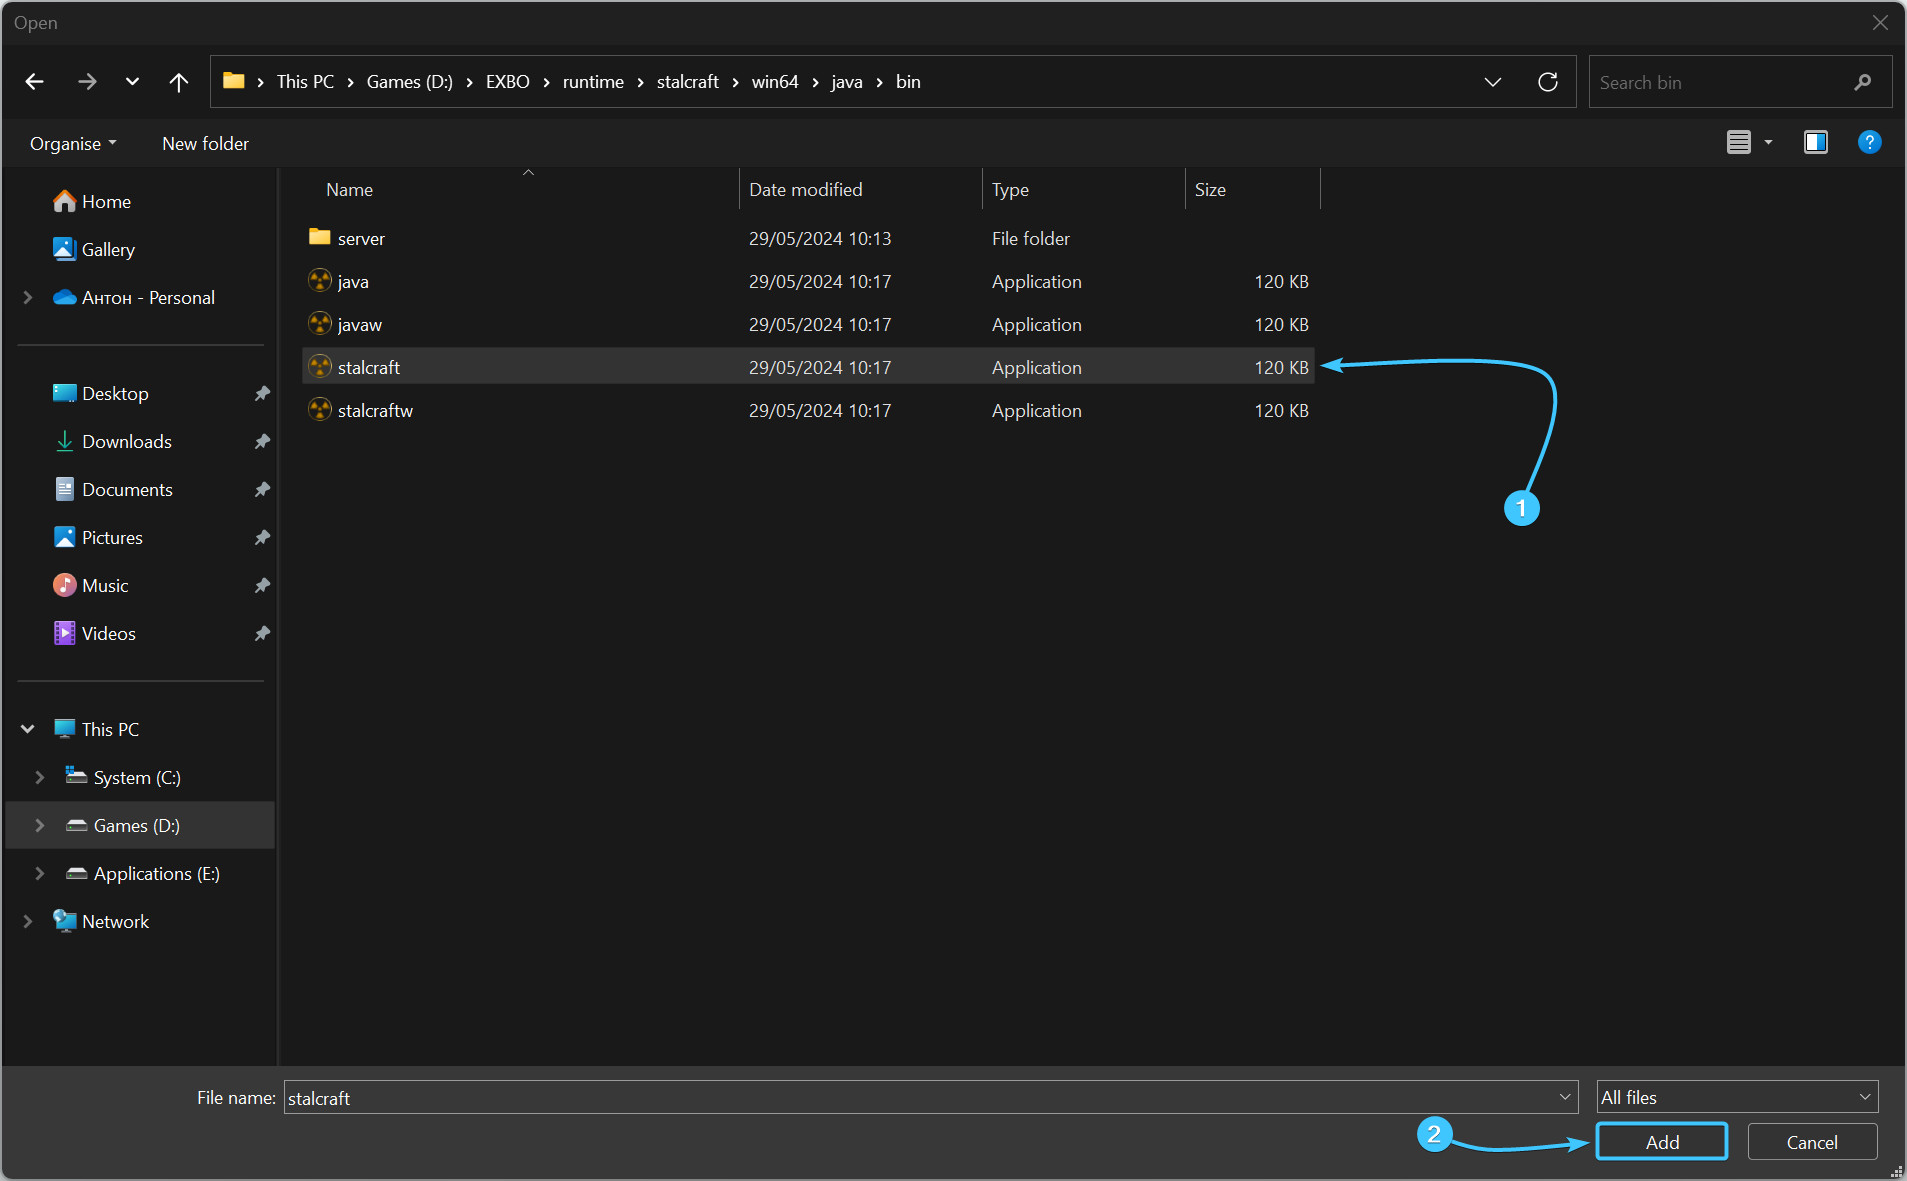
7. In the list, click on the added application. After that, click on the “Options” button.
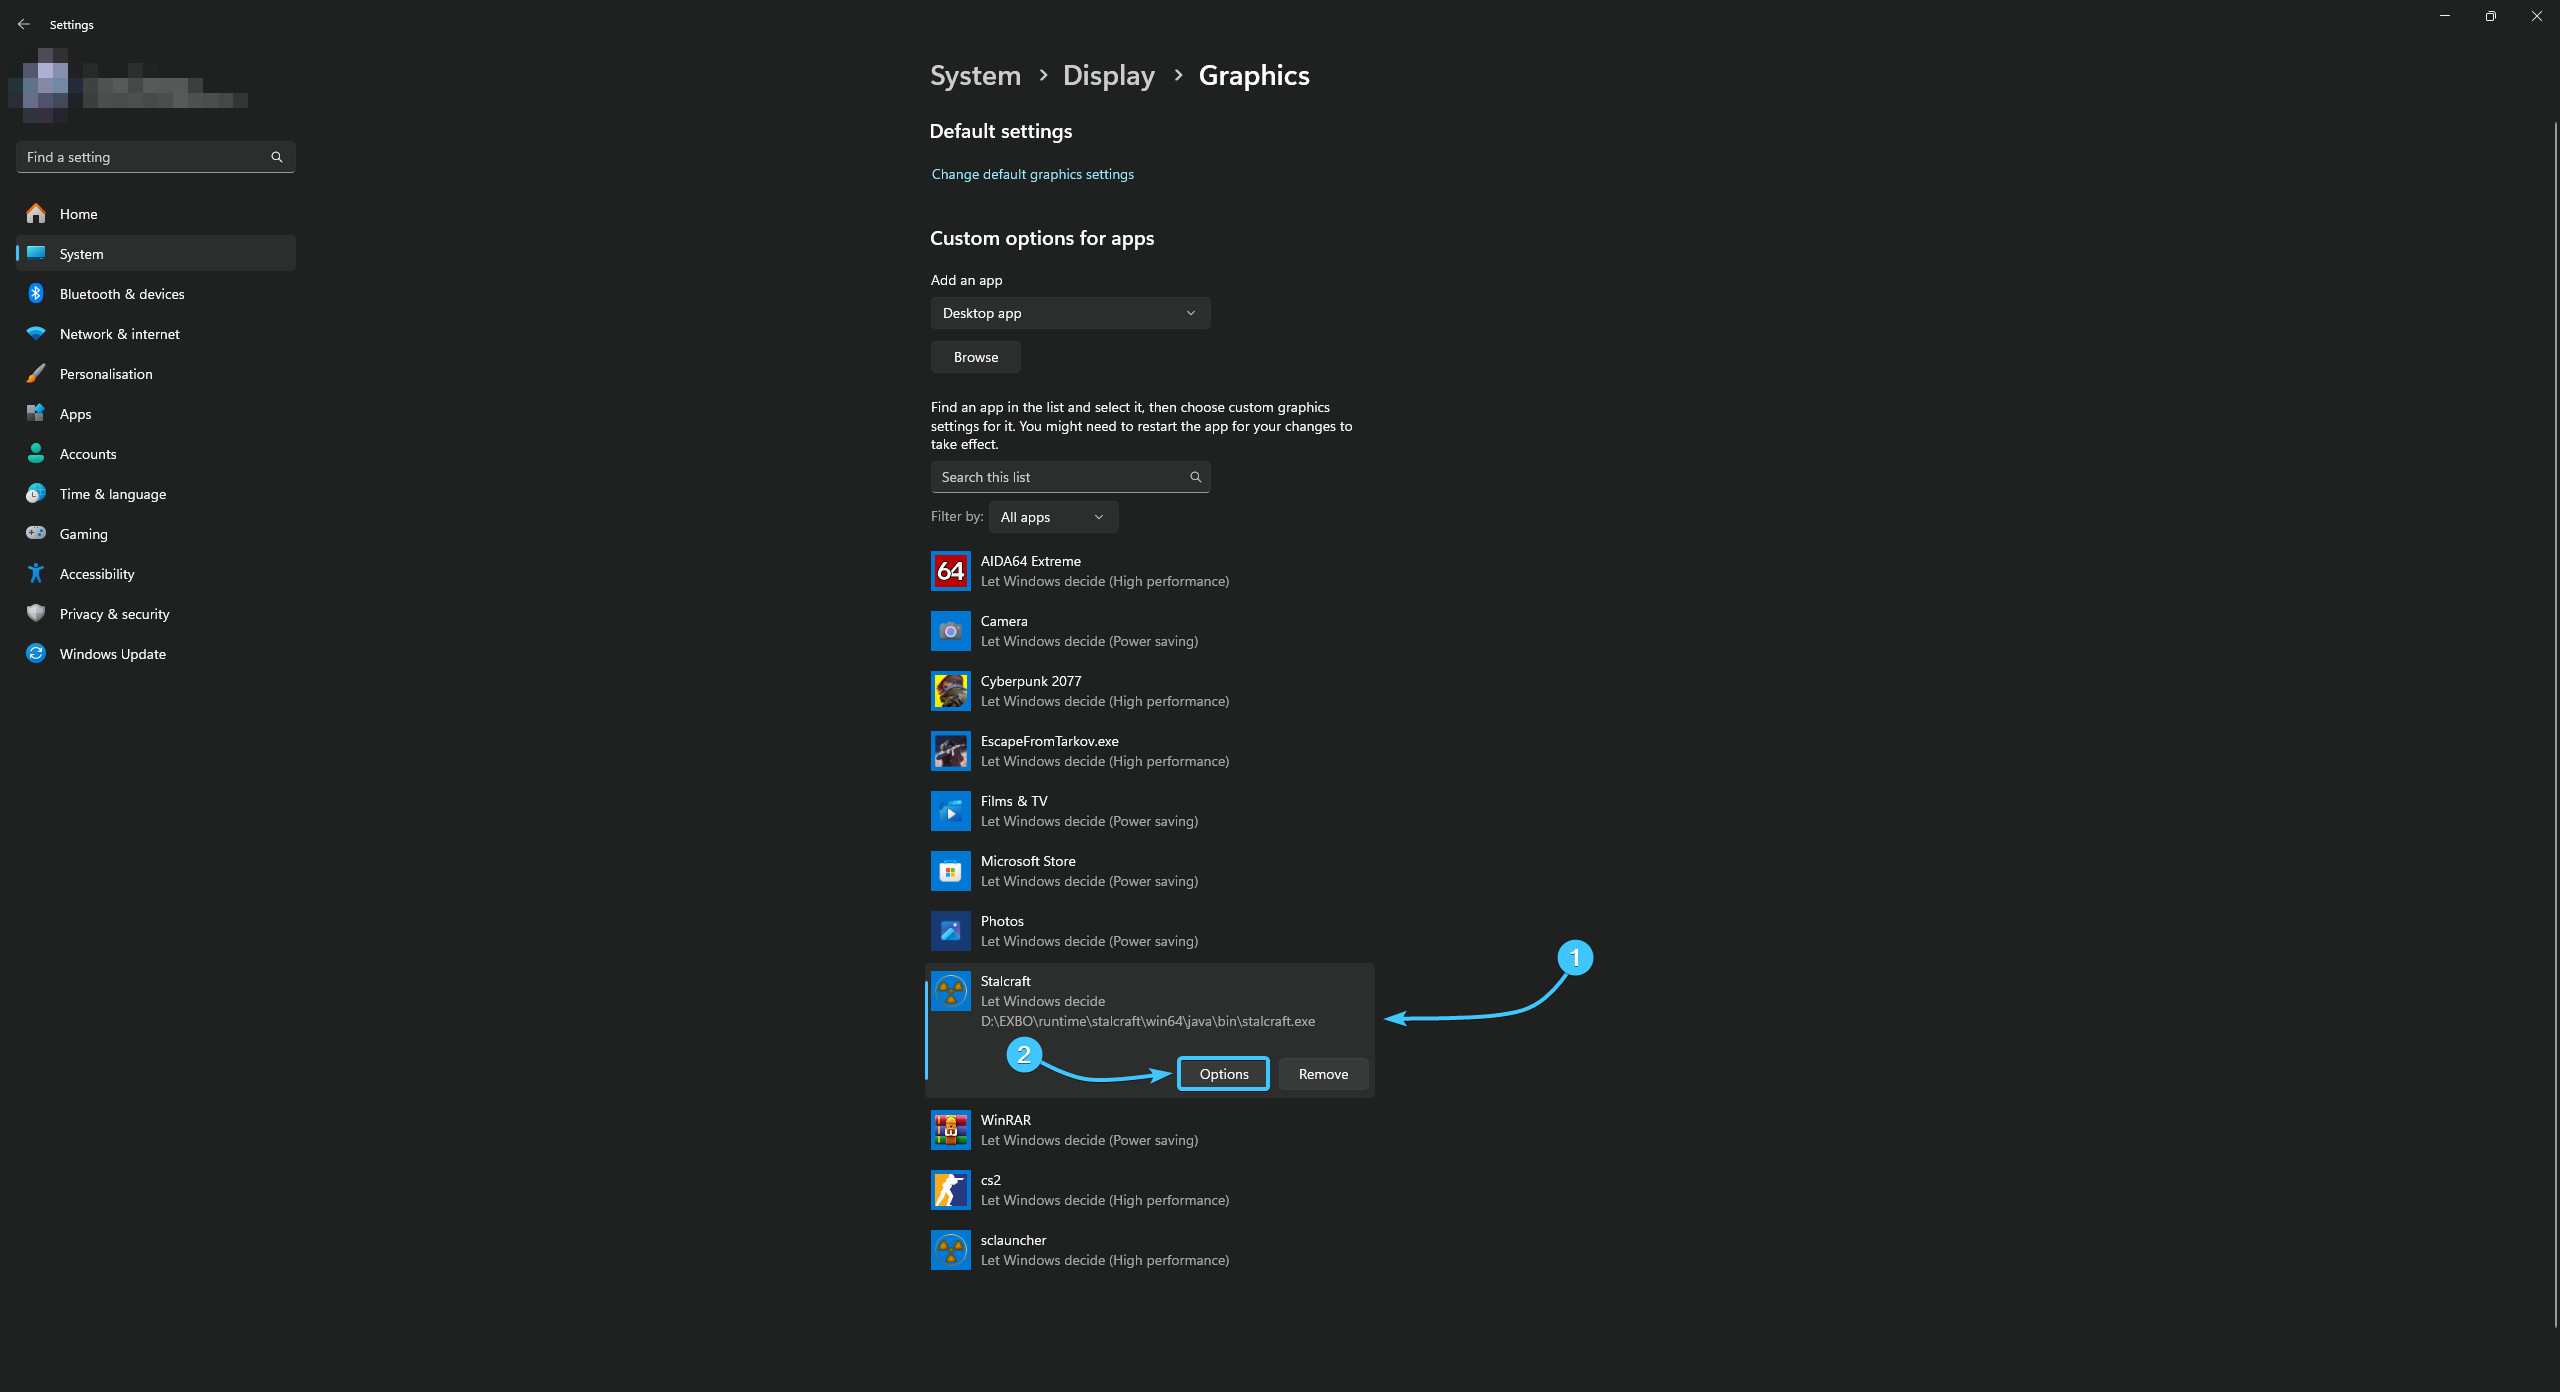
8. In the window that appears, select “High Performance” and click the “Save” button.
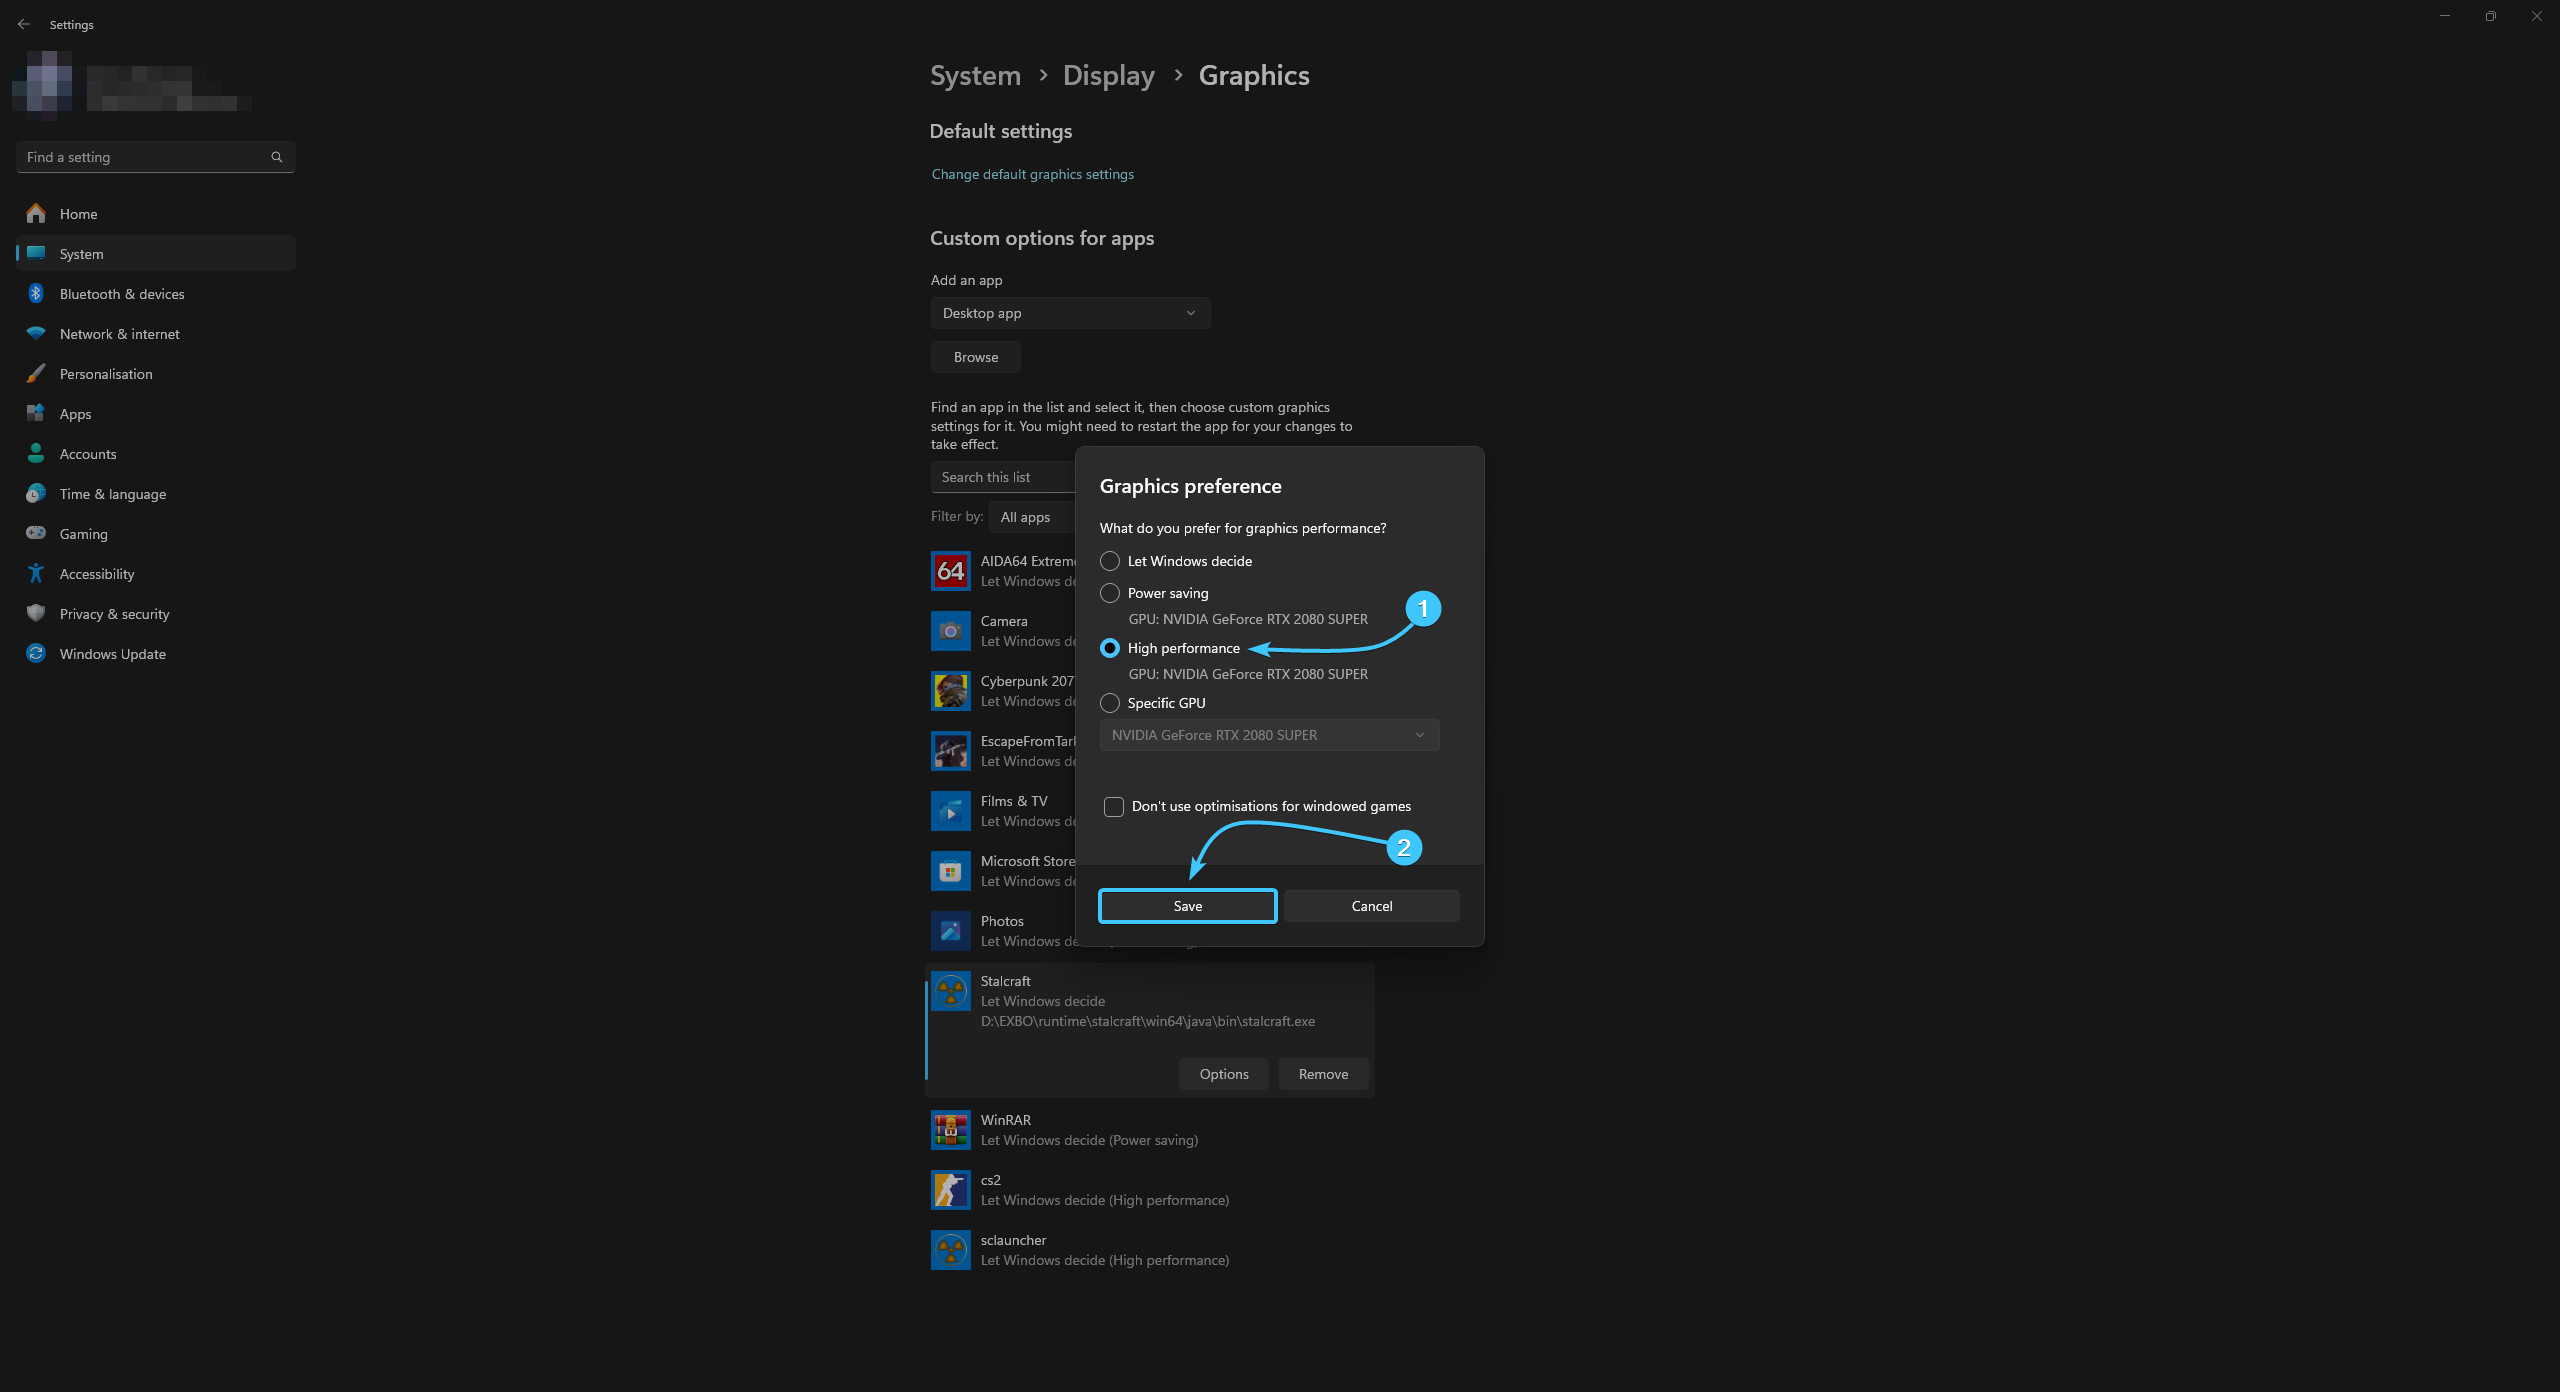
9. Reboot the device. After that, the STALCRAFT game will use a discrete graphics card.
Graphics card switching in Windows 10
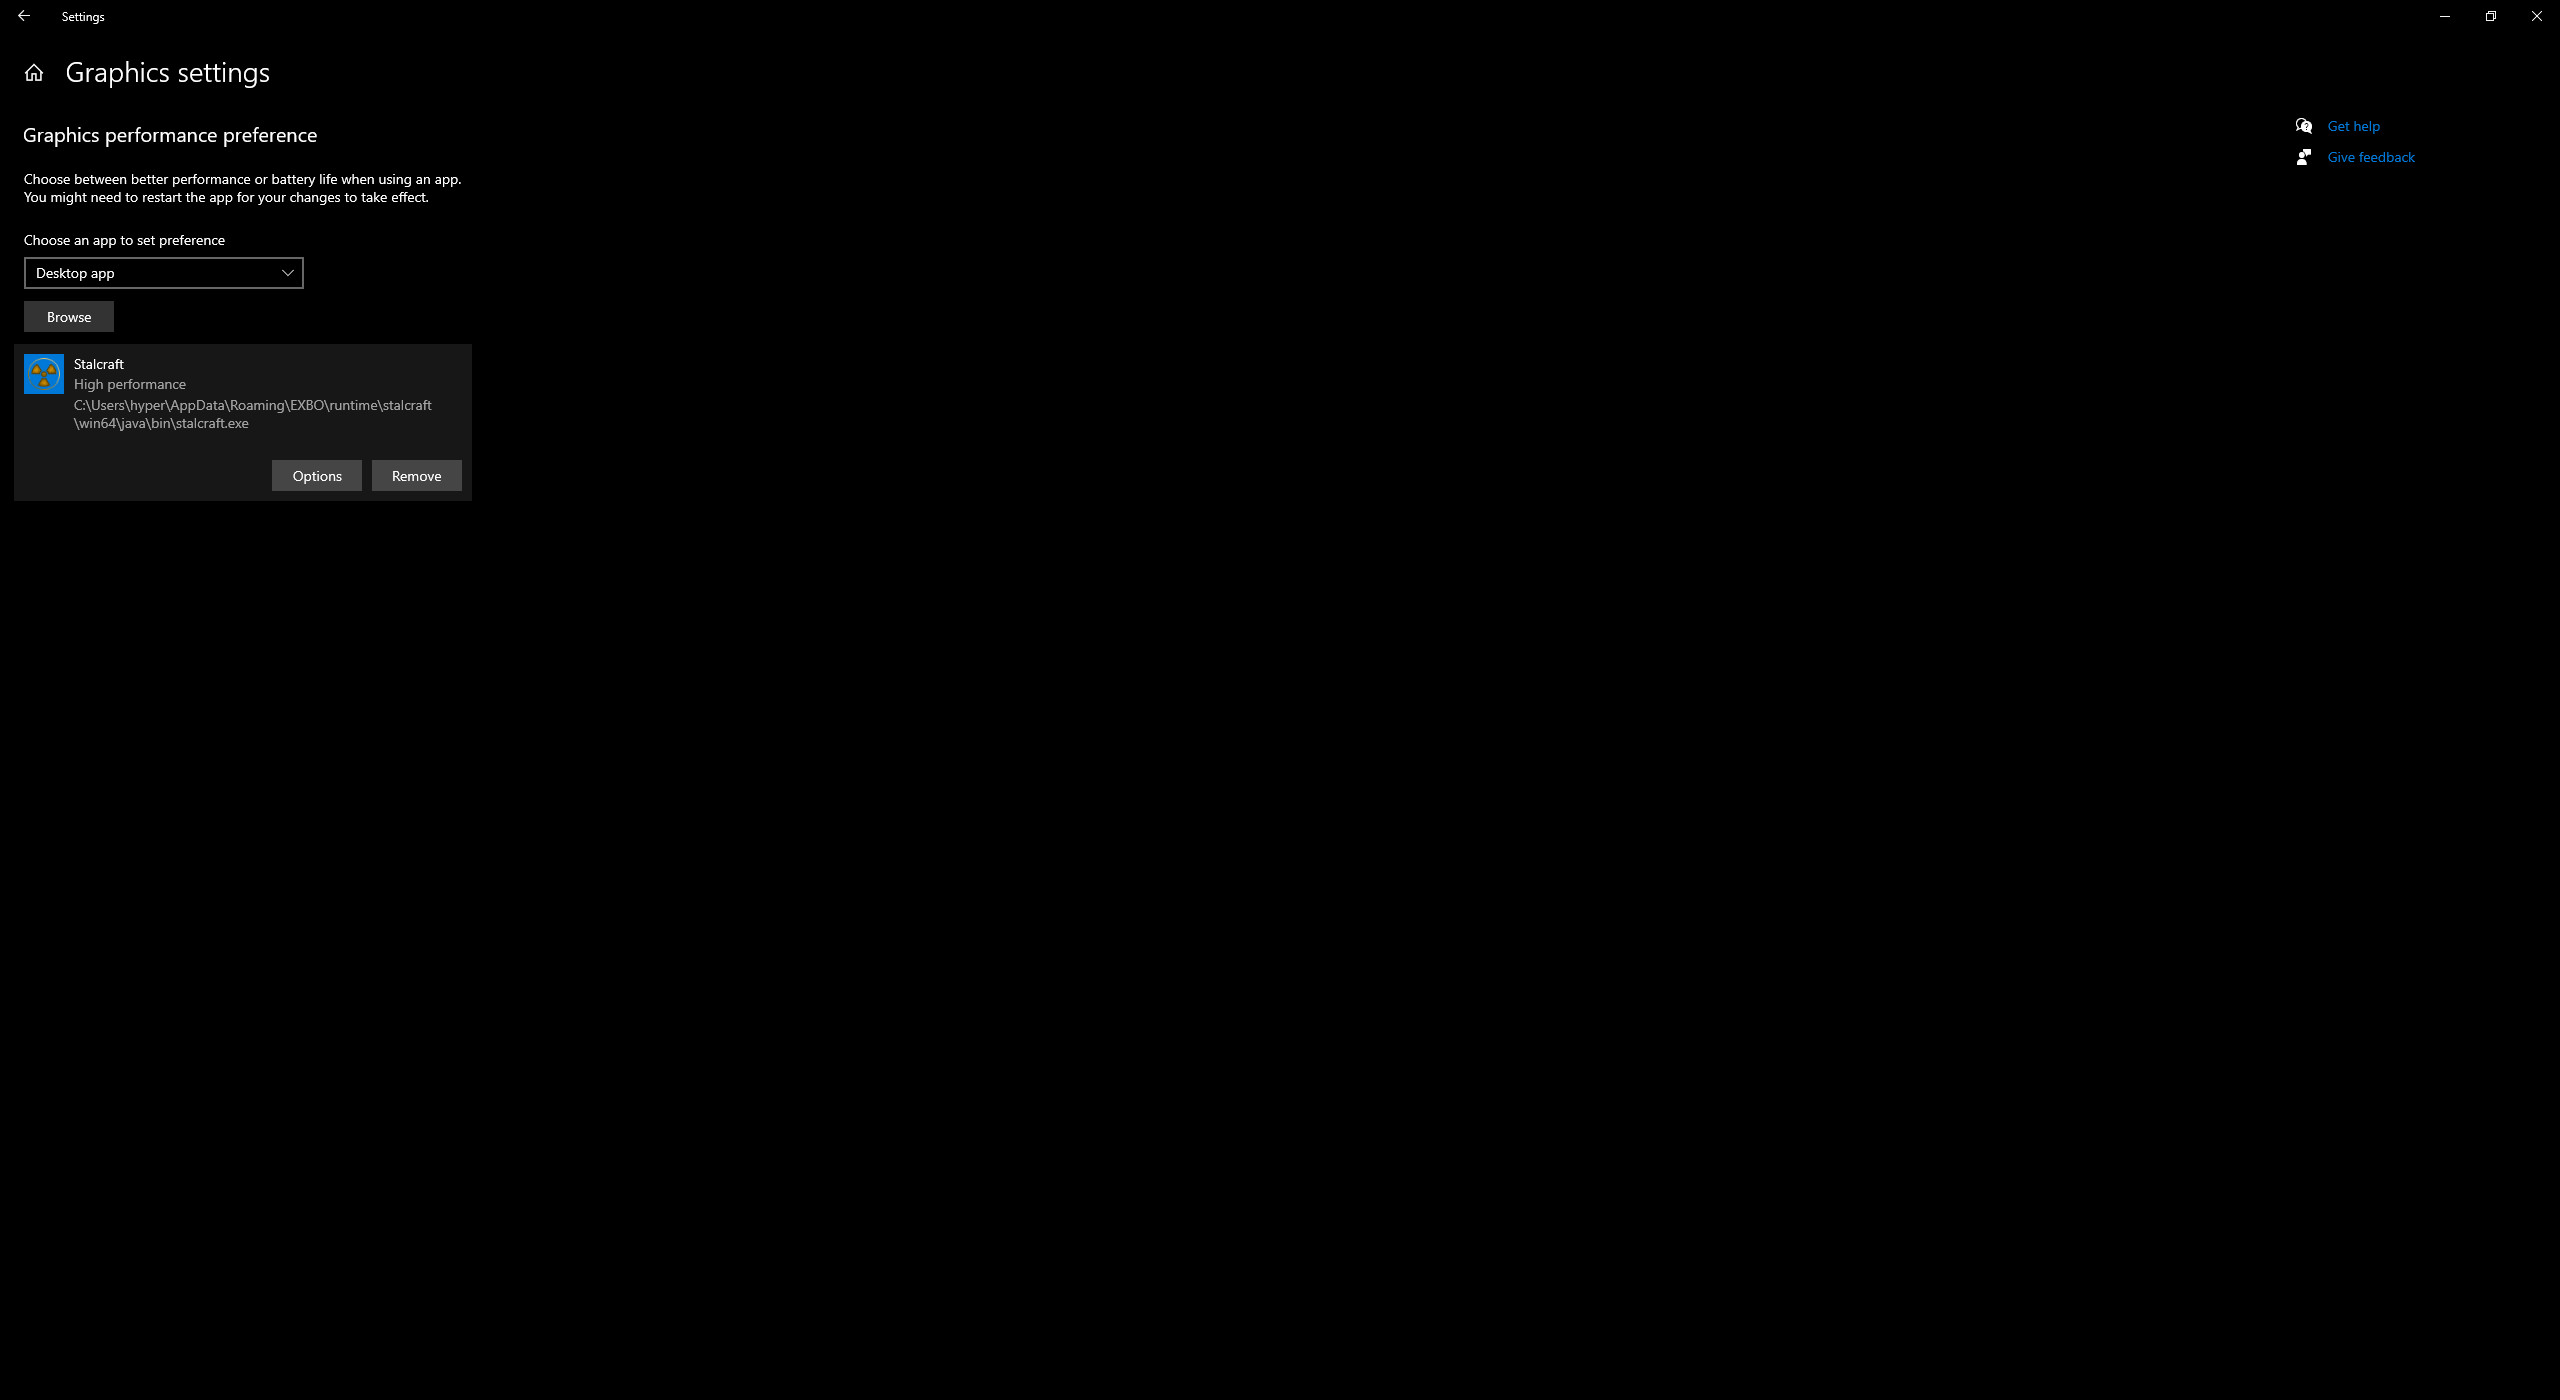
1. Open the Start menu and go to Settings in the Windows 10 operating system.
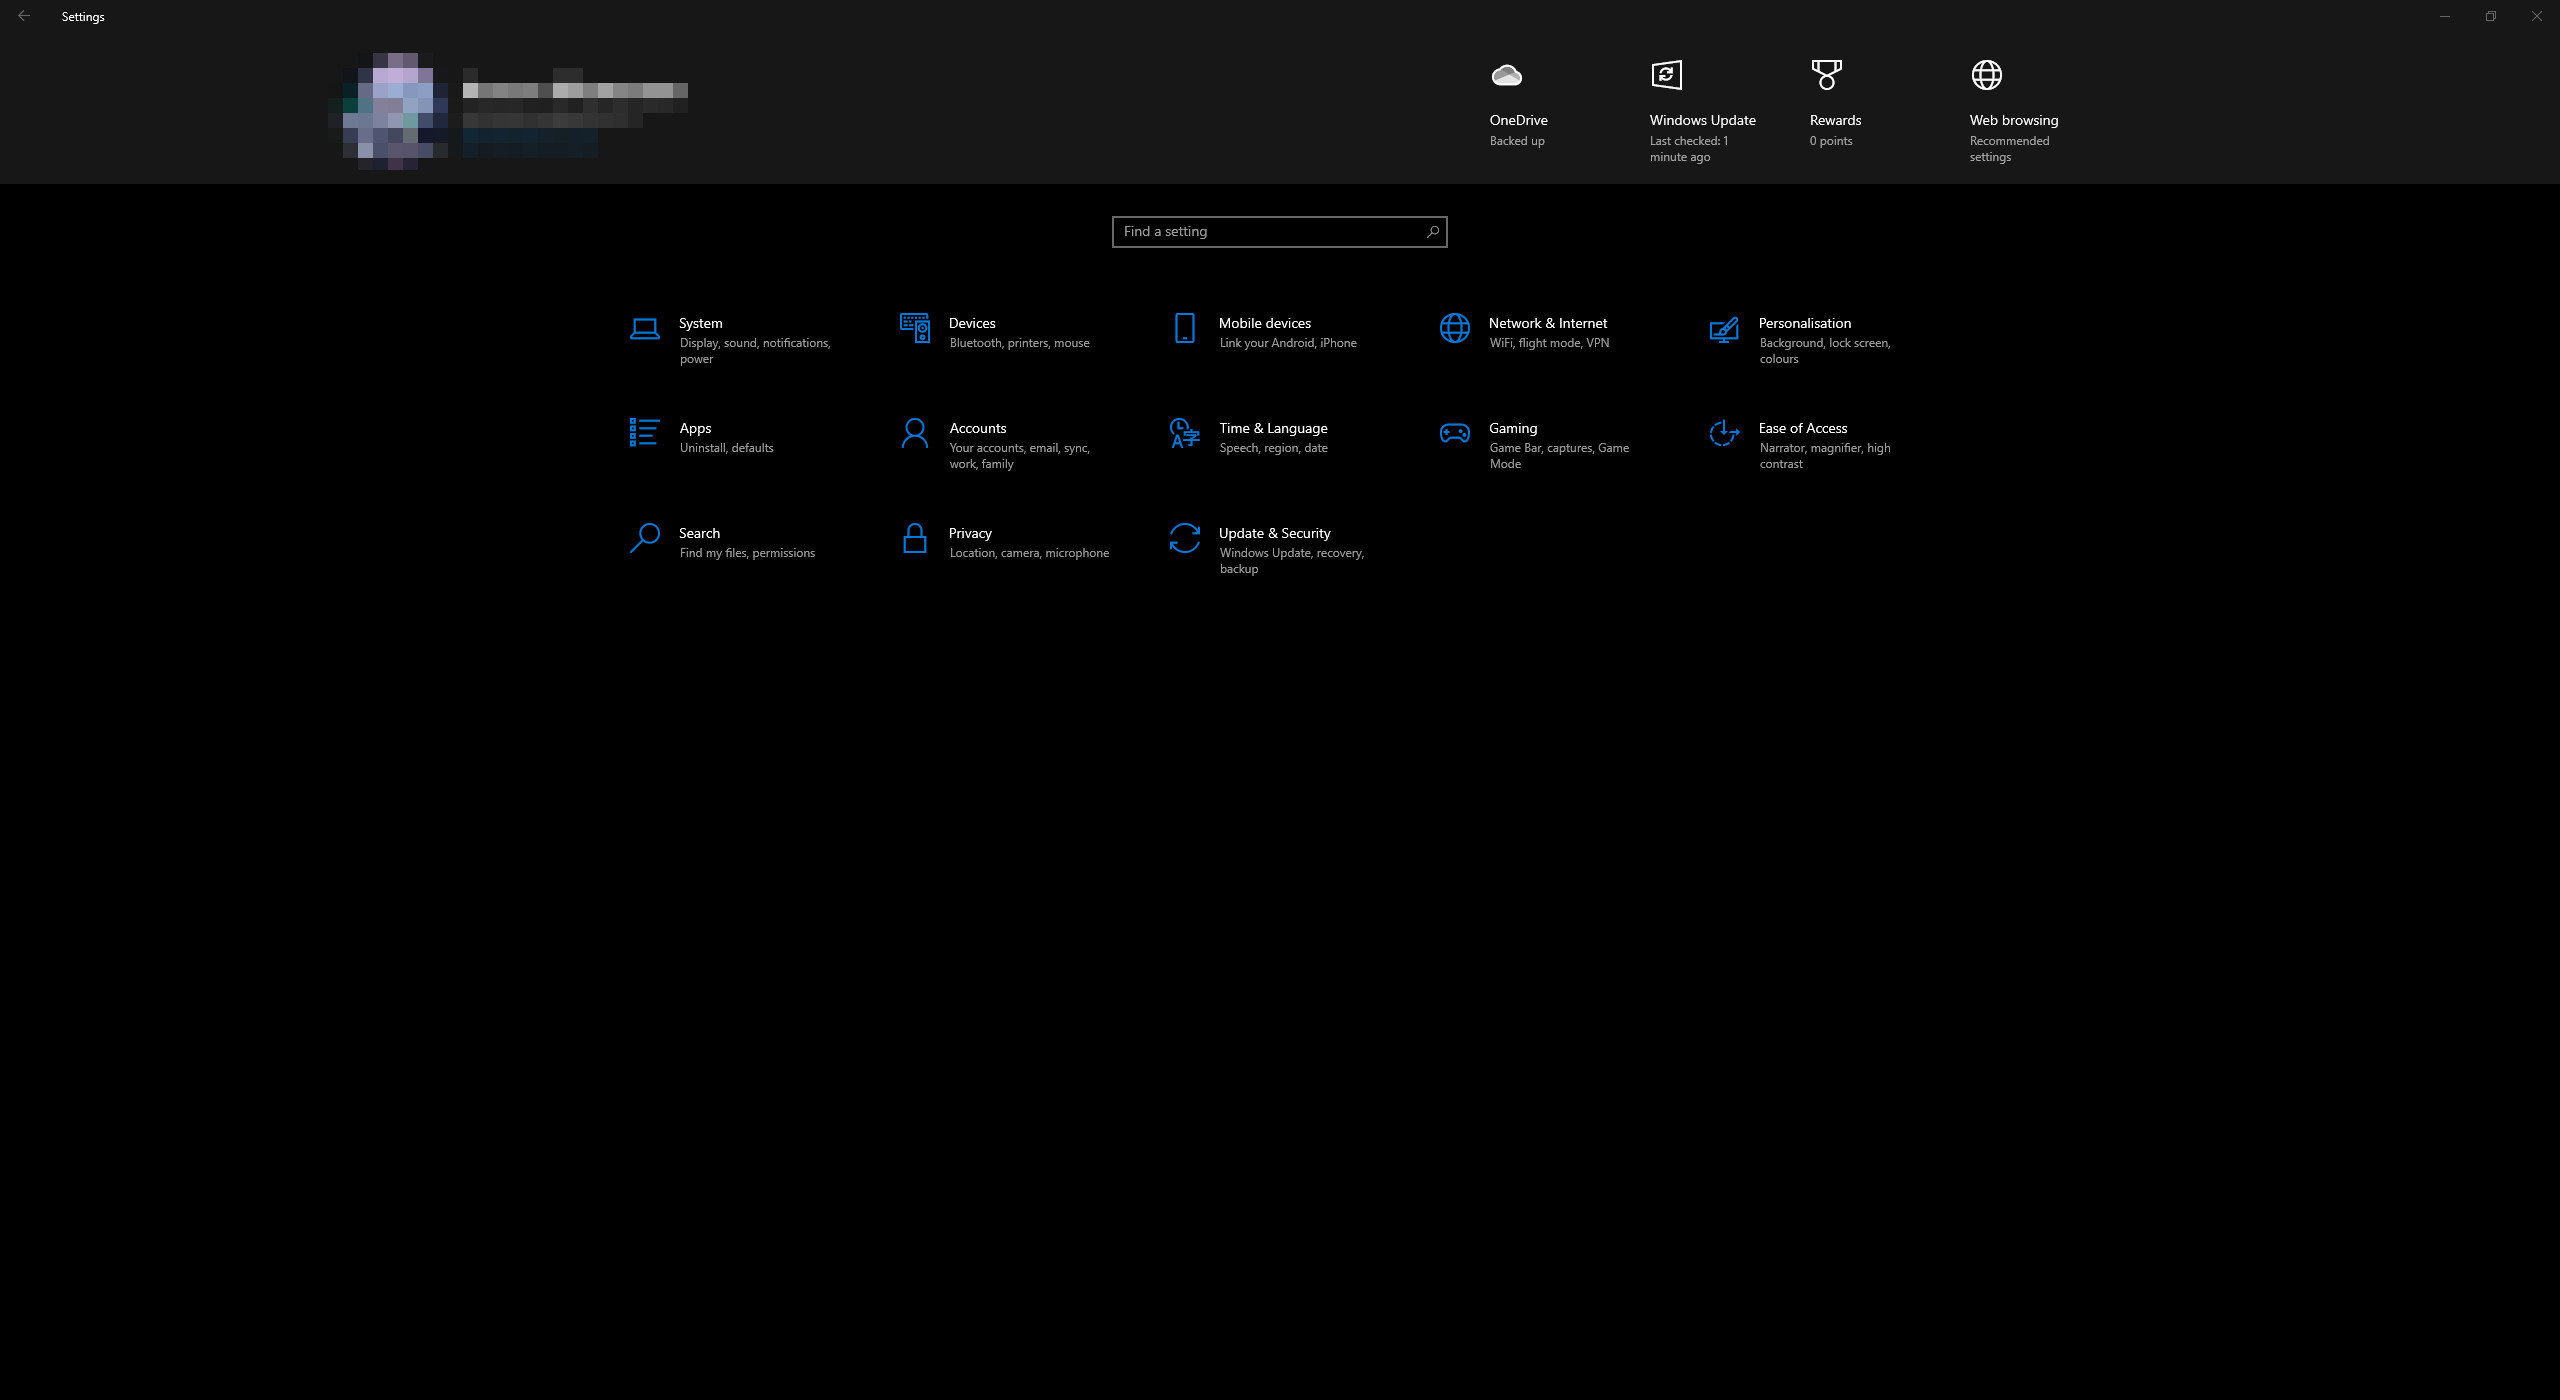
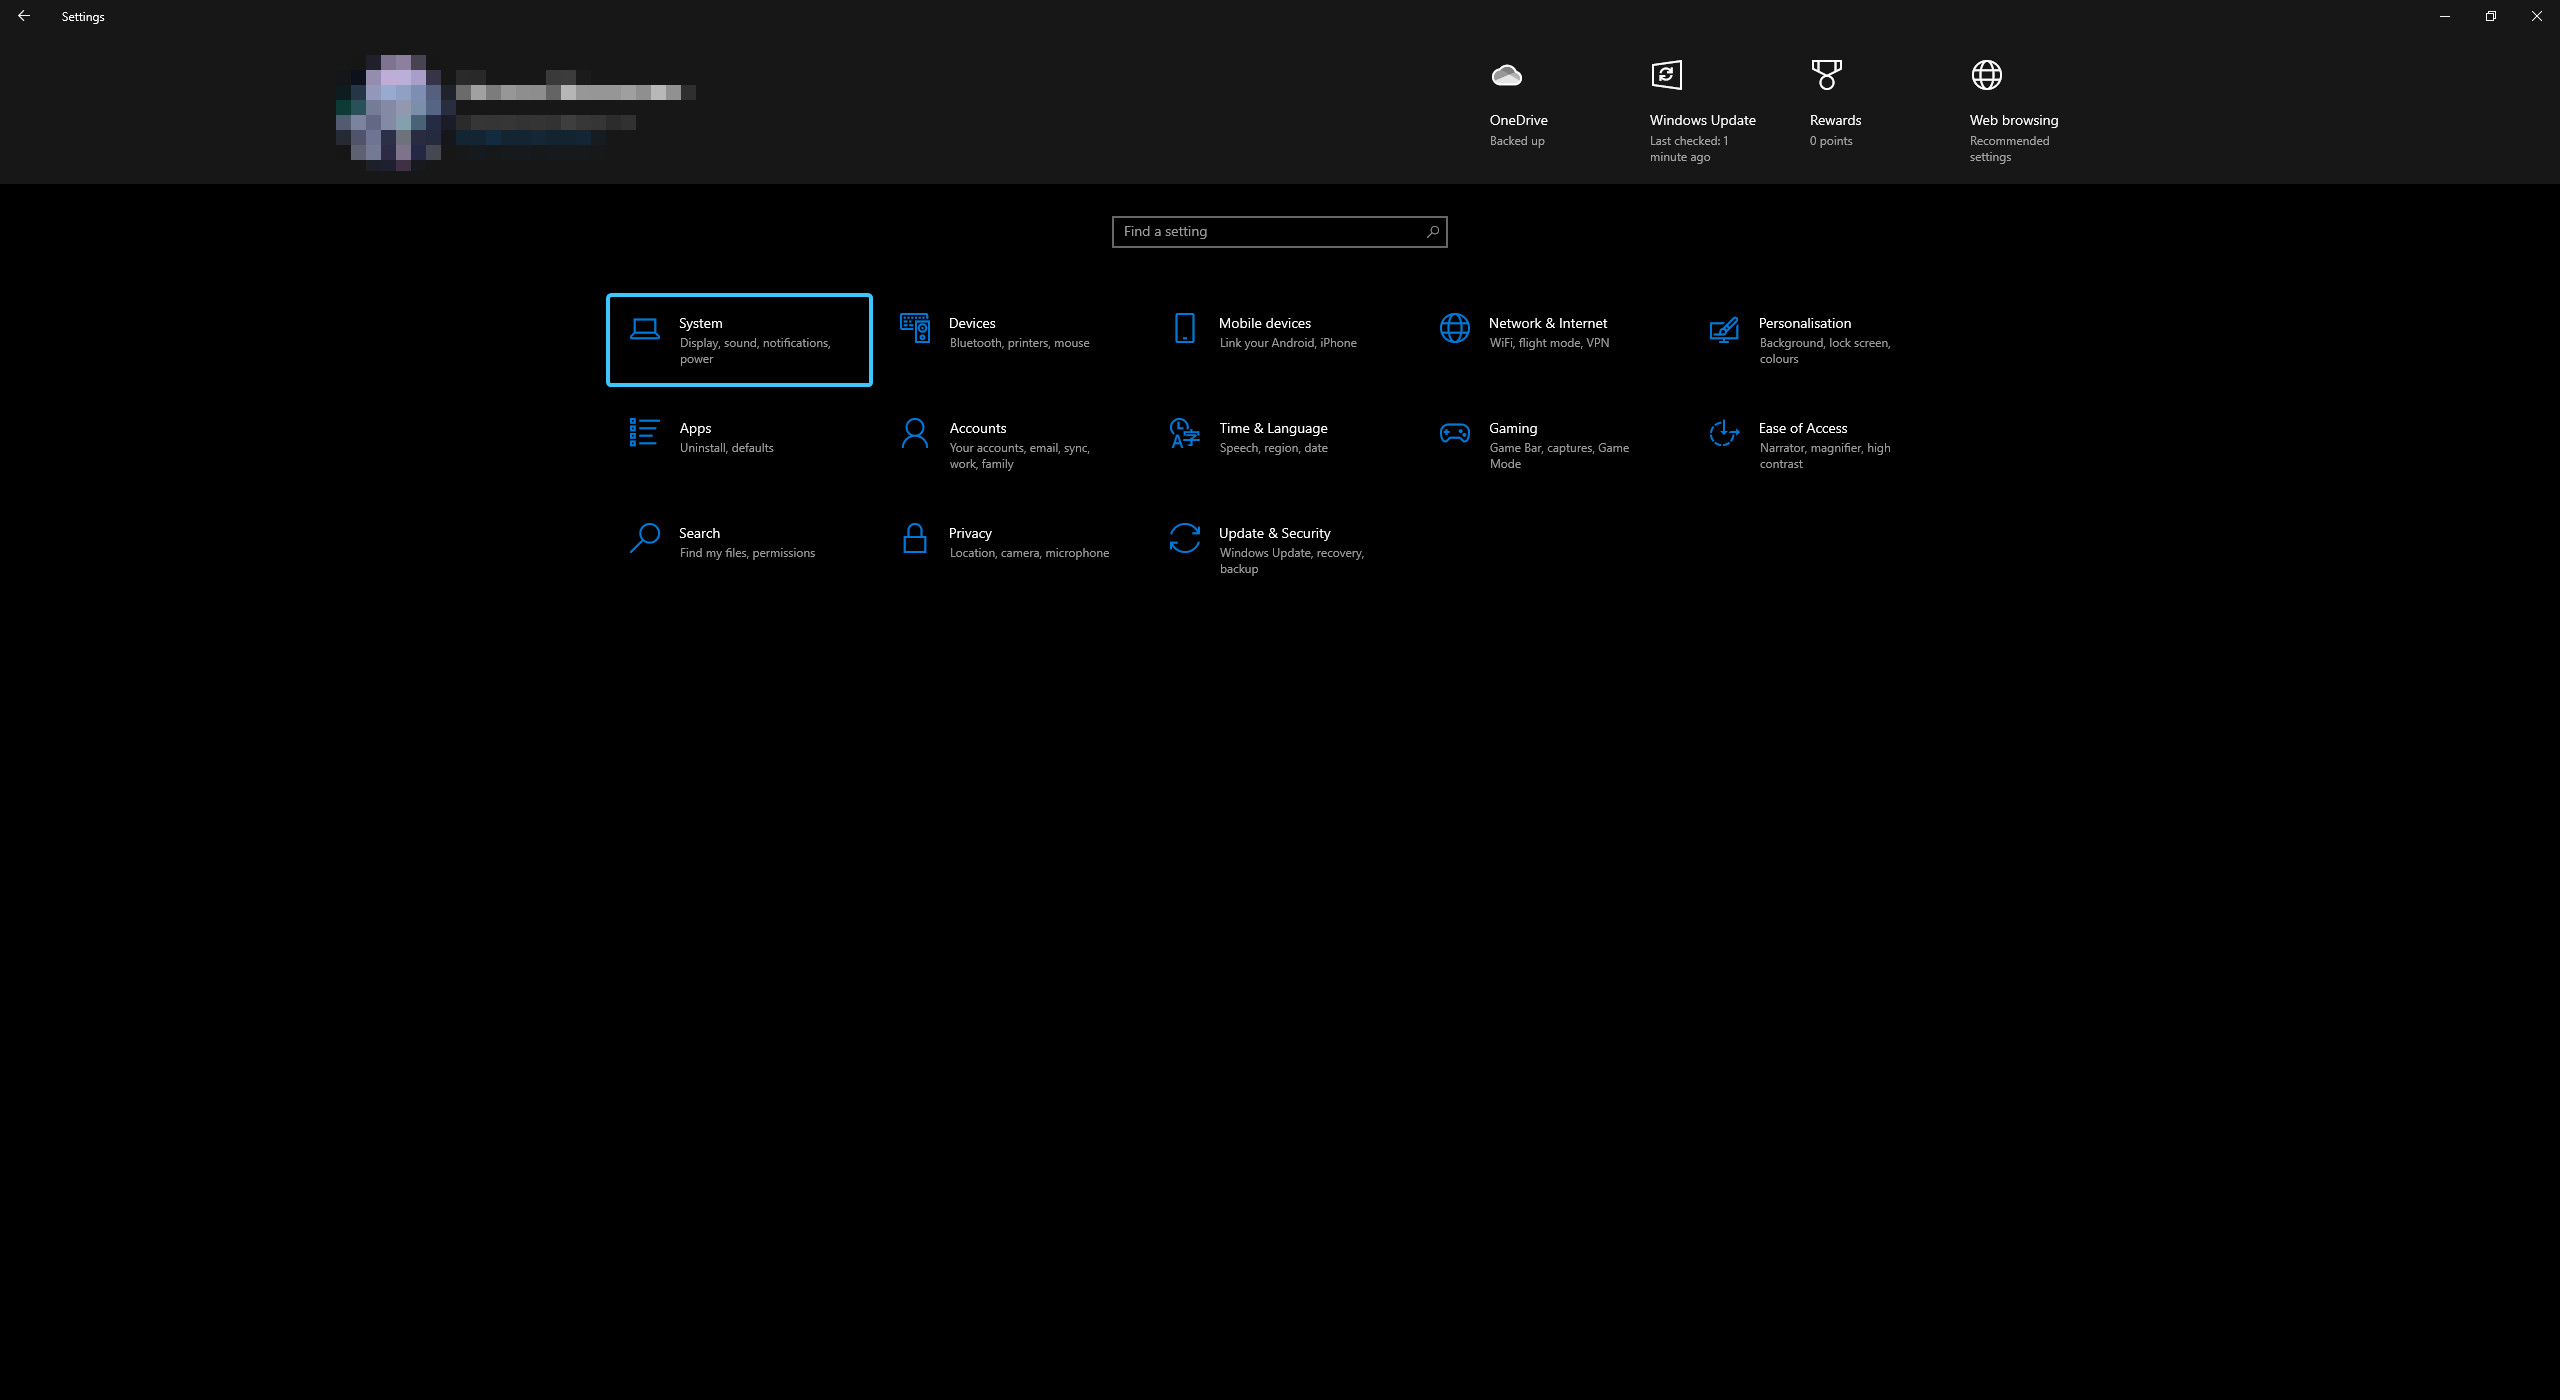
2. A general list of parameter categories will be displayed. Open the “System” category.
3. The “Display” section will open immediately. At the very bottom, click the “Graphics Settings” button.
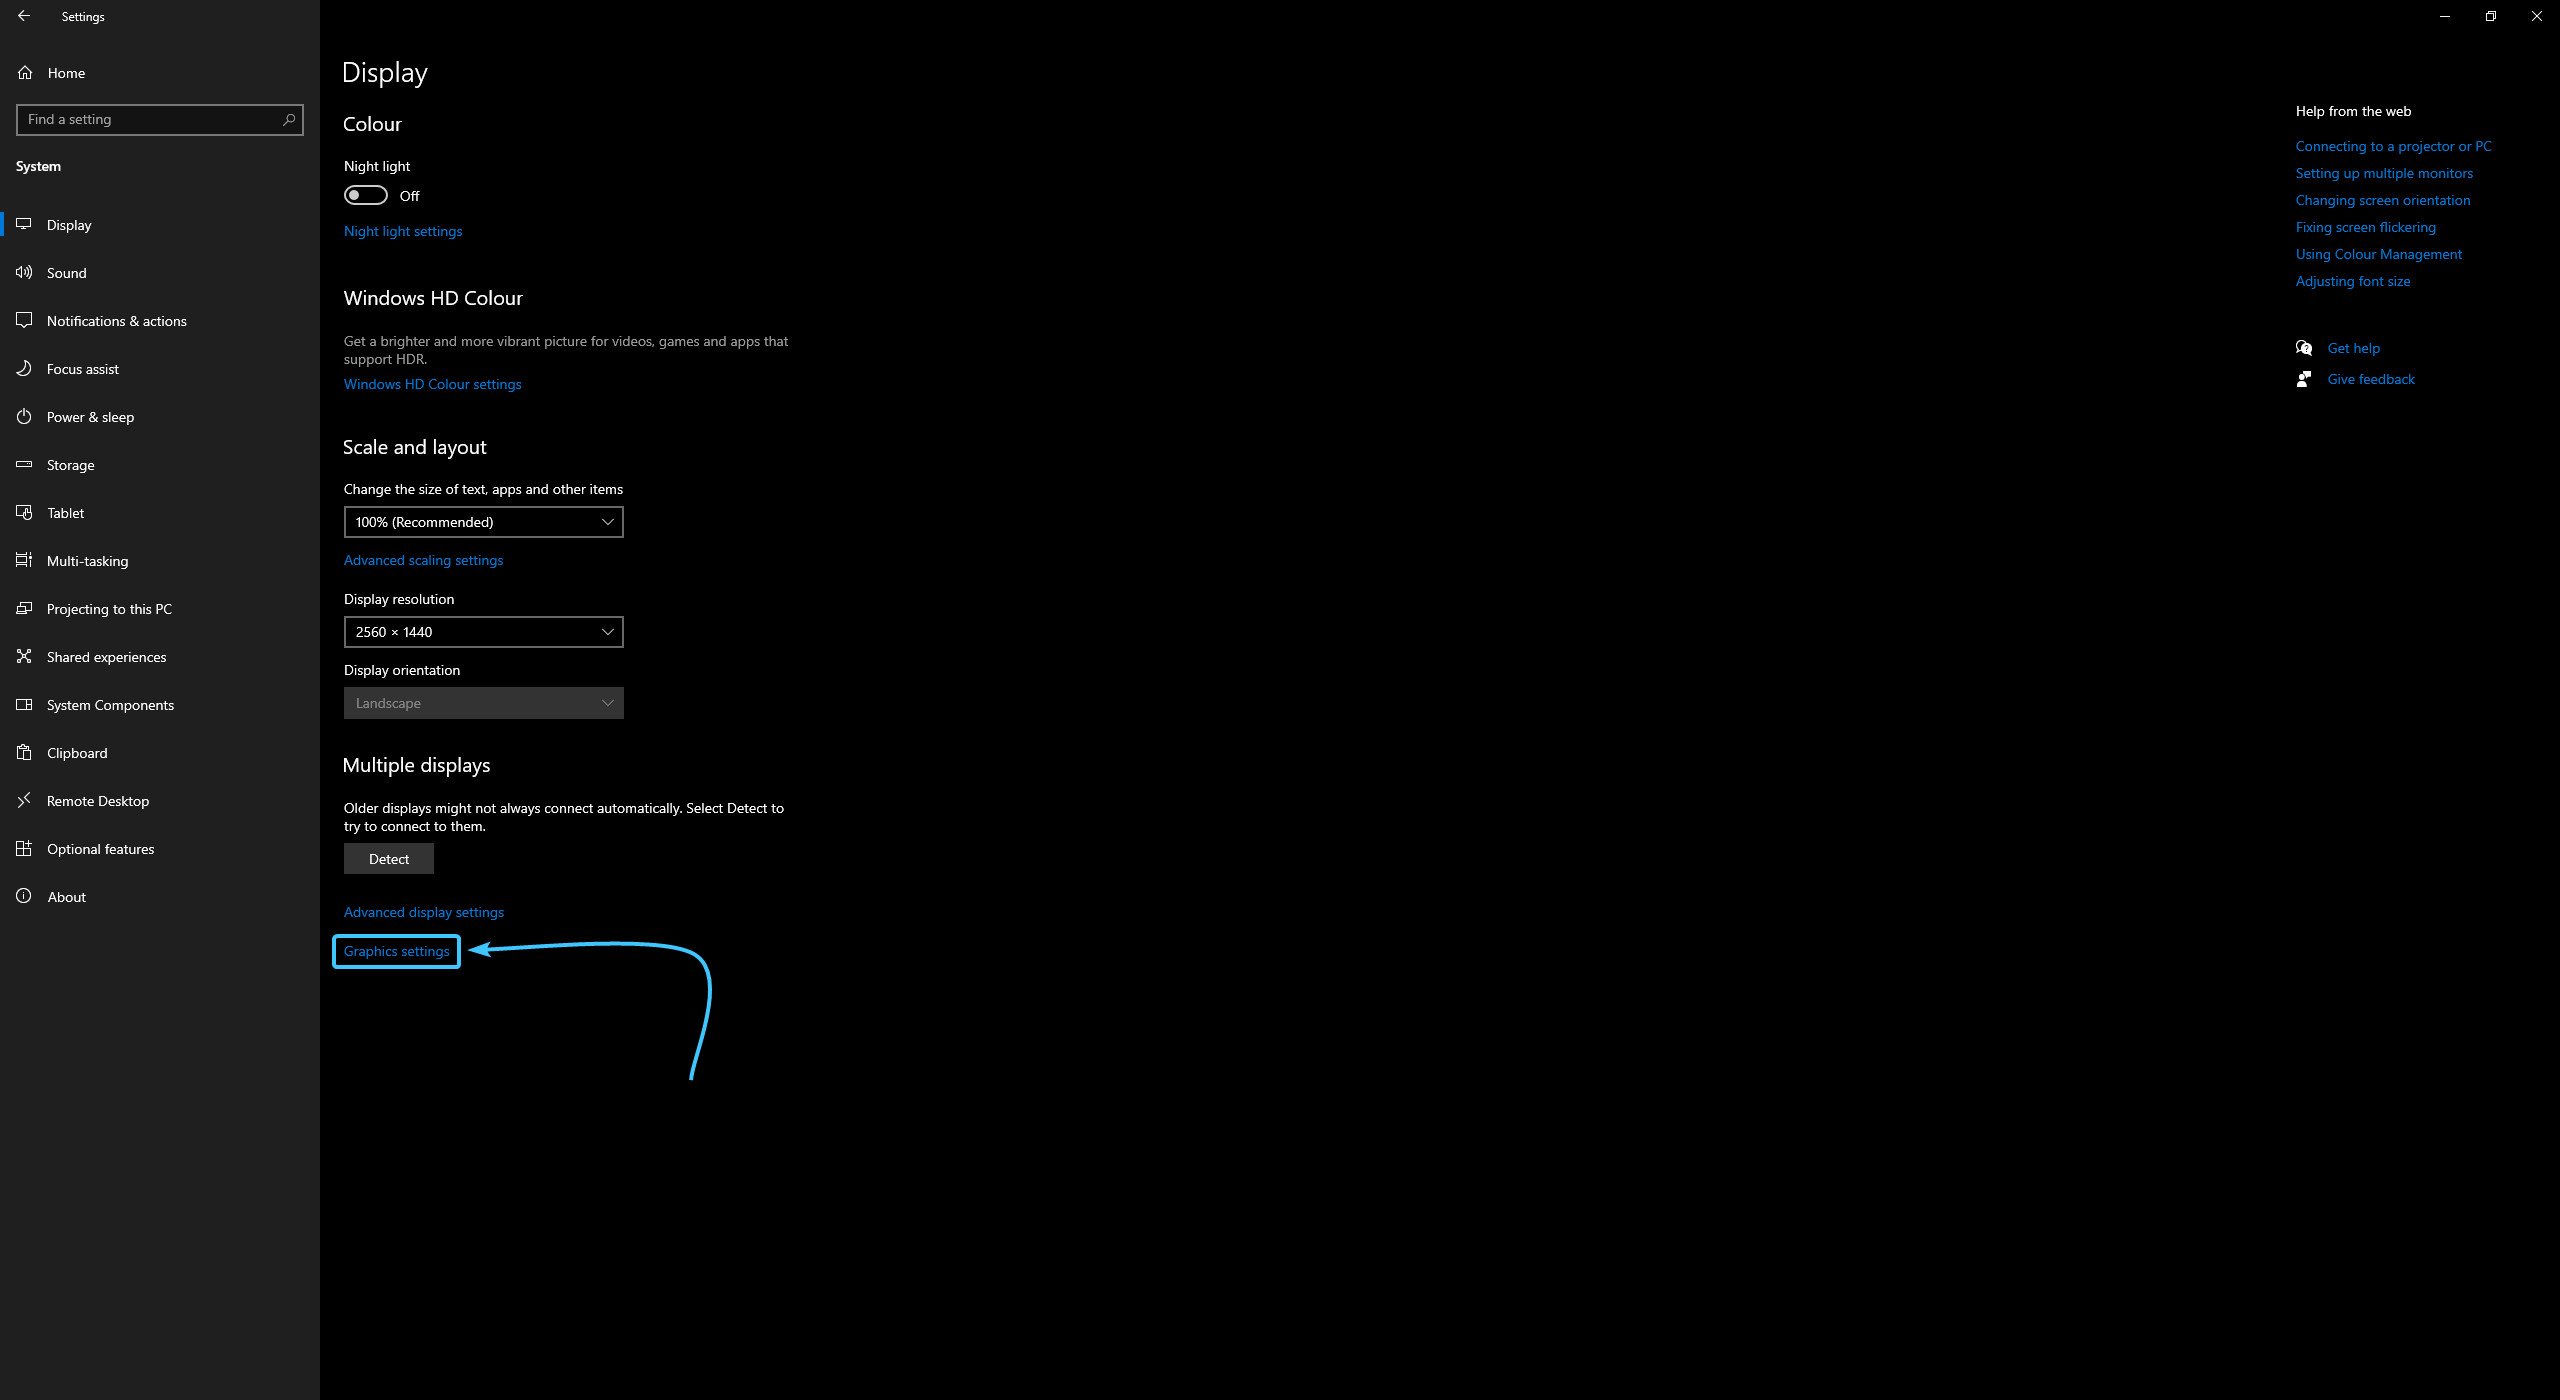
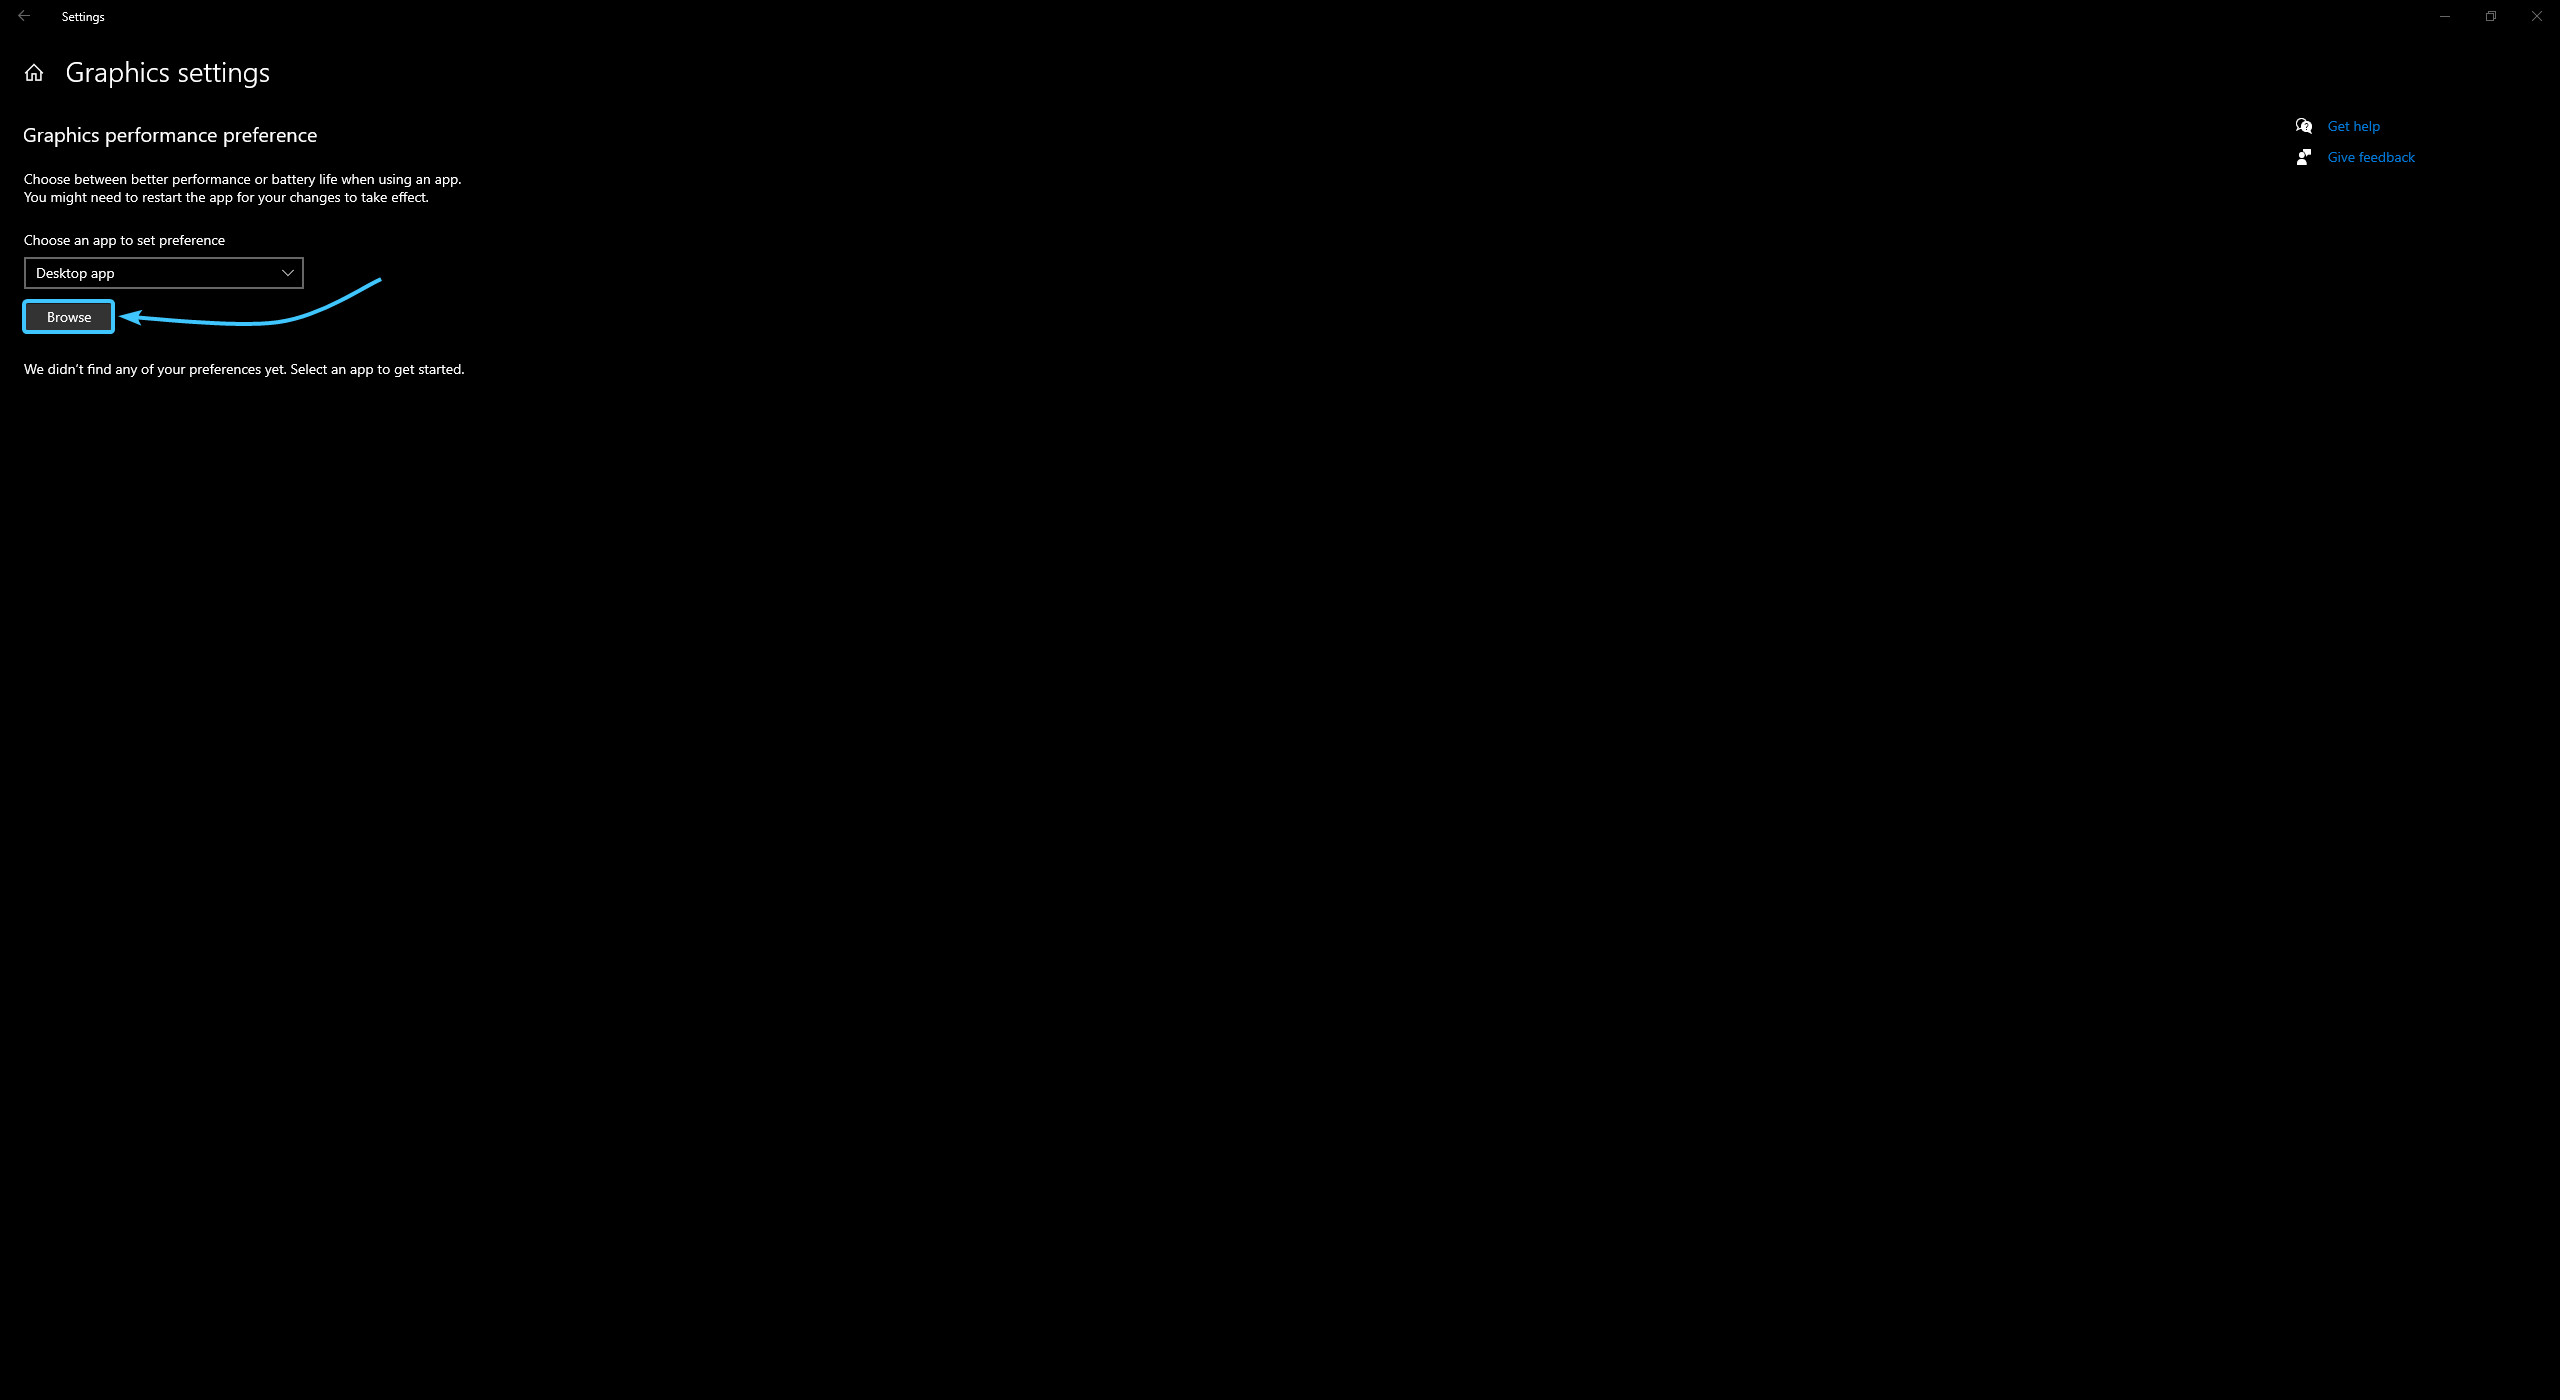
4. Click the “Browse” button in the “Performance preference” section.
5. A file explorer window will open. Follow the path “EXBO\runtime\stalcraft\win64\java\bin”.
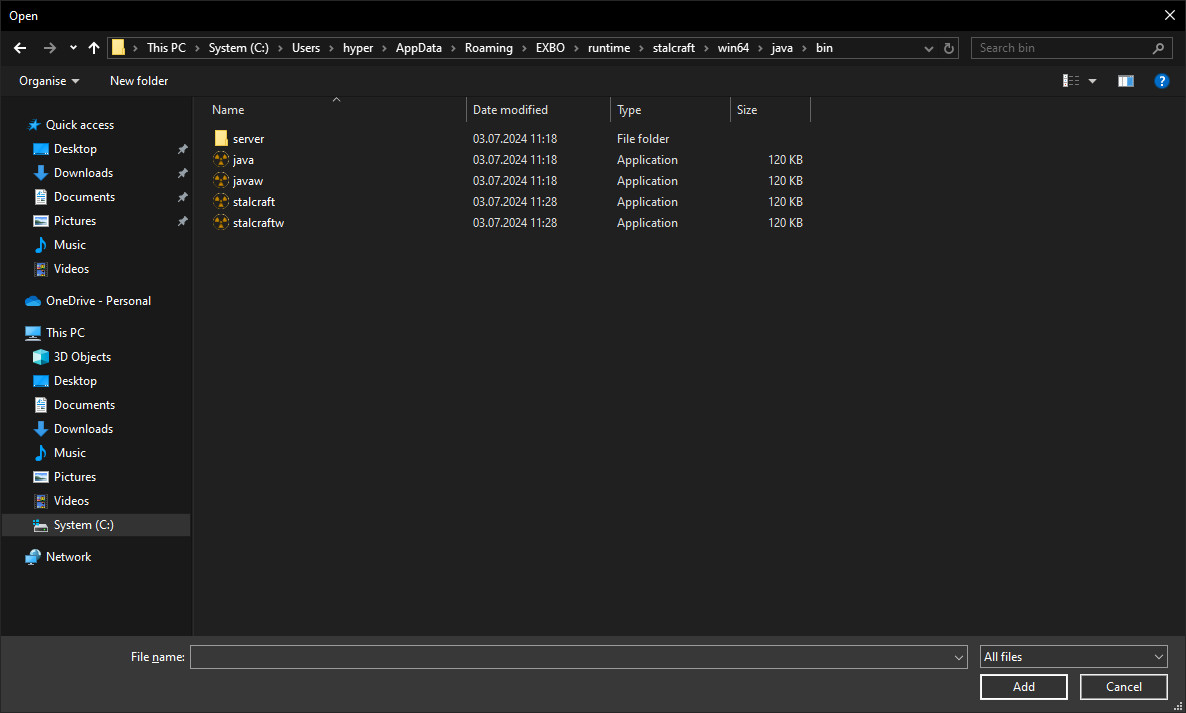
6. Select “stalcraftw” (for Steam) or “stalcraft” (for others) and click the “Add” button.
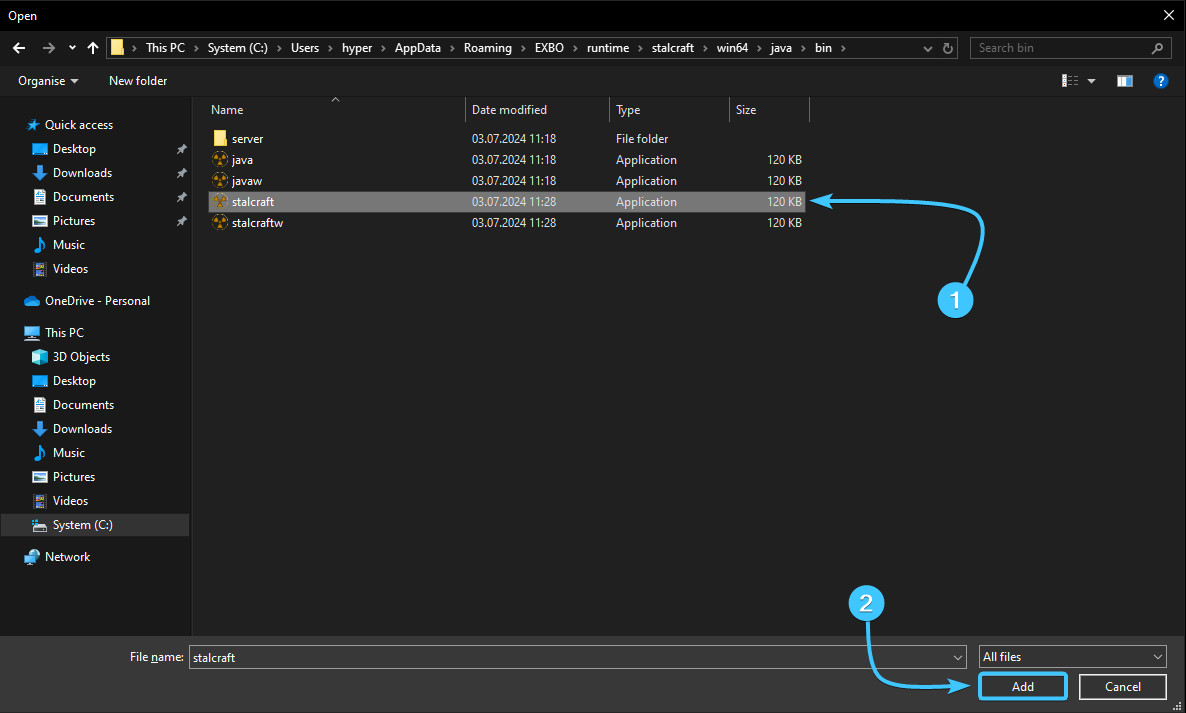
7. In the list, click on the added application. After that, click on the “Options” button.

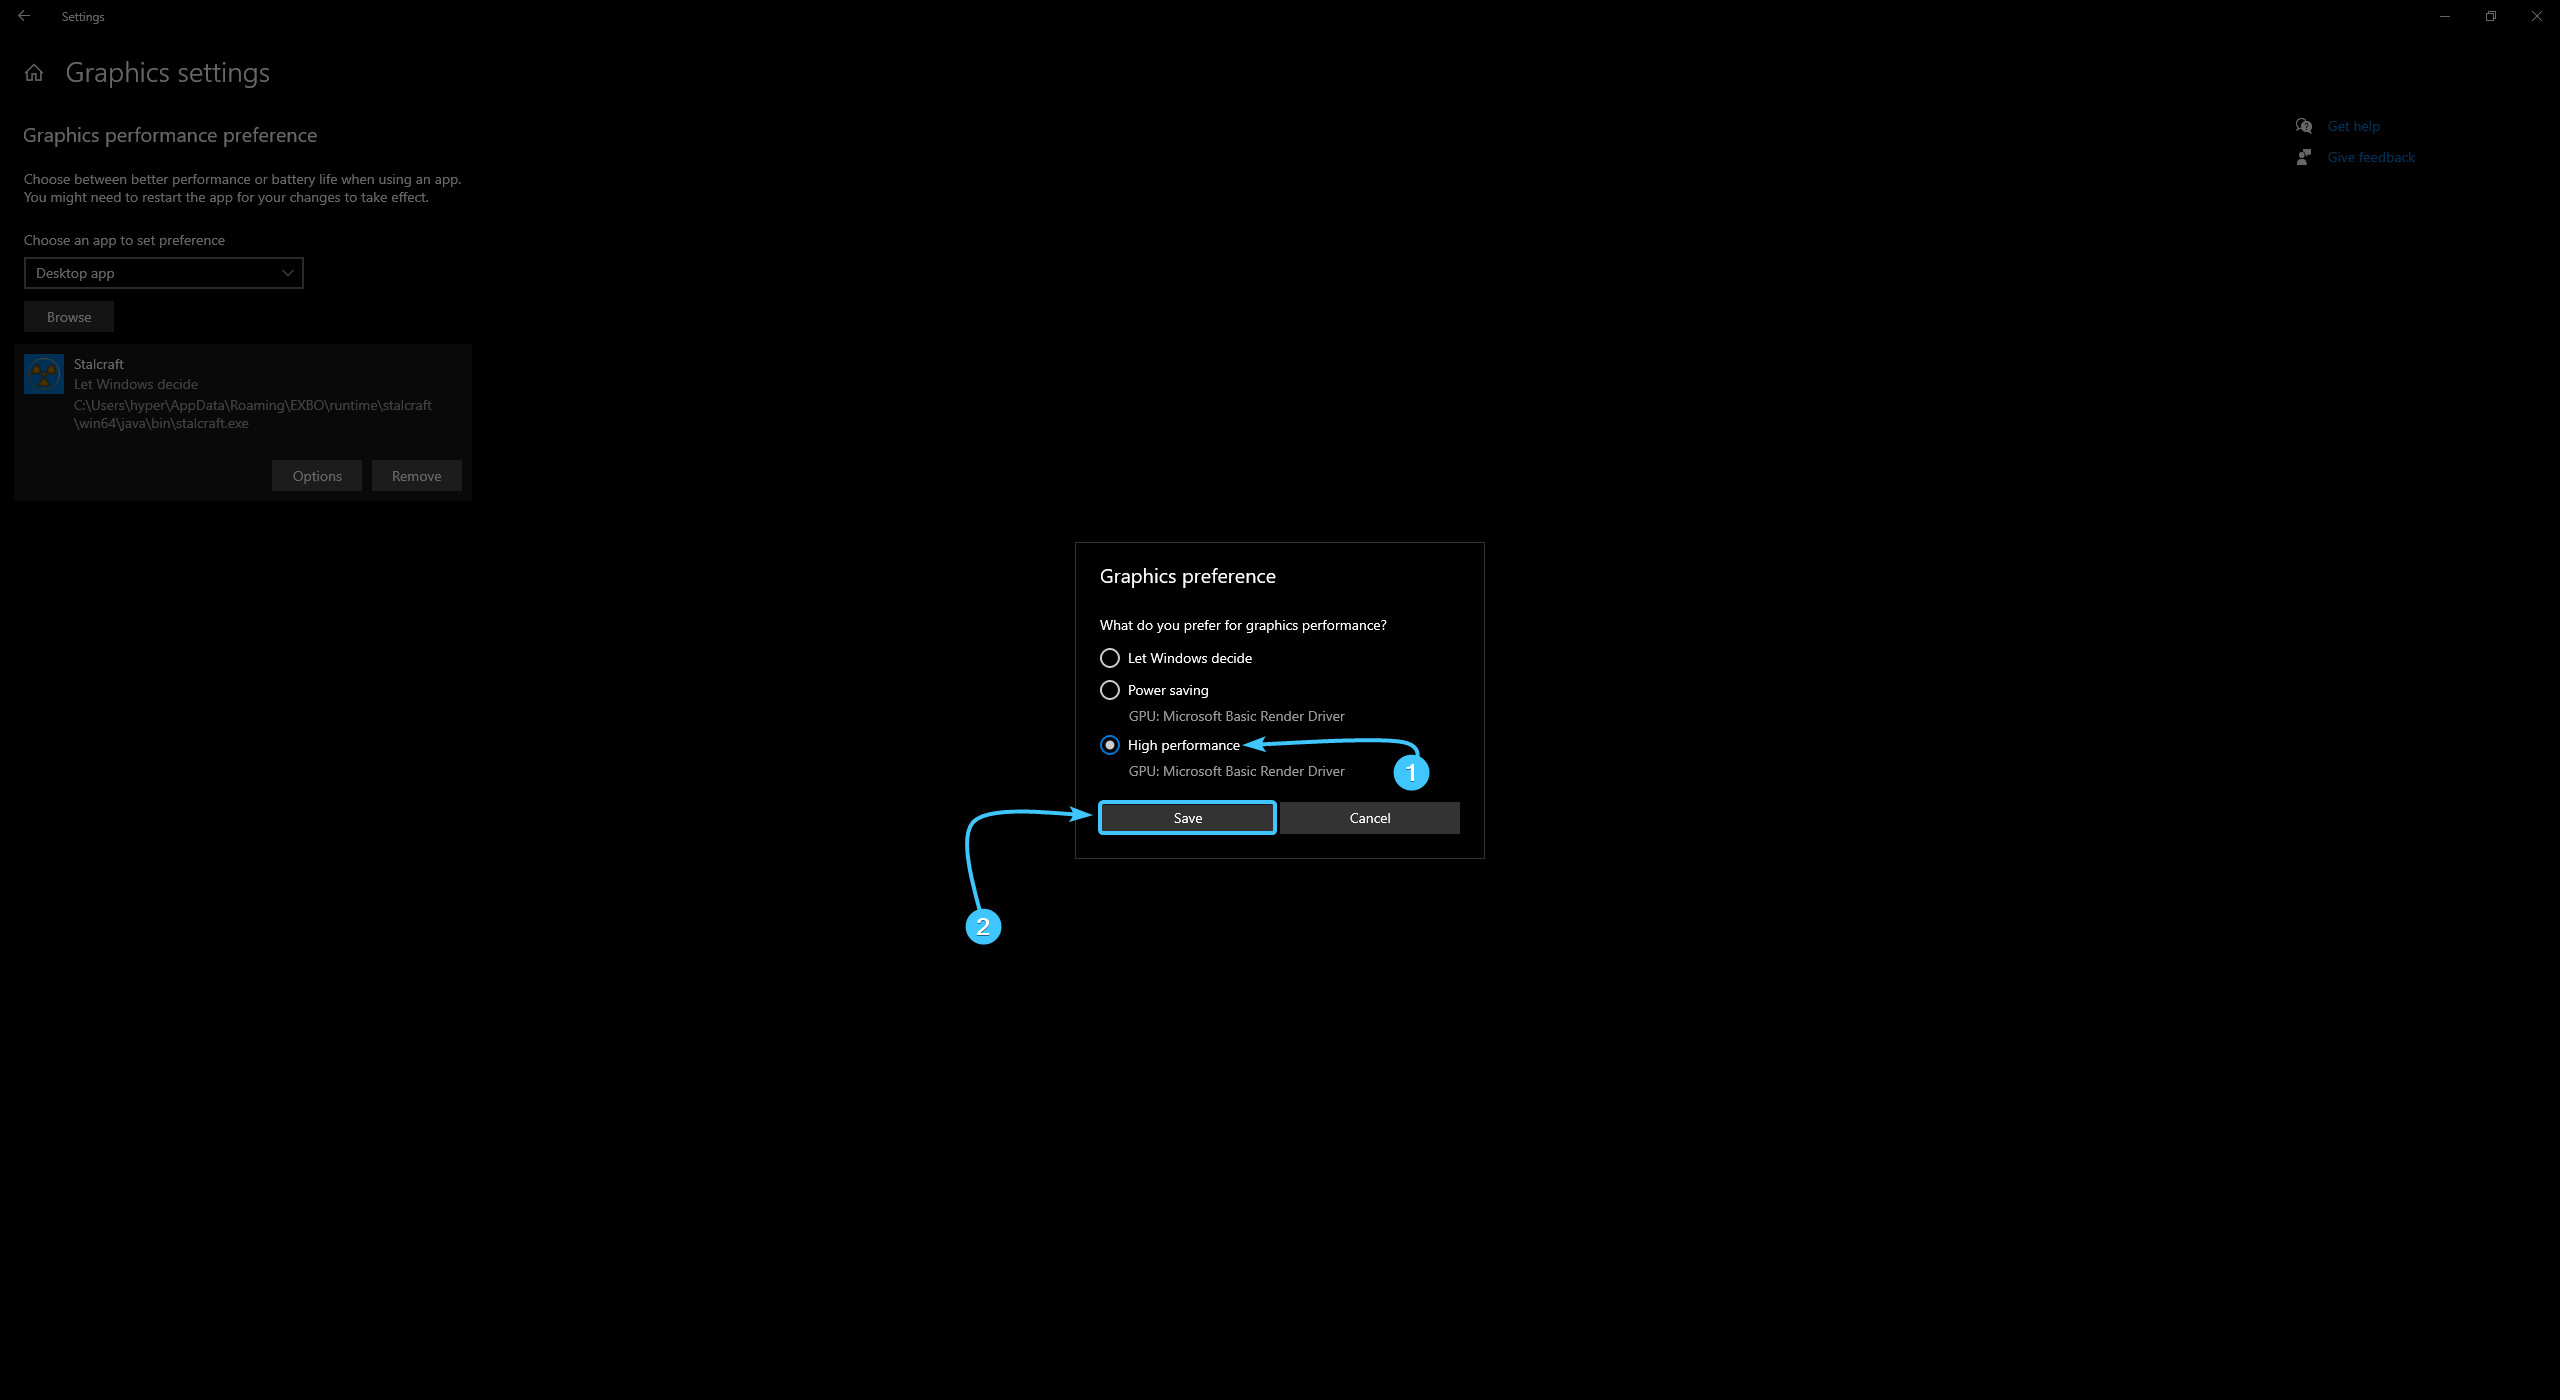
8. In the window that appears, select “High Performance” and click the “Save” button.
9. Reboot the device. After that, the STALCRAFT game will use a discrete graphics card.
Other guides
- NVIDIA drivers update;
- AMD drivers update;
- Intel drivers update;
- Defining graphics card model;
- Uninstalling graphics card drivers;
- NVIDIA settings reset;
- AMD settings reset;
- Intel settings reset;
- Defining processor model.
- Optimisation of windowed applications;
- Disabling variable refresh rate;
- Disabling GPU scheduling;
- Selecting the default graphics card.
